Paint Drip/Lava Lamp Nail Art

5:00:00 PM

Hello Polished People!  How are you all today??  I'm doing well!  Today I bring you my last neon summery creation.  Reason it's the last....well, summer is pretty much over.  It's starting to get cooler out, the days are getting shorter, and sooner than later the green leaves are going to start turning yellow, red, and orange.  Fall is one of my favorite seasons though, so I really am not too upset over it.  I could go on and on about how I love Fall, but that I'll save for another post.

For this manicure, I wanted to use my neons one last time.  A big goodbye to them.  I probably will be wearing them again in the winter when I'm sick of the snow.  I started looking around for ideas and I remembered a paint drip manicure I saw on pinterest a while back.  I started looking and came a cross a few that I liked.

Here's what I came up with....
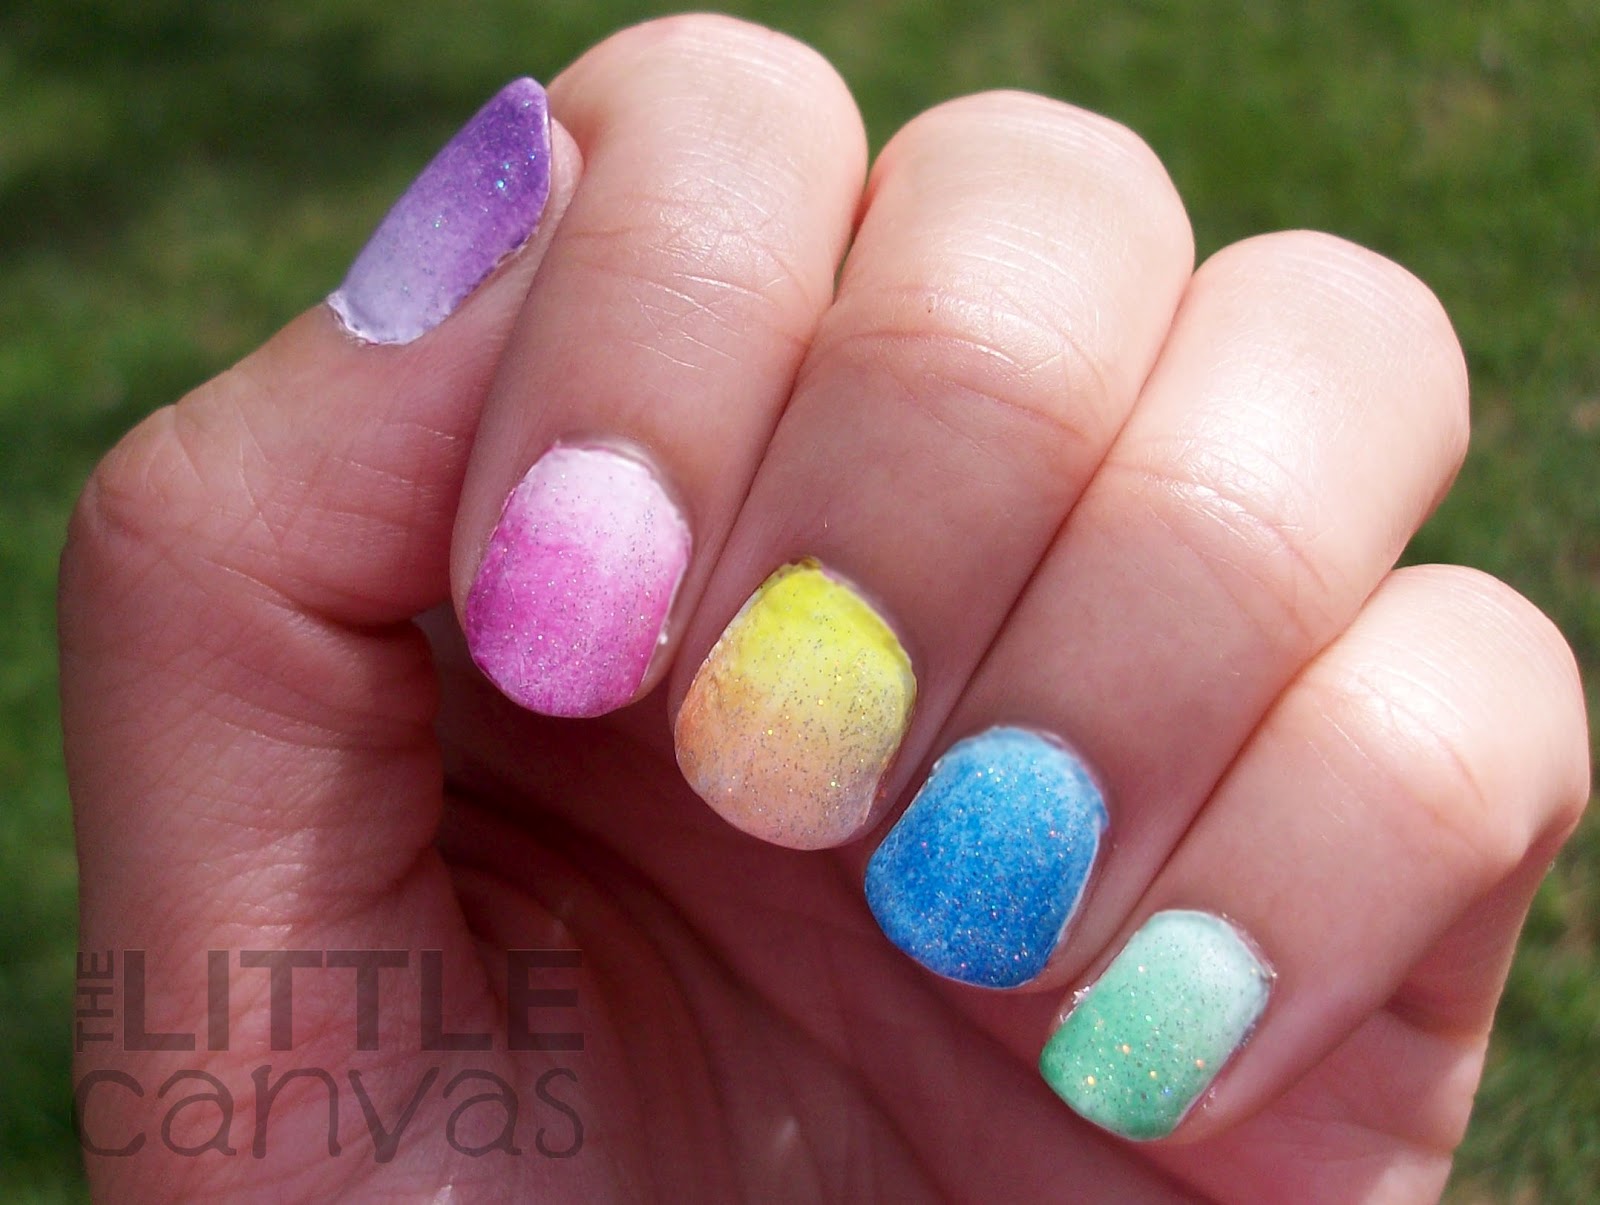

Colors Used:
  • Sinful Colors - Snow me White
  • China Glaze - I'm With the Lifeguard
  • China Glaze - Hang Ten Toes
  • China Glaze - Splish, Splash
  • China Glaze - Sun Kissed
  • Sinful Colors - Summer Peach
Looks easy, right?  Yeah, not really.  This was a pain in the butt to me.  I saw a few YouTube tutorial videos which made it seem so simple!  All of them said to paint the design onto the nails using the regular paint brush and a few stripers.  It was beyond impossible for me.  The only nail which I was successfully able to do with the brushes was my pointer finger.

Instead of using brushes, I used a toothpick.  I outlined the design and then filled the colors in with my dotting tool.  Time consuming and rather annoying, but they came out rather cool looking!  When I showed Nicole (@PolishMePlease) from Polish Me, Please! and Gabi (@RubyStein79) they loved them.  Nicole said that they looked like lava lamps to her, the reason behind the title of this post.  And she was correct!  The neon colors on the white and my drippy patterns looked like the inside of a lava lamp!

The orange polish (on my pinkie finger) I swear is neon.  Summer Peach by Sinful Colors is an awesome neon orange polish.  For the life of me, I could not get it to photograph well.  The second to last picture was probably the closest I could get to what it actually looks like, and then in the last picture, it played some weird looking trick on my camera.  I love this polish, it was only .99 cents when I purchased it, and it was worth every penny.  To be honest, if it were the same price I paid for my China Glaze Summer Neons, I would have paid it as well.

Have you done a paint drip manicure before??  Do you have any tips or tricks?  I may have to try them again!

If you've tried them, I'd LOVE to see your attempts!  Send me a tweet or post a picture to Facebook! :)

Until next time, have a great one! <3

Guest Post

nAil Art Guest post by Polish Pixelle - Glitter Gradient

6:00:00 PM


Hi ho cherry-o! Ave from Polish Pixelle here with the second installment of our nAil Art guest post series!

Alaina and I had serious blogger ADD when it came to choosing a theme for this month. We decided that we did indeed want to do a theme, and it took us about four days to actually come up with one. We also briefly entertained the concept of porno nail art.... but quickly dismissed it because we both prefer to not have R rated blogs :P

We finally came down to two ideas... glitter, and gradients. At that point we were both so flustered with indecisiveness that we decided to combine the two and call it a day. Thus the theme was born... glitter gradients! The rule being that it had to incorporate glitter and gradients, but could be interpreted in any which way.

I went with a literal glitter gradient. My weapons of choice:


- Zoya 'Wednesday'
- Dollish Polish 'Go Luigi!'

I knew I wanted to incorporate an indie, and this is one I havent featured on my blog yet (although will be soon!) and I thought it would be sweet to get it up here on TLC (The Learning Channel? No. Tender Love & Care? No. The Little Canvas!).

I love glitter gradients because they are super easy and add a bit of snazz to any mani (oh yes, I used the word snazz). I applied the glitter on top of my base color and used a toothpick to add extra glitter to the tips. Easy peasy!


So cute, so easy. Can't go wrong with that combo!

Don't forget to head over to my blog to see Alaina's interpretation of the theme!


Love and glitter,


China Glaze

China Glaze - I'm Not Lion with Dots

11:02:00 PM

Today, I am taking a break from some nail art to share one of my new favorite polishes.  This polish is one I searched high and low for after seeing reviews on other blogs.  That polish - China Glaze, I'm Not Lion from the On Safari Collection.  You know, the beautiful light gold with silver and holo fleck glitter.

After searching 3 different Sally Beauty Supplies (Okay maybe I didn't search high and low), I finally was able to score a bottle.  Along with this bottle, I snagged China Glaze Fairy Dust, and a free bottle of top coat.  I'm a sucker for a deal, and boy, did I get one.  The week I got it, Sally's was running a special that if you purchased two China Glaze polishes you'd get a free bottle of $6.99 top coat, so of course I wasn't going to turn it down.  After my $5.00 coupon, I was able to snag all three bottles for $5.39. :) Go me.

Since I am obsessed with nail art, and even though this glitter is AMAZING alone, I had to add some form of a design on it.  I added three dots, and here's how it turned out.  Had to take lots of pictures because it was just so amazing.  The last two are blurry purposely to show the amazing glitter!


Colors Used:

  • China Glaze - I'm Not Lion
  • Sinful Colors - Black on Black
Simple, easy, GORGEOUS!  I didn't realize what a huge lemming this polish is for people!  Ever since I posted that I purchased it, I have had so many tweets of people asking me where I got it or if there were other bottles available!  I can see why it is.

I'm am not a person who typically loves gold things.  Anything that I wear that contains gold must have silver in it also.  This polish is a perfect balance of a muted gold with the silver.  I really can't explain it, and well I hope my pictures have done the talking for me.  In the sun, the polish took on a whole new look with the gorgeous holo flecks.  Application was perfect.  Technically, you could get away with one coat and have almost perfect full coverage.  For this manicure, I used two coats.  The polish wasn't goopy, thick, or hard to work with at all.  I love it.  Since I have removed the polish already, I can also say this glitter was super easy to remove as well.  We all know that glitters can be a real pain in the butt sometimes, but this was not bad at all.

Do you own the polish?  Are you in love with it like I am?  Is it a lemming for you?  

I can't wait to use this polish again, and already have an idea for a New Years Eve manicure using it. :)

Animal Print

Neon Leopard Skittles

9:00:00 AM

Obsessed with gradients?  Yes.  Obsessed with skittles?  Not so much.  It's not that I don't love skittles, I just don't love flat colored skittles on me.  I'm so used to having an accent nail, that it just seemed awkward to me.

When I sat down to do this manicure, I knew I was going to do some form of skittles utilizing my neons since summer is almost over and I'll have to hide them for the winter.  Since I am The Little Canvas, I couldn't just have neons with no nail art, so I opted for another leopard manicure.  And hey, I think it was a wise choice since leopard print ALWAYS looks amazing on neon polish.

Here's how it turned out -


Colors Used:

  • China Glaze - I'm With the Lifeguard
  • China Glaze - Splish, Splash
  • China Glaze - Sun Kissed
  • China Glaze - Hang Ten Toes
  • Sinful Colors - Summer Peach
  • Sinful Colors - Snow me White
  • Sinful Colors - Black on Black
  • China Glaze - Fairy Dust
Neon, neon, neon - go bright or go home.  For sure, this manicure was bright.  It was beyond fun, which I loved, but I just did not love it as much as this neon and leopard manicure.  Probably because it was a manicure with two accent nails.

For each nail, I painted on 3 coats of the respective neon.  Once dried, I added a coat of China Glaze Fairy dust to not only make the neons shiny, but add that holo glitter look.  From there, I added the white dots for the base of my leopard print.  The trick to making sure the leopard print really is uneven looking is to dab the dots on in all different shapes and sizes.  Perfect circles do not look right, at least to me anyways.  Then, with a tooth pick, I outlined the dots unevenly, and filled in the blank areas with some plain black dots as well.

What do you think?  Do you like skittles?  Are you said summer is almost over?  Are you going to say goodbye to your neons soon?

Until next time! <3

Gradient Mani

Sunset Palm Tree Nail Art

10:30:00 AM

I think I may be gradient obsessed.  I somewhat successfully with my gradient skittles so I thought I would try again.  It took me awhile to think about what type of gradient I wanted to do.  Being neon obsessed I was thinking of doing a neon gradient, but I was unsure as to which colors would blend well with each other.  Plus, I didn't want to waste my summer neons if the gradient didn't go according to planned.

Then I remembered a sunset palm tree manicure by @MissMandyPete which I loved!  At the time when I saw it, I was unsure how to do a gradient and was not confident enough with the technique to go for it.  So, with her inspiration and a little gradient practice, I gave it a go.


Colors Used
  • Base
    • Sinful Colors - Snow Me White
  • Gradient 
    • Maybelline - Sugar Plum
    • Sinful Colors - Luminary
    • Sinful Colors - Let's Meet
  • Palm Trees/Birds
    • Sinful Colors - Black on Black
For this manicure, I started off with a base of white polish.  To get the sunset look, I grabbed a fuchsia, coral, and yellow polish.  Nothing is prettier to me than a sunset which goes from pink up in the sky to an orange color to a yellow by the sun itself.  On the make up sponge, I painted on Sugar Plum, Luminary, and Let's Meet, dabbed on a paper plate then onto the nail.  When I was satisfied with how the gradient looked, I quickly added a topcoat to even it out.  

With my striper, I added on the black beach french tips.  Using a toothpick, I drew on the palm tree and the little birdies.

I think if I were to do these nails next time, I wouldn't have done the black tips on all the nails.  It really covered the gorgeous coral to orange gradient I had going.  You can see it on the pointer and thumb though. Overall, I loved this manicure.  It was one of those that I could not stop looking at.  Really made me want to go to the beach!

One thing I need to work on with my gradients is full coverage.  On my thumb and a few other nails there still was white polish around the cuticle that for the life of me I could not get the gradient on.  Maybe that's just the shape of my nail?  Who knows.

Have you done gradient manicures?  How about gradients with nail art??  What are your favorite colors for a gradient? 

Gradient Mani

Gradient Skittles!!!

10:19:00 AM

Hello Everyone!!! It's a big day for me here at The Little Canvas!  One, this is my first, what I call, successful gradient, and my first Skittles manicure!!!!  I'm not sure why I haven't done a Skittle mani until this point, but holy crow I love it and will be doing more!

The idea for this manicure all started when I was searching Pinterest (as usual) and came across this amazing manicure!  Gorgeous, right?  I immediately re-pinned for plans to try and attempt it at a later date.  I was hesitant because the last time I did a gradient it was for some Easter Egg Nails, which I didn't think were that gradient-y looking.  Reason being, I did the gradient with a napkin since at the time I didn't know that you could use make-up sponges.

After purchasing make up sponges, and having a stash with enough colors to finally try a gradient, it was time!  Here's how it came out! *My hands are looking kind of tan, and yay that the grass is green again!!! makes for decent pictures!  Thank you rain!*


Colors Used:

  • Base
    • Sinful Colors - Snow Me White
  • Pink Nail
    • Funky Fingers - Queen Cupcake
    • Ulta - Flamingo
    • Maybelline - Sugar Plum
  • Yellow Nail
    • China Glaze - Sunkissed
    • Sinful Colors - Let's Meet
    • Zoya - Lianne
  • Blue Nail
    • Sinful Colors - Sweet Dreams
    • China Glaze - Splish, Splash
    • Sinful Colors - Midnight Blue
  • Green Nail
    • Funky Fingers - Mrs. Mint
    • Sinful Colors - Mint Apple
    • Sinful Colors - HD Nails
  • Purple Nail 
    • Revlon - Charming
    • Ulta - Tutu Cute
    • Sinful Colors - Amethyst
  • Top Coat
    • China Glaze - Fairy Dust
    • Out the Door
Whew, yes, 18 polishes in total!  Actually, it's 19 if you count my base of Sally Hansen Double Duty Strengthening Base/Top Coat I put on under neath the Snow Me White!  I want to say it's crazy, I really do, but it's just so gorgeous that I cannot bring myself to believe that using this many polishes was crazy.

To get the look on each nail, I painted on the polishes to the fatter side of the make-up sponge.  I dabbed it once on a paper plate, then applied onto my white nail.  When dried, I put on some Out the Door to ensure that the glitter didn't mess up the gradient.  I added two coats of Fairy Dust, a little more Out the Door, and was done.

Can I tell you how AMAZING Fairy Dust is?!?!  I'm so happy I found out about this glitter.  It is the tiniest of tiny flecked glitters, with the most gorgeous holo sparkle.  It's the perfect top coat for creme polishes or boring manicures.  Best purchase in a long time!  I wish there was a way to appropriately capture it's amazingness in a picture....oh well maybe next manicure!

How do you like it?  Good for my first time using a make-up sponge!?  Have you done gradients?  Any tips or secrets?  I've heard that sometimes soaking the make-up sponge in water makes it work better? 

<3

Birthday

Birthday Cupcake Nail Art!

11:00:00 AM

Hi everyone!!! How are you today?!  I'm great, mainly because it is my birthday week!  Yes, that's right, when it's my birthday, I dedicate the whole week to it!  Since it is my birthday, what better way to celebrate than with some cute nail art!?

I had a few ideas in mind when I sat down to do this manicure.  I was in between doing balloons, birthday hats, confetti, or cupcakes.  I was 100% certain though that this manicure needed to have some form of glitter, because come on, it's a birthday.

After some thought, I decided to attempt some cupcakes....here's what I came up with!


Colors Used:

  • Base
    • Sinful Colors - Sweet Dreams
  • Cupcakes 
    • Ulta - Flamingo
    • Maybelline - Sugar Plum
    • Sinful Colors - White on White
  • Sprinkles/Cherry
    • China Glaze - I'm With the Lifeguard, Splish Splash, Hang Ten Toes
    • Funky Fingers - Riot!
    • Sinful Colors - Sugar, Sugar
  • Glitter
    • China Glaze - Fairy Dust
    • Ulta - Pinata Yada Yada

For the cupcakes, I started with a base coat of the Sweet Dreams.  Once that was dried, I added the base of the cupcake with Flamingo.  When that was dried, with a striper, I striped on the lines with Sugar Plum.  Then with my dotting tool, I dotted on the cupcakes frosting using Snow Me White.  With a toothpick, I used my neons to add some sprinkles, which were the perfect option since they matched the glitter so well!

Pinata Yada Yada, oh how amazing you are!  So happy I purchased this polish at the last Ulta $2.00 sale!  I highly recommend it to everyone!  Since it is a rainbow glitter, it would look really amazing over pretty much every color polish!  For a pedicure a few weeks ago, I layered it over Sweet Dreams so I knew it would look perfect for this manicure.  I also added a coat of Fairy Dust to ensure extra sparkle. :)

I love, love, love Sweet Dreams by Sinful Colors.  It is the prettiest blue shimmer polish.  I had written about this polish before where it dried bumpy and I absolutely hated the formula.  After using it a few more times, I'm in love with it, and didn't have the air bubble issue.  I clearly added too many coats way too fast last time which caused that issue.

I'm in love with this manicure, and cannot stop looking at my nails.  The glitter is so sparkly and the cupcakes are so cute!!!  The glitter reminds me of confetti as well, which is perfect for a birthday manicure!

What do you think?  Have you done special birthday manicures?  Do you own Pinata Yada Yada and think it's amazing as well?

:)

8:57:00 PM

Something exciting happened to me last night - I was RT'ed by CutePolish on Twitter!  For those of you who do not know, cutepolish is a nail art vlogger, who I absolutely love!  Her videos constantly inspire me and were one of the main reasons I attempted nail art way back when.  Her video tutorials are easy to understand, and can make truly make anyone a nail artist.  I have copied many of her designs.  Most recently, I attempted her blueberry nail art, which to me was beyond adorable!

So last night, I sat down to paint my nails.  I already had an idea in my mind, so I didn't have to go searching for designs like I usually do.  Nine times out of ten, I start by surfing through cutepolish's YouTube Channel.  If you have watched her videos, you know that she starts off with a quick explanation of the design before starting to the tutorial.  From there, she starts polishing and says the one thing that sticks with me each time I paint on my base coat.  Of course, I decided to tweet it...."start off with a base coat to protect your natural nails"

With a tag and a tweet, I was RT'ed :)


Now I know it may be stupid to dedicate a post to this, but holy crow was I excited.  I got an interaction saying she RT'ed my post, and then it started.  Over 50 RT's from her followers, almost 40 new followers on my Twitter, some new Blog followers with a huge surge of page views, and new Facebook "likes".  Just crazy.

So I would like to say thank you to Cutepolish (who will probably never read this) and a hello to all my new followers!  Thanks for taking the time to look at my sites and decide to follow.  Just as she inspired me, I hope I can inspire some of you to do nail art as well!!!!

Until tomorrow and my new post, have a great night!!!! <3

Foodie Mani

Watermelon Nail Art

10:00:00 AM

Well hello everyone! How are you on this fine day??  I'm doing well.  Feel like I've been slacking on the blog now that I cut back to posting every three days, but sadly it had to be done for a couple of reasons.  First, my blog was becoming a nuisance and no longer fun.  I typically paint my nails typically every three days so to paint, take pictures, edit, watermark, and write posts every two days was just getting crazy!  I was taking off perfectly good manicures just to paint another one, which left me not fully able to enjoy my work.  Secondly, I have gotten a bit busy with school, work, and life.  While I love painting my nails and blogging, those are some things I cannot neglect for obvious reasons.

Returning back to my every 3 day posting has been great, I've been able to save up some posts so I will hopefully not fall behind again.  Sure the page views have gone down a tad, but oh well!  I'm doing this for fun and really I never expected to hit 10,000 views, so to have done that, I'm truly honored.

Enough of my babbling, onto my nails!  Today I bring you some watermelon nail art!!!  I have seen people do watermelons all over the internet, be it on another blog, Pinterest, or just Google.  Back before I was a blogger and did strawberries on my nails, I saw this idea, but didn't have colors to actually do so!  Once I entered this amazing blogging world, my stash has doubled and guess who has enough colors to do pretty much whatever she wants?!  Yup, me!

Here's how they came out!!


Colors Used:
  • Base
    • Ulta - Flamingo
  • Watermelon Rind
    • Funky Fingers - Queen Cupcake
    • Revlon - Sassy
    • Sinful Colors - HD Nails
  • Seeds
    • Sinful Colors - Black on Black
Cute right?  I got so many compliments on these nails that I may have to do them again before the summer is over!!  

To start, I painted on a base coat of Flamingo by Ulta.  I'm new to Ulta polishes.  I went into the store one day and hit their $2.00 a bottle nail polish sale and walked out with four bottles.  An amazing deal considering the bottles are regularly priced at $6.00.  I was very impressed with the formula!  I had full coverage in two coats, but I really wanted the pink to pop so I used three for this manicure.  Flamingo is a creme polish, and call me crazy, but I detected a really, really, really subtle shimmer.  Emphasis on the really.  I typically hate cremes, but am in love with this one.

Once that was dried, I added on light pink French Tips with my striper and Queen Cupcake.  When that was dried, with the striper again, I added Sassy (a lighter green polish) and left a little bit of the pink showing to resemble the rind.  With the striper again, I went back and added some HD Nails (a darker green shimmer polish) to give the rind a real watermelon look.

Before adding a top coat, I tooth picked on some seeds, which ended up being more difficult than usual for me.  I think it was the shape of the seeds that threw me for a loop.  I'm usually used to dabbing on circular things so it was just annoying.

What do you think?  Do you like my watermelons or strawberry nails better?  Do you like fruit themed nail art?? I found a fruit salad manicure that I'm dying to try so keep an eye out for that!

In the end, I rate this manicure a 4 on the difficulty scale.  I really think you should all try it!!! And if you do, I want to see!  Send me a Tweet or post it to my Facebook.  I love to see others nail art!!!

Olympic Nail Art! - Week 1 Summer Challenge

9:00:00 AM

Happy Olympics!!!!!  I'm not sure why, but this year I'm hooked.  At 8pm, I turn on that television and I watch right until the coverage ends at 12am.  Swimming, gymnastics, volley ball, you name it, this year I can't stop watching.  The Summer Olympics are also 100 times better than the Winter Olympics.  Although, I do love the Ice Skating during the Winter ones.  In celebration of the games, and after seeing the cute nail art on the Olympians and from many other nail bloggers, I decided to attempt one myself!!!!

On top of it, I was asked by Erin over at Hand-y Feats and Other Treats to participate in a Summertime Challenge and Week 1 is Olympic Themed!!!  The challenge is as follows:


I explained to her I wasn't sure if I would be able to participate in each week due to scheduling and such, but she was super sweet and told me to post when I could!  She also said that if I had to skip a week it was okay too!!  I think some of you guys should join in as well!!! Posts start on each Friday, and you have the full week to post, reason why I'm posting this on Wednesday instead of last Friday.  If you can't, then oh well!  Point of the challenge is to have fun!!!  I'll try my best to participate each week, but in September it might get a bit hectic with my start of another challenge, but we shall see!!!!  Head on over to her blog if you are interested in joining!!!!

Anyways, on to the nails!


Colors Used:
  • Base
    • Sinful Colors - Snow Me White
  • Rings/Flags
    • Sally Hansen - Blue Me Away!
    • Sinful Colors - HD Nails
    • Sinful Colors - Let's Meet
    • Sinful Colors - Black on Black
    • Sinful Colors - Sugar, Sugar
  • Gold Medal
    • Sally Hansen - Golden I
    • Sinful Colors - Amethyst 
The nails were rather simple.  The Olympic Rings and "2012" were drawn on with tooth picks.  The pinky, pointer, and middle finger were supposed to represent the flag look of the logo for the 2012 London Games.  To get the stripes, I used my striper brush, and tried to line up my nails as best as I could.  Finally, I added a gold medal with some more tooth picks.

They were cute, festive, and perfect for the opening of the games!  I wish I could have kept the manicure on longer, but white nail polish never seems to look good after 2 days.  Maybe I'm crazy and it's just mind over matter, but I always feel like it looks super worn out.

Did you do Olympic Nail Art??  What do you think of all the cute nail art on the US female swimmers?!

Again, if you are interested in joining the challenge, head on over to Hand-y Feats and Other Treats or send Erin a message!  Hope to see a few of you joining and getting your nail-art on!!!!