
Good morning polished peeps! How are you all today? I'm bringing you yet another Halloween manicure today! I'm so proud of myself that I have stuck to Halloween all month! Maybe this means I should try to do Christmas manicures all of December? Hmmmm decisions.
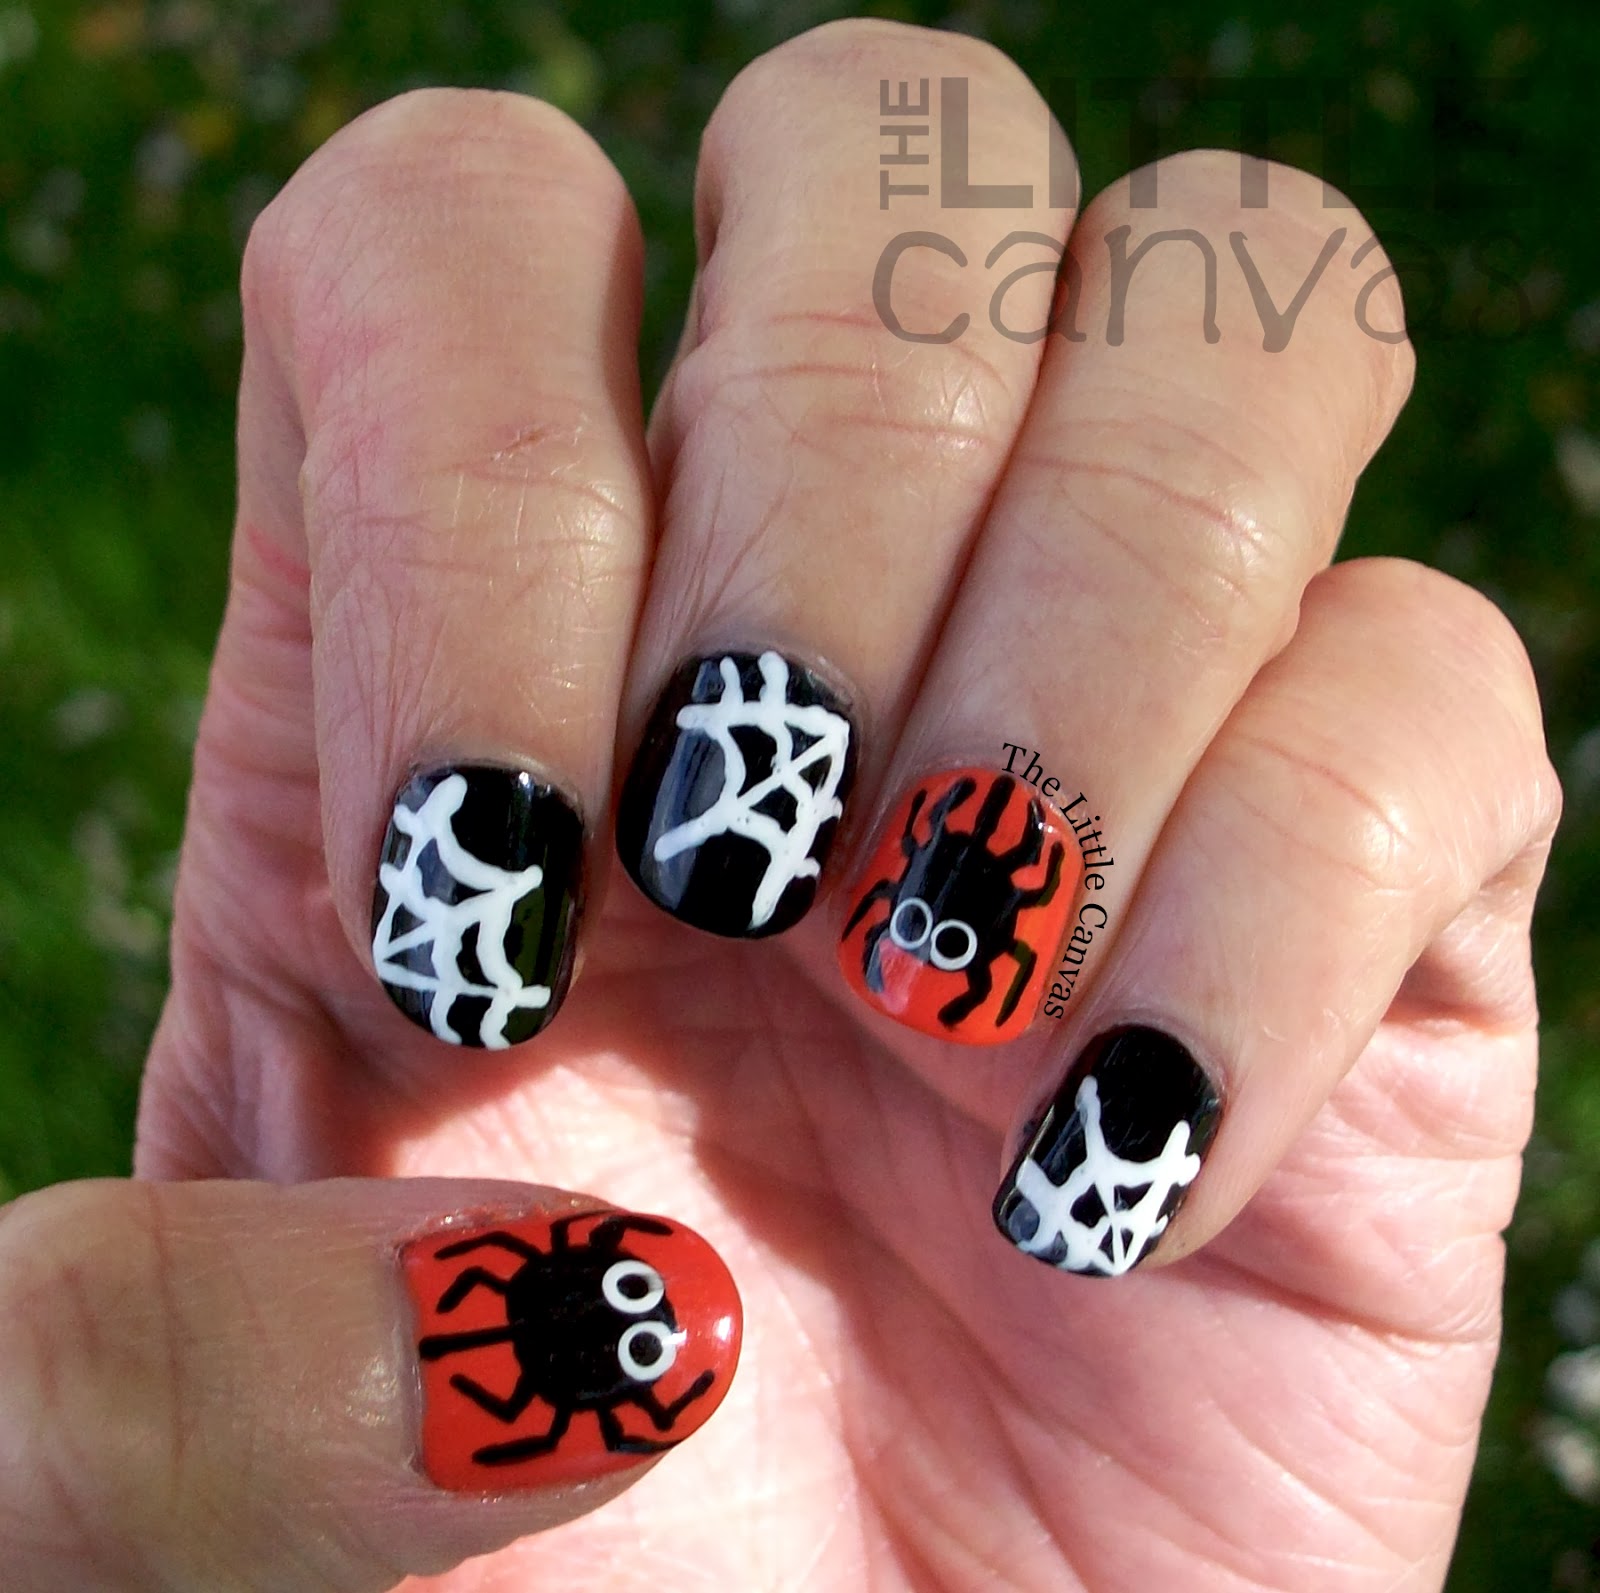
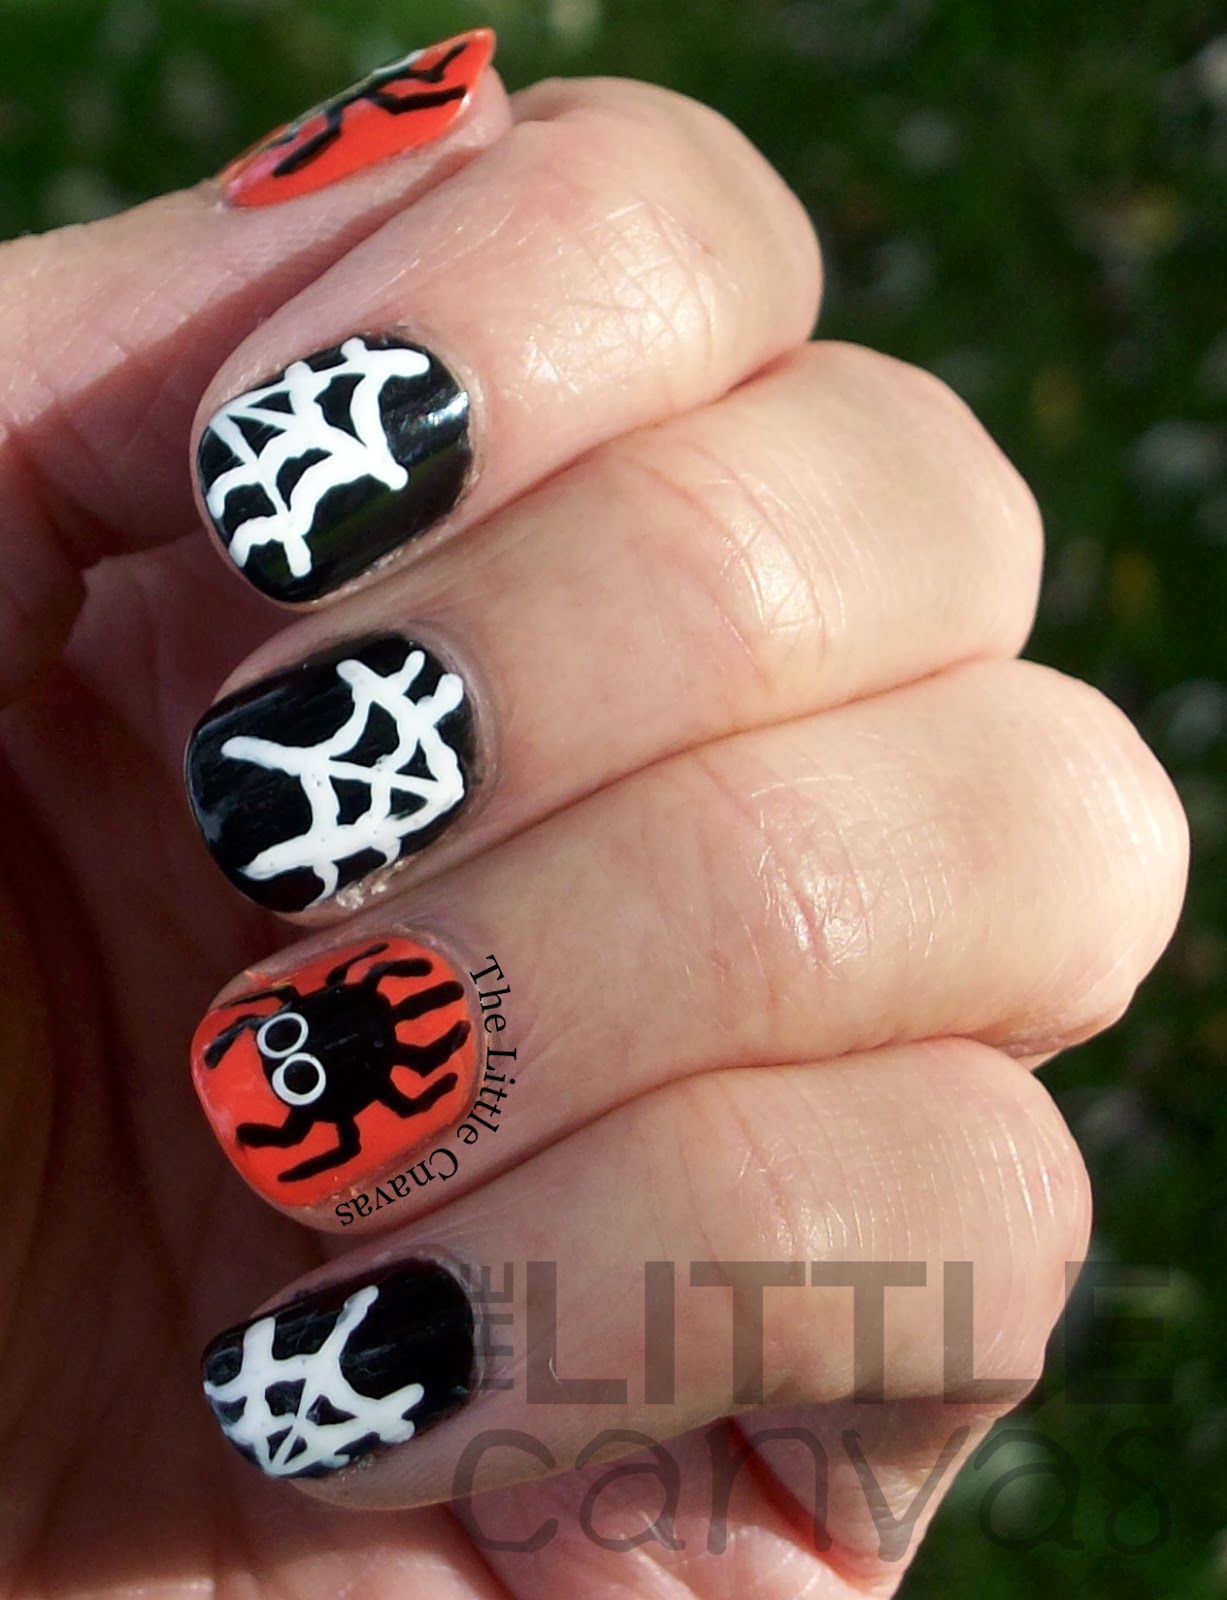
Today I'm bringing you a spiderweb manicure with little spiders. Now, if you know me, you know that I absolutely HATE spiders. I find them to be the most disgusting little creatures with their 8 nasty legs and those big bodies...blech. So gross!
After seeing this manicure by Alli over at The Daily Varnish, my fear for spiders diminished a tad. They weren't scary at all, actually, I found them to be quite cute! I love how polish can do that! Please, I beg of my followers, do not send me someones recreation of scary spider nails which will most likely give me nightmares. I'm sticking with only looking at the cute ones!
I took inspiration from Alli's manicure and switched up the design a little bit, and well I'm super happy with the result. So happy, that I decided to create a tutorial! Let's take a look!

Colors Used:
- Jessica - Shiny Black
- Zoya - Thandie
- Sinful Colors - Snow Me White
How to Get the Look:

Spiders
- Paint your nails with your favorite Halloween orange polish. For my manicure, I used Zoya - Thandie
- In the center of your nail, with a large dotting tool or nail art brush, create a circle for the spiders body.
- Using a nail art brush or striper, from the cuticle down to the "butt" of the spider, draw a single line to represent the web the spider is hanging from. Then draw the little legs. I did the bottom legs and moved to the front of the spider.
- When the black body is dried, with a small dotting tool, add white eyes. If you want, you can go back and add black dots for the pupils.
Webs
- Paint your nails with your favorite black nail polish. For this manicure, I used Jessica Cosmetics in a Shiny Black from the Black Beauties kit.
- With a striper or a nail art brush, draw three lines from either the tip of the nail or the cuticle of the nail outwards. The two outer lines should be a large "V" with a third line coming out from the middle.
- With the striper or a nail art brush, draw swooped lines in between the main three lines.
- Repeat step number 3 but further up the web.
Don't forget to finish with a top coat on all the nails when the designs are dried! I used Out the Door shiny top coat on my nails, but this design would look great using a matte top coat as well!!
What do you think? Liking the design? Will you maybe do it on your nails for Halloween?
If you recreate this design, please share your recreations with me! If it weren't for The Daily Varnish, I never would have thought to do this design in the way I did. Be sure to check out The Daily Varnish and all the amazing manicures that Alli and Katie do :).
Until next time, <3.
No comments:
Post a Comment
Oh how I love reading all of your comments! I truly appreciate each and every single one!