
Hey everyone!! We are almost to the end of 2020, and boy oh boy was this year a crazy ride. While many people are saying 2020 was the worst year ever, I'm trying my best to look at the positive of the year instead of the negative. As you know, I work in healthcare and faced numerous challenges. Despite the challenges, struggles, and hardships, the residents at my facility remained happy, healthy, and safe. What more could anyone ask for? There were many lessons learned and at the end of it all, I'm a stronger person because of it all. I truly hope that whoever is reading this looks at the negative in their life and tries to find one positive, and rise from the ashes.
Anyways, I could go on and on about that all day, but you are here to see the nails. Today's manicure is a kitchen sink manicure for New Years Eve. Every year I always grab my silver or gold holographics and do something fun. To be completely honest with you, my New Years manicures are 9 times out of 10 my favorite of the whole year. Today's design is no exception.
Let's take a look!
Colors Used:
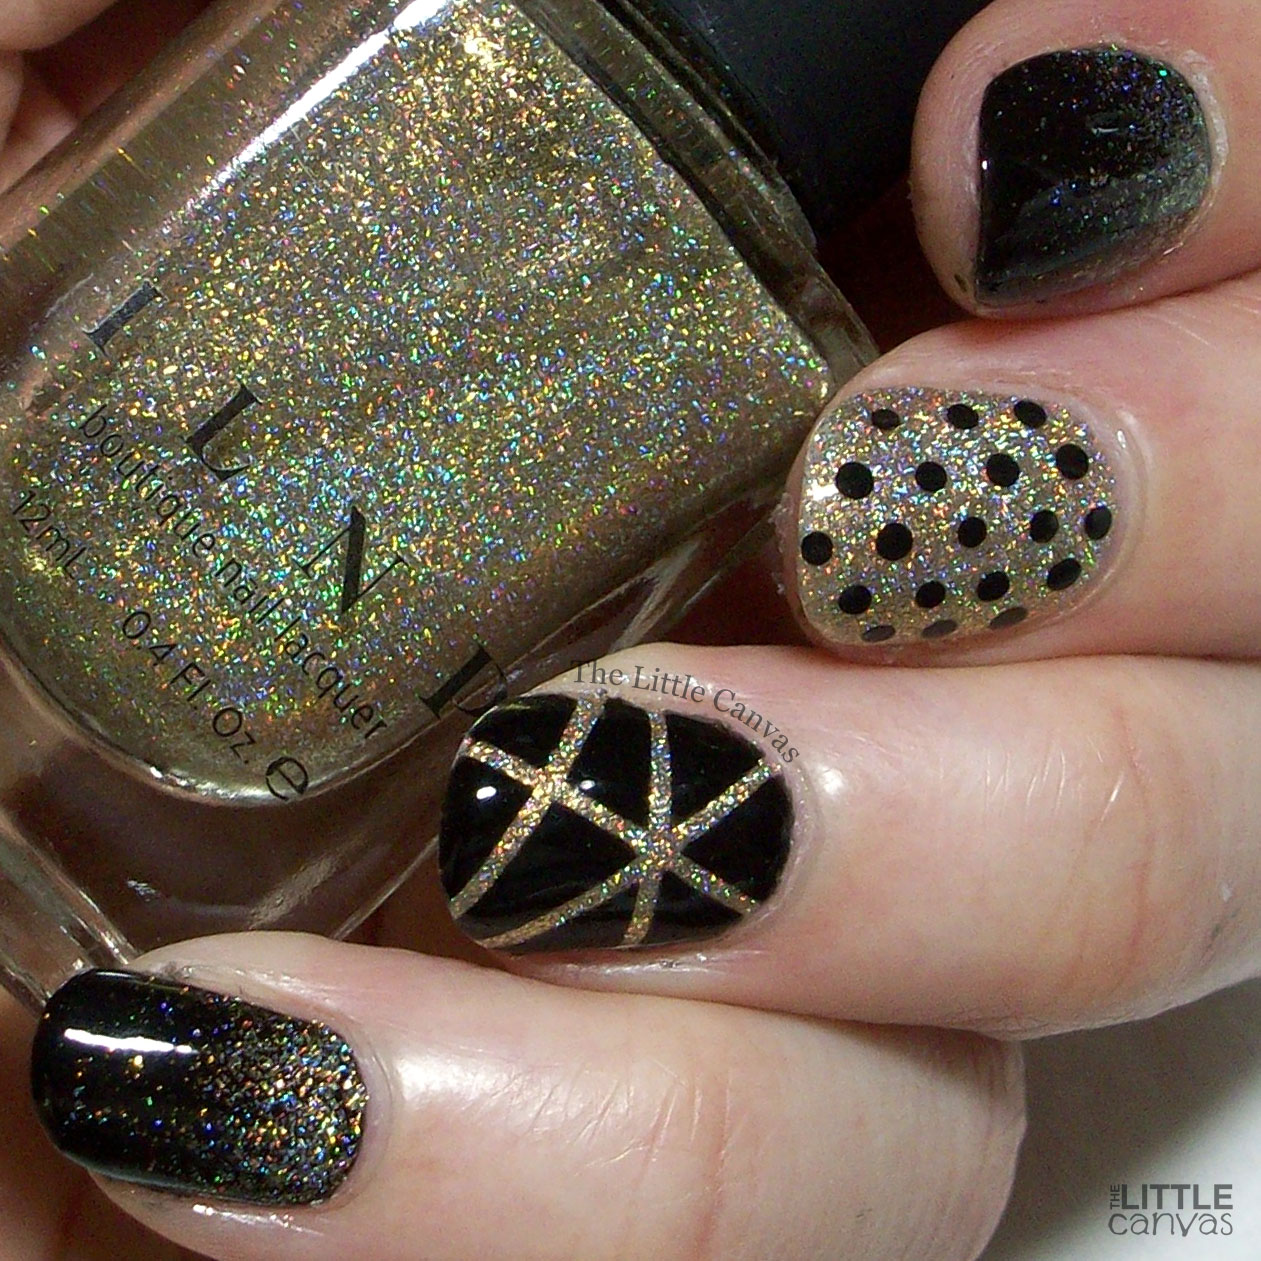
- ILNP - Versailles
- Sally Hansen - Blacky O
Two polishes, one fabulous manicure. Each time I look at the manicure I love it even more. The gradient using Versailles is perfect, because it's a perfect polish! Two coats and full coverage of this gorgeous light gold holographic. To me, this polish is the gold sister of Mega X, my favorite silver holographic polish from ILNP. You might be seeing that polish make an appearance for my final manicure of 2020.

I just love how the pinkie and index finger turned out. The gradient was so perfect that it looked like little fireworks or glitter bombs coming from my cuticles. Then the laser tape design just pulls it all together. I was going to keep my middle finger blank, but you know me and my polka dots. I can't leave well enough alone. Plus, it looked a little naked with everything else crazy going on with the manicure.
What do you think? Fan of this look?
If I don't get my next post up before the New Year, I want to wish everyone who is reading this a very Happy and Blessed 2021. End this year on a positive note. You made it through a pandemic, you didn't let the world take you down. Let's all make a resolution to look at the positive and find one thing each day to be grateful for. Release all your expectations you have about 2021, and just focus on each day. Every single day that we are given is a major blessings. Look at it like that. If we go into this New Year looking at the negative and having a victim mentality, then that's how we are going to perceive every day. So instead of letting that happen, be the winner, be positive, and just kick 2020 to the curb and take 2021 by storm! Please be happy, healthy, and safe.
And as always, thank you for sticking with me. I know I went on some hiatuses because life got crazy, but I am so grateful for the ability to come back like I was never gone. I love every single one of you.
Until next time, <3.


