Gradient Mani

The One With the Candy Corn Spider Web

9:00:00 PM

Nothing to Disclose


Happy Friday to everyone!  How are you all doing??  Started out sunny here then turned into a rainy day really fast.  Yes, I'm posting this in the evening when I usually post in the mornings, but I was a total space case and forgot to write up the post and actually publish it.  Edited the photos the other day, uploaded them, pre-published the post, but then never wrote anything.  I really am wondering if I'm losing my mind.

Today's design is a re-creation of my candy corn spider web design.  Again, I'm in a little bit of a funk with new ideas, so I'm hitting up the oldies but goodies.  It's been awhile since I've created a gradient, and what better time to do one than with the candy corn colors?! 

Let's take a look! 


Colors Used:
  • Sally Hansen - Electra-Cute
  • Sally Hansen - Blacky O
  • Sally Hansen - some white that the label fell off of
  • ORLY - Mirrorball
Yeah, I had to break away from using only Sally Hansen polishes in this manicure because I just needed to have a holographic accent.  How can you blame me, Mirrorball is amazing and by far one of my favorite silver holographic polishes.  Plus, it really makes this whole manicure pop, don't you think?


I'm going to have one of those pat myself on the back moments with this design.  I'm very proud of my gradient, spider web, and my nail length.  You have no idea how long it has taken me to strengthen my nails and get them long again.  Now if I can only keep them this way through the Christmas season....

What do you think of this design?  Are your nails ready for Sunday??

I have one more post for you for Halloween.  Nothing fancy, but still worth sharing since I did it.

See you soon! <3 


Halloween

The One With The Candy Corn Patch Work

9:00:00 AM

Nothing to Disclose Press Sample Affiliate Link


Good Morning, Polished World!  I meant to post this yesterday, but hey it's better than being a week late on posting.  I now have two more Halloween designs to share before Sunday.  Might even have three more depending on how my week goes with painting.  I'm actually enjoying keeping up on this blog.  Not going to lie, a little upset that my photos aren't getting as much traction on Instagram, but I blame myself.  I kind of fell off the face of the earth so I'm shadowbanned or something.  Maybe this week will help.

Today's design is a re-creation of one I did a few years ago.  Maybe it was even last year.  Who can even remember.  Regardless, I always love the Halloween patchwork designs but not the color combos, so I came up with a Candy Corn patchwork.  When I did it the first time, I fell in love, so it makes sense that I re-created it again this year.

Let's take a look! 


Colors Used:
  • Sally Hansen - Blacky-O
  • Sally Hansen - Electra-Cute
  • OPI - Exotic Birds Do Not Tweet
  • OPI - Alpine Snow
We all know that ORLY Liquid Vinyl and White Tips have been my favorite black and white polishes for quiet a long time.  I think that they have been replaced by Sally Hansen Blacky-O and OPI Alpine Snow.  The two of them apply so perfectly in two coats and dry super fast.  It actually shocks me the dry time on them.  Then I'm able to get right to work on the nail art.  Don't get me wrong, I still love my ORLY's but these are just wonderful.


I love the patchwork and the color combination.  Something about it framed with the black index and pinkie finger just really goes together well.  I didn't think people would notice these nails, but they did and I received a lot of compliments.  Now that I'm looking at the photos, they are rather eye catching.

What do you think? Fan of this manicure?

Until next time, <3.

Animal Print

The One With the Leopard Manicure I'm Pretty Sure I've Already Done

9:00:00 AM

Nothing to Disclose


Good Morning and Happy Friday!  I realized I have failed yet again at posting to the blog.  And on top of it, I'm again behind when it comes to editing nail photos.  I'm planning on spending this weekend inside and just working on the blog, my nail polish storage, and catching up on some much needed sleep.

Today's design is a fun little leopard manicure, which as the title states, I'm pretty sure I've already done.  It's one that I absolutely love because it's one of those color combinations that I normally do not attract to.  The subtle gradient I feel really makes it.

Let's take a look!


Colors Used:
  • Sally Hansen - Sweet Tea
  • ORLY - White Tips
  • Some random gold polish'
Sweet Tea by Sally Hansen really is one of my favorite polishes.  It's such a gorgeous peach color which applies completely in two coats.  That's impressive since I typically find that polishes in this shade usually are extremely patchy and take at least three coats to have full coverage.  It worked wonderfully for the gradient with the white polish.


When that gradient was just how I wanted it, I went through with a dotting tool and added the gold centers for the leopard design.  I then went through with a tooth pick and painted the black accenting.  I know that some use a small paint brush or the dotting tool to complete the details, but I find I have more control with the tooth pick.  Plus, I can make it look more "leopard-y".

What do you think?  Fan of this look?

Until next time, <3.


Flowers

The One With the Daisy Manicure

9:00:00 AM

Nothing to Disclose Press Sample Affiliate Link


Good morning, Polished World!  And welcome to August!!!  Can you believe how this year has just flown by?  In a few short days, it will be my birthday and in another few weeks it will be my favorite season!  Don't get me wrong, I love that end of summer warmth, but there's just something about Fall that I absolutely am drawn to.  It is by far my favorite season and I wish it lasted longer.

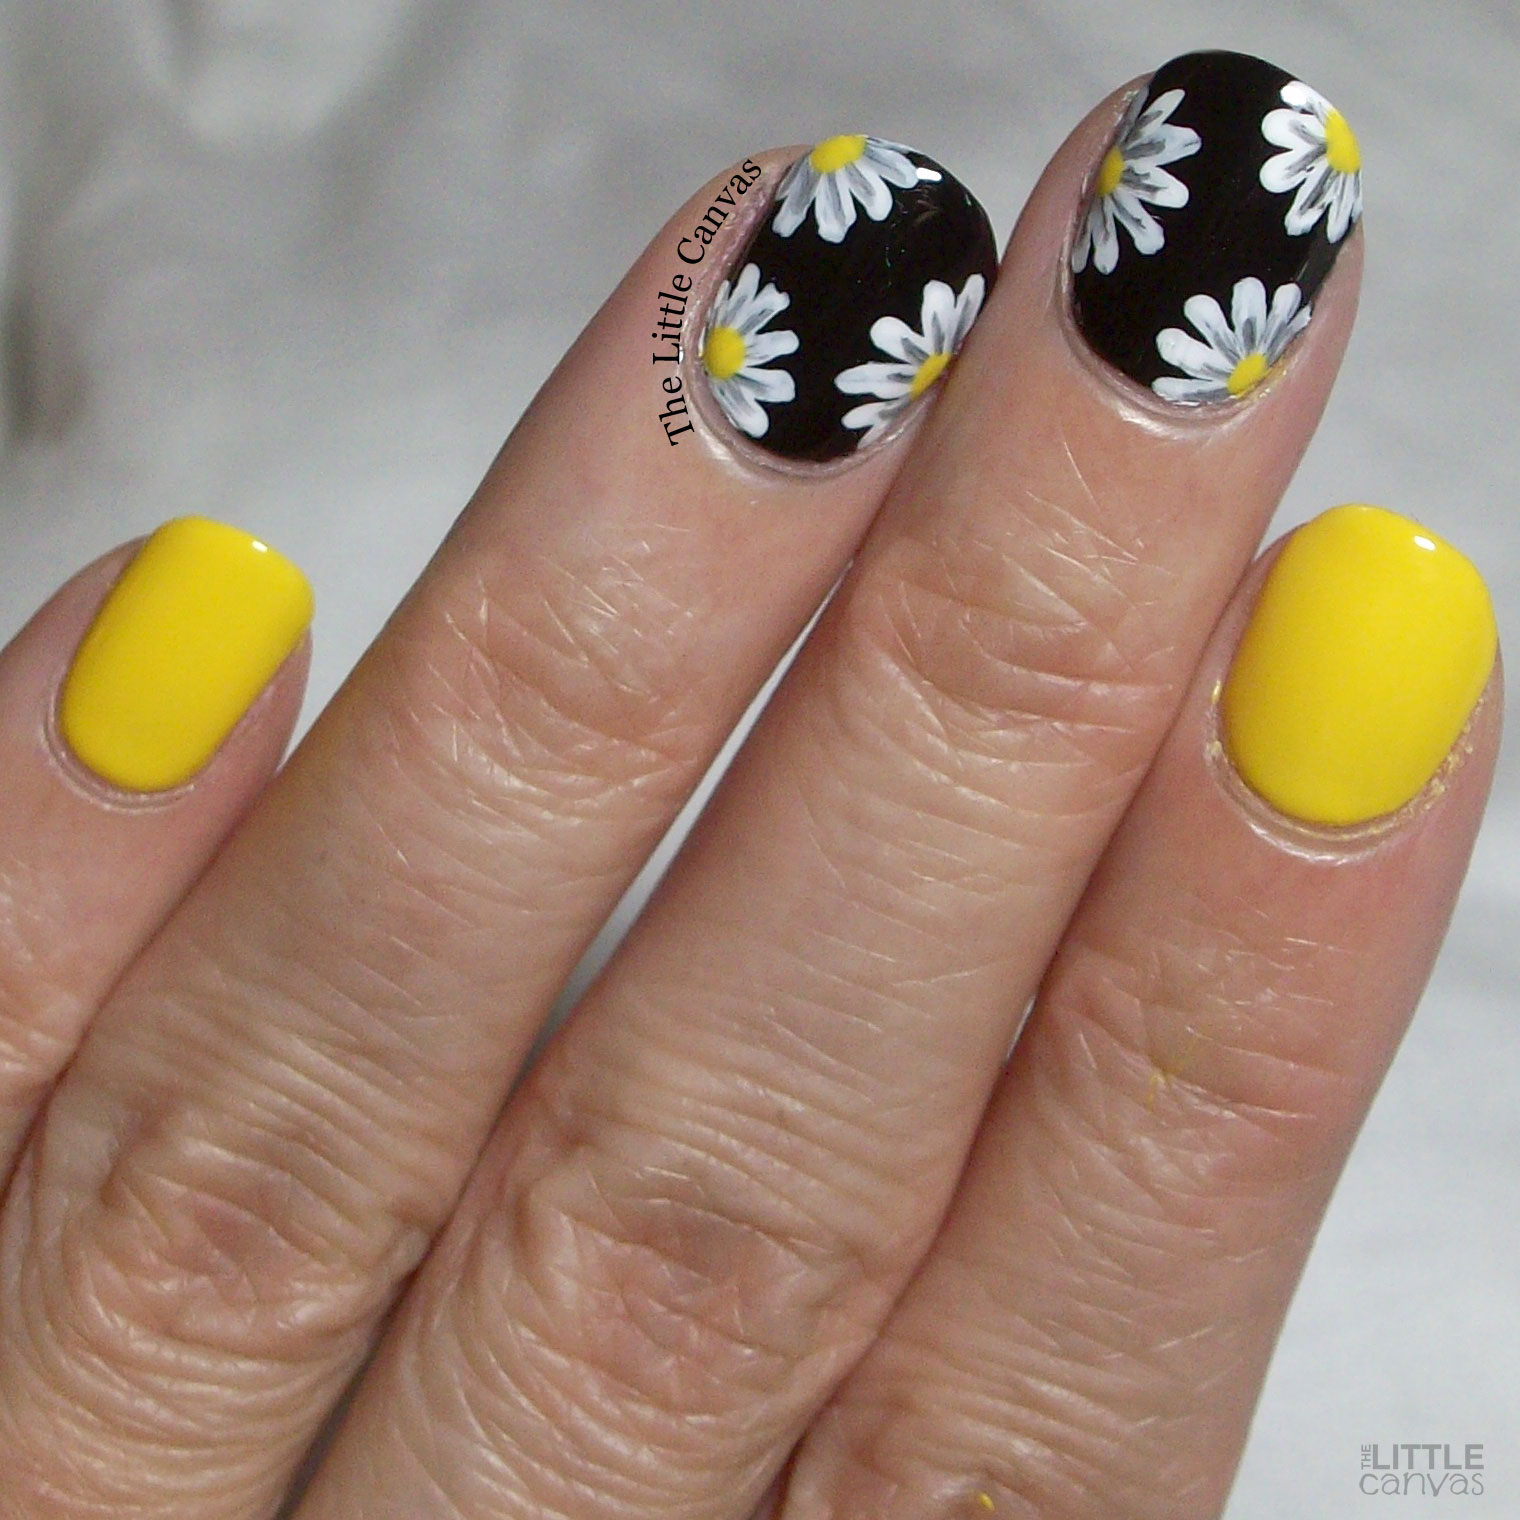
Regardless of my love for fall, I'm still here sharing some summer-ish manicures!  Every year I create a black and yellow daisy manicure and every year they are my favorite designs.  I saw PippyPolish added some dimension to her daisies and I thought I'd give that a go by doing a little swipe of black on the petal.  To be completely honest, I think it made the manicure.

Let's take a look!


Colors Used:
  • Sally Hansen - Blacky-O
  • OPI - Exotic Birds Do Not Tweet
  • White Acrylic
What is it with this color palette that just screams gorgeous?!  The black, white, and yellow is just so striking to me.  Especially using Exotic Birds Do Not Tweet, one of my all time favorite OPI polishes.  I took some pictures holding that bottle but it took away from the design so I opted to hold Blacky-O.  Both polishes apply wonderfully in two coats.   Once Black-O was dried, I went through with my white acrylic and added my little daisies.  Added the details, slapped on a topper, and called it a night.


I'd also like to take a moment to look at how long my nails are compared to what they were in the beginning of the year.  This has taken some time, and switching of many base coats, to get here.  I can't tell you how brittle my nails have been in the last year due to all the hand washing.  Now that I'm using ORLY Top 2 Bottom Base Coat, alongside FingerPaints Ridge Filler, my nails are truly sturdier than ever.  I also lotion them up before applying anything which I think has helped a bit too.  Maybe that's mind over matter.

Until next time, <3.

4th of July

The One With the Fourth of July Manicure

9:00:00 AM

Nothing to Disclose


Good Morning, Polished World!  Happy 4th of July to my American readers!  I have to say, this is one of my favorite holidays.  Warm weather, fireworks.  Can't go wrong, can you?  I could go on forever about my opinions on how this country has changed so much in the past 10 years, but this blog isn't political.  This blog is about the nails and well, today my nails are celebrating my country.

It's been awhile since I've actually done nail art.  Life got crazy, as it did this time last year, and I just have had no time.  Now everything is settling out and I decided it was time to delve back into my creative outlet.  What better way than to start with some red, white, and blue nails?!

Of course, when I sat down to paint today's manicure, a million ideas were coming to my head.  So today's manicure is literally a kitchen sink mani.  Many designs thrown into one.  Something crazy, just like me!

Let's take a look!


Colors Used:
  • Sally Hansen - Tidal Wave
  • ORLY - Stiletto on the Run
  • OPI - Set Apart by Tile Art
  • ILNP - Mega X
Tidal Wave is my go to blue polish for the summer.  It's the first pedicure polish, then I switch it up to different colors for about 3 other pedis, then I'm right back to it.  It's also my go-to color for manicures when I'm just swatching.  Throw a holographic top coat on it, and you have one gorgeous mani or pedi.  It applies perfectly in two coats, and of course works wonderfully for nail art.

I'm not going to lie, I forgot how to do a good old fashioned smoosh manicure like on my ring finger.  I finally remembered how to do it when I painted my right hand, but of course the dots on my right hand are a tad funky, so there's no photos of that.  I'm not angry with how this ring finger turned out though.  It kind of looks like if one of those bomb popsicles melted.


The smoosh manicure blends really well with the Tidal Wave pinkie finger, and the Mega X middle finger, but then you have the index finger.  The red, white, and blue dots that could have been it's own design.  I feel it's disjointed and takes away from the manicure as a whole.  But then part of me thinks it blends well.   Part of me wishes I just painted a regular red nail there, or left it white.  You know me though, can't leave well enough alone.

What do you think?  Like this design?

Have a safe and Happy 4th of July everyone!

Until next time, <3.


Dry Brush Mani

The One With the Sally Hansen Black and White Dry Brush Mani

9:00:00 AM

Nothing to Disclose 


Well Good Morning, Polished World!  How are you all doing on this fun Sunday?  Are Sunday's even considered fun?  For me they're a day of "ugh I'm going back to work tomorrow" mixed with errands that I didn't do throughout the week because I was so busy with work.  Did anyone else have a super busy week last week?  I felt like everything and anything that could happen did.  It was one of those weeks where I had plain nails and avoided all forms of social media.

Now I'm back though and life is calming down.  I decided to go into the drafts for today's post since obviously last week I had zero time to do any nail art.  I have so many ideas and designs that I want to re-create too, so I'm hopeful that tonight I'll have some time to sit down and begin creating again.  Until then, today's design is a black and white dry brush design I did last month.  I had no idea where I was going with this one, I just kind of let the paints flow.

Let's take a look.


Colors Used:
  • Sally Hansen - Blacky O
  • ORLY - White Tips
  • Some Gold polish I can't remember the name of....it was an ORLY though!
You think by now I'd write the names of the polishes used in the drafts of these posts so when I come back to them a month or two later I know what colors I used.  It's only been 9 years of blogging and I've yet to learn that lesson.  Seriously though - I started this blog in 2012, can you believe I've been doing this for 9 years?!  I think if I make it to 2022, I'm going to re-create every single manicure that I did during my first year.


Sorry, got off track from today's manicure.  I actually am obsessed with how this design turned out.  I love the swooped drybrush.  I always go side to side or upside down, but instead I went a little abstract.  When the dry brush was done, I debated on stopping there but it seemed like it needed something more.  Enter in the gold dots.  I wish I had gold flake or something because that would have looked really awesome on this design.  Oh darn, I should have dry brushed the gold!  Regardless, I think the dots added to the abstract look.  

What do you think? Fun manicure? Something you'd try?

Until next time, <3.


Christmas

The One With the Minimalist Rudolph Manicure

9:00:00 AM


Good morning, Polished World! How are you all doing today?  It's Wednesday which means....UGHHH the middle of the week.  You know, that day that feels like a Thursday but in reality you still have two more days left in the work week.  Actually, with my job, there really is no end to the work week, but whatever. I like to dream that my weekends are 100% work free.

Well, regardless of a crazy work schedule, I've still managed to start my Christmas manicures!  The trick is just getting the photos edited and up on the blog and Instagram.  So far, I have created three.  It would have been four, but I wore a swatch of Christmas Cookie by ILNP for a few days and it was too pretty to take off.

Anyways, today's manicure is a cute little simplistic Rudolph the Red Nosed Reindeer design that I found while surfing Pinterest.  I fell in love with the simplicity of it.  The original design that I found had a white three dimensional snowflake on the accent nail, but I of course opted for glitter.

Let's take a look!


Colors Used:
  • Sally Hansen - Bordeaux Glow
  • China Glaze - Big Hair and Bubbly
  • ORLY - White Tips
  • Black Acrylic 
Sally Hansen Bordeau Glow is the PERFECT Christmas red polish.  I don't know why I haven't used it until this year because I'm pretty sure I've owned this polish for awhile now.  I normally don't gravitate towards red, so when I have a few reds that I like I stick to them.  I think when I got this one, I avoided it because it looked like a frosty finish which I typically don't like.  When I found it in my drawer, I just thought it looked like the perfect Rudolph red.

After one coat of this, I fell in love.  It applied perfectly in two coats.  It had a gorgeous finish - it wasn't so much as frosted but a weird mixture of frosted and foiled....if that makes sense.  It just has such wonderful dimension and is beyond shiny.


For my little minimalist Rudolph, I took the red and made one big dot for his nose in the middle of my nail.  I then went through with a black acrylic and added the little eyes and antlers.  A coat of top coat and I really loved the look.

What do you think?  Cute Christmas design?

Until next time, <3.


Flowers

The One With the Daisy Re-Creation

9:00:00 AM

Nothing to Disclose Press Sample Affiliate Link


Good Morning Polished World!  Welcome to yet another week.  Can you believe that Thanksgiving is next week?  Where did this year go?  Oh, that's right...COVID ate it all and spit it out leaving us here to wonder what the heck just happened.  Hopefully this second wind that is coming right now will come and go quickly and we can have a nice little Christmas season.  I'm not going to lie, I started decorating today for Christmas.  Earliest I've ever done, but hey, I wanted a little Christmas cheer in my office.

Today's post though has nothing to do with Thanksgiving or Christmas.  It's actually got quite the summer vibe to it.  It was in the 70s last week which is very odd for November.  I was able to get a lot of outdoor work done, and since I felt like it was a little second wave of summer, I thought my nails should match.  So I recreated a daisy dotticure that I did yearrrrs ago.

Let's take a look.


Colors Used:
  • Sally Hansen - Blacky O
  • Sally Hansen - Wet My Thistle
  • Acrylics
Yes, I cheated and used acrylics for my daisies.  It got late after doing the base coat and the dots that I just didn't feel like waiting for polish to dry.  I can't be the only one who is obsessed with using acrylics for easy and fast nail art.  How could you hate using them when they dry so fast, you can manipulate the design more, and if you mess up you can wipe it off and start over.  The only issue is that the tips will chip a tad easier than normal paint if you have a design that overlaps the end of the nail, but whatever.  I change my nais every 3 to 4 days.


Anyways, Blacky-O was the perfect glossy black polish for the base of this manicure.  After the two coats dried, I went through with Wet My Thistle and created the polka dots. I was a tad nervous at first that the polish wouldn't show up on the black because it was a pastel, but it worked wonderfully for the dots.  No need to go over them again or anything...just one dab and done.  After they were dried  added my flowers and some top coat and admired my work.

What do you think?  Fan of the daisies?  Did you have the same heat wave where you were?

Until next time, <3.


Galaxy Mani

The One With the Galaxy Nail Art

9:00:00 AM

Nothing to Disclose


Good Morning, Polished World!!  How are you all doing today?  Can we believe it's already November 11?  Yup, 11/11 - which is supposedly a day of good luck.  That means it's only fitting to share a galaxy manicure....right?  I don't know it makes sense in my mind.

I have to admit, my mind is kind of mush because right before writing this post, I finished editing 12 posts worth of photos.  I'm pretty sure my eyes were crossing when it came to the last design.  I posted on my Instagram story some of my sarcastic post titles coming over the next few weeks.  Sure, in my tired mind they're sarcastic and witty, but in reality they're probably dumb.  Today's post title, clearly, is not one of them.  I couldn't think of witty post title for galaxy nail art.

Back to the whole eyes crossing thing...can I tell you how long it took me to edit these photos?  I was staring at three identical photos trying to figure out which galaxy looks the least blurry.  In reality, it's a galaxy, it's supposed to look blurry!

Let's take a look!


Colors Used:
  • Sally Hansen - Blacky-O
  • Oh man I painted these in February and have no idea what other colors I used...they were holographic!
Seriously, I cannot for the life of me remember what yellow, blue, or pink polish I used to create the galaxy.  This is one of my favorite designs to create though.  There really is no messing it up.  You start off with a black base coat.  When it's dry, I went through with a white polish on a make up sponge and just dabbed it in random areas to create a "galaxy" base.  Then through the center I dabbed the yellow polish, followed by the pink and blue.  Threw a quick coat of INM Northern Lights on to blend it together a little more.


Once the INM Northern Lights was dried, I went through and added the little stars.  Another coat of top coat and I called it a night.  Haha, night...galaxy.  I need to go to bed.

What do you think?  Fan of this manicure?

Hope you all have a lucky day. 

Until next time, <3.


#SallySquad

The One With the Candy Corn Spider Web Manicure

9:00:00 AM


Good morning, Polished World, and Happy Halloween!!!  Is it just me or is anyone else feeling anxious because of tonight's Blue Moon?  If you work in healthcare like me, you already know how a normal full moon affects the industry.  Hospitals, nursing homes, you name it, all things weird and crazy happen. Prayers to all my healthcare workers who are working today!  Hopefully I won't get called in.  Seriously though, leave it to 2020 for there to be a Blue Moon on Halloween.

Anyways, I almost forgot today's post, which is crazy because this is my favorite Halloween manicure to date. On Instagram, I have been obsessing over Sammie's Halloween manicures.  My first design this season was inspired by her, and if my nails were longer I would have re-created her pumpkin design.  Maybe I will put a Thanksgiving twist on the pumpkin and recreate it then.

Well, Sammie came up with a really cool orange ombre spider web design that I really wanted to re-create.  After my last mani with a nude base, I was really hating the idea of attempting another nude look, even if it was an ombre.  Then, it hit me....the candy corn gradient!  How cool would a spider web look on top of that?!  I always love doing the candy corn gradient, but hate it on it's own.  I've always wanted to put something on top but never knew what.  Now, that all changed...

Let's take a look!


Colors Used:
  • Sally Hansen - Electrocute
  • Sally Hansen - Blacky O
  • ORLY - White Tips
  • ORLY - Mirrorball
  • OPI - Exotic Birds Do Not Tweet
Seriously....isn't this the BEST Halloween manicure ever?!  Hands down it is my one of my all time favorite designs.  It honestly might be my favorite. Actually, I did like this naked nail with a black jelly, vampy accented spider web nail.  Getting off topic, but this is amazing.


I debated on having glittery black nails framing the manicure, but I decided for the plain black and am so happy that I did.  Then I was thinking of adding little googly eyes on the index finger, but thought it would take away from that awesome accent.  You know, my perfect candy corn gradient.  It's been a long time since I've attempted a gradient and I was beyond thrilled to see I still can accomplish one, especially one nubby nails like I have right now.

What do you think?  Fan of this Halloween design?

I hope that everyone is super safe this evening and has fun!

Until next time, <3.


#SallySquad

The One With the Candy Corn Patchwork

9:00:00 AM

Press Sample 


Good morning, Polished World!  How are you all doing on this fine Sunday?  Can you believe I am here for yet another post?  I haven't disappeared yet.  Nor am I planning on it.  I can't begin to tell you how grateful that I am to be back to painting my nails, posting, and sharing them on Social Media.  Sure, I'm not where I was when I disappeared a few months ago, but I'll get back there again.  It's been relaxing for me to find an escape again from my work life.

Today's design is a different Halloween design which I do not believe that I have done before.  The other night when I sat down to do my nails it was close to 11pm.  I didn't want to do just a swatch so I went to my Pinterest board for some inspirations. I came across a candy corn patchwork design and I settled for that.  At first I was going to do it on on my nails, but alas, it was 11pm and I didn't want to go all out like that.  So, I opted for the easy peasy accent nail.

To be honest, I love it just as an accent.  Let's take a look!


Colors Used:
  • Sally Hansen - Blacky-O
  • OPI - Exotic Birds Do Not Tweet
  • OPI - No Tan Lines
  • ORLY - White Tips
Isn't this a cool manicure?  I really, really loved this design a lot more than I thought I would.  It also received a lot of compliments.  To get the look, I started out with a base coat of white polish.  Then I outlined the patchwork boxes.  I then colored in each box with either yellow or orange.  When that was dry, I went through and again outlined with black, and then added the little sew marks.


Now, you all know my love of ORLY Liquid Vinyl.  It has been my favorite black polish for years and years.  Sally Hansen Blacky-O is now right at the top of the list.  This polish applies kind of thin on the first coat but builds up beautifully on the second coat.  It is beyond shiny and just like the other Miracle Gel polishes, it wears like steel and doesn't chip easily.

What do you think? Like this Halloween manicure?

Until next time, <3.


Halloween

The One With the Ghoulish Ghosts

9:00:00 AM


Good morning polished world!  How are you all doing on this Wednesday?  The weather is finally like Fall here with temperatures in the 50s and 60s.  We are due for a frost and the leaves are finally changing.  Ahhh, it's truly my favorite time of year.  Now, I just need to get some apples and start making some pies!

Before the pie making, there's some blogging to do.  Today's Halloween design was inspired by Coffee & Nail Polish.  She created the most unique ghost design for #GlamNailsChallengeOct.  In all my years of blogging I had never seen anything like it, and I for sure never thought of doing it!

Let's take a look!


Colors Used:
  • Sally Hansen - Stilletos & Studs
  • INM - Northern Lights
  • Acrylics
Isn't this so amazing?!  Shannon came up with the idea of see through little ghosts.  I always hate doing ghost designs because the opaque white always didn't look right to me.  While this looks like an unbelievably complicated design, it was so easy to do!  I took white acrylic paint and watered it down.  I painted the design on the nail, then let it sit for about 30 seconds.  I then wiped off the access and was left with the outline of the ghost.  I brushed around some excess acrylics to fill in some really naked areas and was left with little ghosts!


Stilettos & Studs was a great base color for this manicure.  I debated on going with a straight black base with a scattered holo topper, but when I saw this polish in my drawer I had to use it.  It gives it that cloudy, spooky, night sky feel.  Two coats and I had full coverage of this Miracle Gel.  It wore like a beast, it took a little scrubbing to remove it.

What do you think?  Like these little ghosts?  Think they're spooky or cute?

Until next time, <3.

Color Block Mani

The One Inspired By SamRoseNails

9:00:00 AM


Good morning polished world!  How are you all doing today?  It's Tuesday but I wish it was already Friday.  The weeks are just getting longer and longer, and my rest is getting less and less.  I need a long vacation.  Anyone have any suggestions?

Since I'm tired and running off to work, my post is going to be short and sweet.  Today's manicure is inspired by SamRoseNails on Instagram.  She had the cutest mosaic looking nail art which I fell in love with as soon as I saw it.  The mint, the silver, then the nude.  It just all went together so well!  After I broke two of my nails, I thought that this design would look perfect on my shorties that I was rocking for a little bit.

Sadly, mine didn't turn out as good as hers, but I still do like them.  Let's take a look!


Colors Used:
  • Jessica Cosmetics - Flower Crown
  • Sally Hansen - Champagne Supernova
  • Sally Hansen - Silver Stallion
My lines were so much thicker than hers which looked kind of messy and not so neat.  I love the design, but I think I just was tired and ended up blobbing the lines on the nails instead of paying attention.  It looked good on my thumb, but that's a larger canvas which helps things out a bit.

Flower Crown is a gorgeous mint polish which I received last year in a giveaway.  I never win anything, so when Jessica Cosmetics contacted me saying that I won the Gypsy Collection, I was happy as could be!  Then the collection got put on the back burner and I haven't used any of the polishes until now.  I'm a slacker, I know.


This view of the manicure I like better than the other photo.  Probably should just delete the other photo and pretend it didn't happen.  I switched up the manicure a bit and instead of doing two of the mint/teal nails I did a silver accent to match the silver on the design nail.  Not sure if I lied that silver nail, but after showing it to my friend she prefered it.  Who knows, she might have just said it to be nice!

What do you think?  Like this manicure?

So happy my nails are growing out again.  You know, just in time for the dreaded Valentine's Day nails.  Blah.

Until next time, <3.

China Glaze

The One With the Galaxy Manicure

9:00:00 AM


Good morning my lovely Polished Peeps!  How are you all doing on this cold, chilly Monday?  We were hit head on by Winter Storm Harper so I've spent the last 48 hours at home.  Went outside, shoveled, baked some cookies, made some dinners, slept a whole heck of a lot.  It was a much needed 48 hours of decompressing and quiet time.

My plan was to share yet another snowflake manicure with you all today, but since I spent the last 48 hours being a bum, that meant I spent those 48 hours with naked nails.  So, I have to break my snowflake streak and share with you a galaxy manicure.  It's actually a fitting manicure for today seeing as there was that blood moon and a total lunar eclipse last night.

Let's take a look!


Colors Used:
  • Sally Hansen - Onyx-pected
  • China Glaze - various polishes from the OMGFlashback Collection
  • INM - Northern Lights
Guyssssss, this galaxy manicure is by far one of my favorite.  I wish you could see how it sparkled thanks to the amazing holographic polishes from the China Glaze OMGFlashback collection.  Then when I topped it with Northern Lights, it was a holographic, sparkly wonder.  Truly looked like a galaxy!


To get the look I started off with my new favorite black polish, Sally Hansen Onyx-pected from the Miracle Gel line.  Two coats and full coverage.  I then went with a white polish and sponged the base of the nebula.  I then took multiple holos and filled in the white.  I then added a top coat of INM Northern Lights to blend it all together.  When that was dry, I added the little stars, and another top coat, and bam Galaxies.

What do you think? Fan of this galaxy manicure?  Did anyone see the super blood moon?

Until next time, <3.

#SallySquad

The One With the Miracle Gel Shiny and Matte Top Coat Comparison

9:00:00 AM


Hey polish world!  How are you all doing today?  As promised I'm back today to show you a comparison between the Sally Hansen Miracle Gel Shiny top coat and the BRAND NEW Sally Hansen Matte top coat!!  I was so excited when I got the invitation to be apart of the #SallySquad and review this for you!

It is no secret that I love the Miracle Gel polishes, including the shiny top coat.  I have a few matte top coats that I like, but none that have become a staple in my collection because I don't like how the matte looks on my nails.  I feel like it's never matte enough....if that makes sense.

That all changes though with this Miracle Gel Matte Topper!

Let's take a look!!

Miracle Gel Shiny


Miracle Gel Matte


Look at the difference between the two!!!  Seriously, I haven't found a matte that is so visibly different from the shiny when photographing them.

Best part - I only needed one coat to get this matte look!  My other matte toppers have required at least two.  You know what else is great about this matte top coat - I didn't have to add a shiny top coat base down before adding the matte.  My OPI, China Glaze, and a cheap drug store one, all required me to put a shiny topper down first because if I just did the plain matte, the colors would drag and smear.  Not with the Miracle Gel matte!!!  Ahhhh love it!

If you want to get your hands on a bottle - click here and pre-order your own from Amazon!

Until next time, <3.

#SallySquad

The One With the Snowflakes and Candy Cane Nail Art

9:00:00 AM


Good morning polished world!!  How are you doing today?  It's Wednesday, middle of the week, so close but still so far from Christmas.  I just painted my next Christmas manicure and I'm not feeling it, but we will talk about it on that post.  I'm just annoyed by it so I had to mention it here!

Anyways, today's manicure I did like but it didn't photograph 100% how I wanted it to.  Mainly because the green was gorgeously dark that it photographed almost to be black.  It matched the candy cane dress I wore to a work Christmas event perfectly though, and the dress was a lighter green.  My camera just loves me so much sometimes.

Let's take a look!


Colors Used:
  • Sally Hansen - Jealous Boyfriend
  • Sally Hansen - Can't Beet Royalty
  • ORLY - White Tips
I cheated using an ORLY when reviewing Sally Hansen Miracle Gels, but I don't own a Miracle Gel in white!!  Does that even exist?  If it does, I need to get my hands on it!!!

Let's talk about Jealous Boyfriend by Sally Hansen.  GORGEOUS dark green polish which covered completely in two coats.  Absolutely am in love with this color and am kicking myself that it didn't photograph perfectly.  It's so brilliant and I am so happy to have this polish in my collection.

Can't Beet Royalty is a gorgeous red, and I don't say that much about red polish.  Only one coat over the tape to get the candy cane look.  As you can see, it didn't even bleed under the tape, which means it's amazingly perfect for nail art.

What do you think?  Like this look??

Wait until tomorrow when you see it with a matte top coat!!!  Yup, that's right, Sally Hansen has a Miracle Gel Matte!!!

Until next time, <3.


Orly

The One With the Pumpkin Mani I Meant to Post a Week Ago

9:00:00 AM


Good morning polished world!  How are you all doing this week?  I did some MAJOR Christmas decorating this weekend.  Not only did I decorate four 7 foot trees at work, I came home and put a crud ton of lights on my house.  I'm not going to lie, I'm still quite exhausted from it.  Since I knew I was going to be doing all this decorating, I had swatch on my nails so I wouldn't be upset if they chipped.

With all this decorating, I literally forgot to post today's pumpkin manicure.  Yup, that's right, this post was supposed to go up around Thanksgiving and I completely forgot.  Of course I didn't realize this until I came to the blog last evening to post a different manicure and saw the pumpkin draft just sitting there.

Since November isn't over, then it's still perfect timing for me to post this!  Fall is just ending, and winter is coming.  That means Christmas and snow manicures are coming soon!!!

Let's take a look at the pumpkins first.


Colors Used:
  • Zoya - Alma
  • Sally Hansen - Champagne Supernova
  • ORLY - Liquid Vinyl
Isn't it cute?  I actually did this manicure to match a dress I wore to the Harvest Dinner at work.  I was so fall festive that evening.  The orange was a perfect Fall orange where I didn't feel like the manicure had a Halloween vibe.  Seriously, Zoya Alma is gorgeous.  Two coats and full coverage, and I was scared it was going to take more because of the jelly formula.  It built up quite nicely.


Really was thrilled with this design. First time I attempted this design of a pumpkin and was pleased with the final look.

What do you think?  Like this design?  Fan of Alma by Zoya?

Until next time, <3.

#SallySquad

The One with Sally Hansen Smartease and Metro Midnight

9:00:00 AM


Good morning polished world!  How are you all doing today?  I could have sworn that yesterday was Thursday, but of course, it wasn't.  It's weird, because everyone I talked to felt the same way.  Odd how that happened.  Alas, here we are and it's Thursday, not Friday.  Guess we should talk nails.

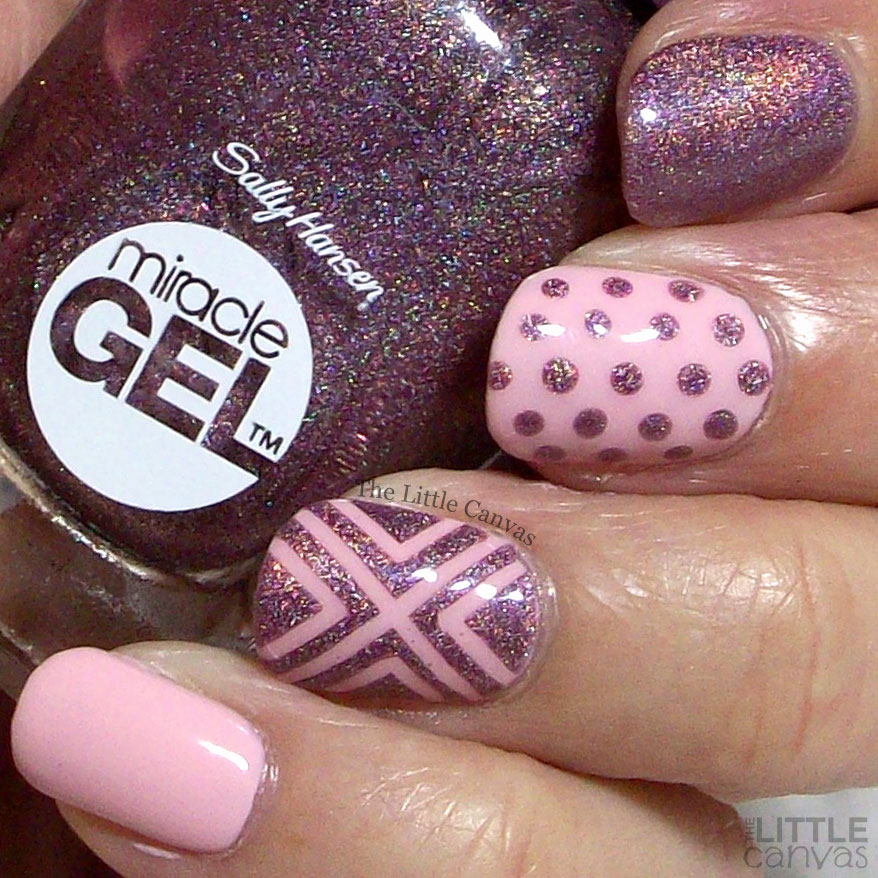
Today is my last post for the Sunset Splash collection from Sally Hansen!  I think I saved the best for last too.  Smartease and Metro Midnight are the pink and purple from the collection.  Although I kind of can see Metro Midnight being a dark pink/purple.  You can be the judge of that part, all I know is that it's a holographic polish.  Yes, that's right, a mainstream brand has released a holographic, and guess what, it's just as good as an indie!

Let's take a look!


Smartease is a pale pink polish which covered completely in two coats.  Normally I'm not a huge fan of pink nails, but this one I did like.  In my opinion, it's not that summery of a polish, I see it more being a Spring shade.  Paired with Metro Midnight though, it does get that summery vibe.


Metro Midnight......just......no words people....no words.  Look how amazingly gorgeous that is?!  Two coats on my index finger and used for the tape design.  The holo effect is so strong in this baby!  I really felt like I was using one of my ILNP or Serendipity Polish holographics.  Speaking of which, this is actually a recreation of a design I did using my Serendipity holographic polish last year!

What do you think?  Like this design?  Love the holo??

I had fun this round with the #SallySquad!  Can't wait to see what's next!!

Until next time, <3.

#SallySquad

The One With Sally Hansen Bourbon Belle, Sundown Socialite, and Sunflowers!

9:00:00 AM


Good morning polished world!  How are you all doing today?  It's Saturday, I'm kind of under the weather, so that means I'm going to rest up all weekend.  It really hasn't been my week.  On Wednesday I fell at work injuring my knee, so I've been living in a knee brace for the past two days.  My saving grace is that it's cooler out so I don't have to wear that thing in the brutal heat.  Finally Fall is here though.  It was such a wonderful Fall day yesterday, so I'm hoping I feel better today so I can enjoy it.

Today I have two more polishes to share with you from the Sally Hansen Sunset Splash collection from the Miracle Gel Line.  Have I mentioned how excited I am to be apart of the #SallySquad??  Bourbon Belle and Sundown Socialite are perfect summer to fall transition polishes.  As soon as I saw them, I knew what nail art I was going to do with them. 

But first, a swatch!


Above is two coats of Bourbon Belle.  A beautiful dusty peach polish.  Now I'm sure not everyone will call it dusty, but to me it's not as bright as a normal peach, therefore I think it's dusty.


I then grabbed the duochrome Sundown Socialite and dry brushed it over Bourbon Belle, and goodness was I in love.  Part of me wanted to swatch the whole thing over it, but after seeing the dry brush I was obsessed.  I need to use it though on it's own ASAP.

Nowwwww, for the nail art....SUNFLOWERS!


Every year I do a sunflower manicure.  Usually I do it over a royal blue polish, but these two polishes together were calling to me to use them for a base for some sunflowers.  At first, I wasn't too happy because the back orange petals seemed to disappear on the base, but once I added hte yellow petals, the details in the center, and added the top coat, I truly was in love.  To me, this is the perfect end of summer design.

What do you think?  Like this manicure?  Like the polishes?

Until next time, <3.

#SallySquad

The One With Sally Hansen La Vida Lilac and Floral Nail Art

9:00:00 AM


Good morning polished world!!  How are you all doing today?  It's in the 90s, and September, so do not get me started.  We all know how much I love Fall, so it's killing me that it's not here yet.  While I should be posting my palm tree manicure I did last week, that's going to hold off and probably end up being posted this winter when I'm missing Summer.  I'm really a contradictory person, aren't I?

Anyways, the reason I'm holding off on my post is because I'm super delayed in posting my #SallySquad manicures!  Yup, that's right, I'm now part of Sally Hansen's #SallySquad where I get access to the new lines of polishes to share with you all.  The first collection I received is the Miracle Gel Sunset Splash collection.  You all know how I rave about the Miracle Gel polishes in all my other posts, so you know I was excited to receive more.  Truly, these babies wear like iron on my nails and take forever to chip.  I always end up removing them before they're ready to come off.

 First polish I want to share with you is La Vida Lilac.  Let's take a look!


Just like all my other Miracle Gel polishes,  this covers completely in two coats.  Smooth application, perfect brush size.  And what a color.  Beautiful grey lilac polish which is such a versatile base for nail art.  Speaking of which, let's take a look at what I did.


I went back and forth debating on what I wanted to do on this base.  I've been wanting to do my annual sunflower manicure, but another polish in this collection I feel would be a better base for sunflowers.  Then I was going to do daisies, but I'm kind of all daisy-ed out - for now.  Then it hit me, a while back I did a yellow and black nail art design over a grey polish.  I thought those colors would be a good match over the top of it.


And as you can see, I was correct.  Really loved how this manicure turned out.  Added a top coat of the Miracle Gel topper, and I'll be sad in three days when I go to remove this manicure and there are no chips.  But alas, I need to move on to painting more designs!!!

What do you think?  Like this look?  Fan of the Miracle Gel polishes??

Until next time, <3.