FingerPaints

Snowflakes with Madam Glam and FingerPaints

9:00:00 AM


Good morning polished world and Happy Monday.  Now you might be surprised to see that I'm posting on a Monday when usually I have Twinsie Tuesday on Tuesday.  Well for the month of December, the Twinsie's are taking a little break.  So that means I'll be back to posting every 2 to 3 days.

I honestly cannot believe that tomorrow is December, and we have yet to see any real accumulation of snowfall.  It was in the 60s here on Friday and the meteorologists said that it has been one of the warmest Novembers in a long time.  I never thought I would say this, but I'm kind of missing the snow.  I really love when the Christmas lights are on the bushes and they're shining through the snow.  It just makes the season feel complete.

I've been seeing some snowflake manicures appear on Instagram.  Most recently I saw this one by 25 Sweet Pea.  I loved the black snowflakes over the fun pink base.  While I didn't have that speckled polish, I do own an awesome one from Madam Glam which was PERFECT for this manicure.

Let's take a look!


Colors Used:

  • Madam Glam - BFF
  • FingerPaints- Patent Black
  • FingerPaints - Glitz and Glam
  • FingerPaints - Sterling Sculpture

Okay, so be patient with me.  Below are two bottle shot photos,  Each kind of looks a little different color wise and I think it's because of the bottle that is being held.  Which makes absolutely no sense in my mind but maybe because one bottle is silver and one is blue??  I have no idea, I need to get my OttLite out so this doesn't happen again.  I'm may have a Masters degree, but it's not in photography for sure.


First up is Madam Glam BFF.  This is such a pretty pale blue polish with multi-hexed black glitters mixed throughout.  First coat was super sheer, so I wasn't having much hope that it was going to be full coverage in two coats.  On my pinkie it was, but on my pointer it wasn't, so I went for three on each nail just to even it all out.  I love the dimensions this polish has because of the sheer base and the black glitters.  It's a jelly sandwich in a bottle.  Putting the black snowflakes over the top of it too really brought out the dimensions in my opinion.  It was gorgeous on it's own though and I almost didn't want to put the snowflakes on top.


I feel like this picture shows Madam Glam's BFF more true to color.  It's so mind boggling to me that the actual bottle shot of that polish doesn't seem true.  I mean both kind of are true because when I wasn't in my lightbox the Madam Glam did look like the photo above.  Meh whatever.

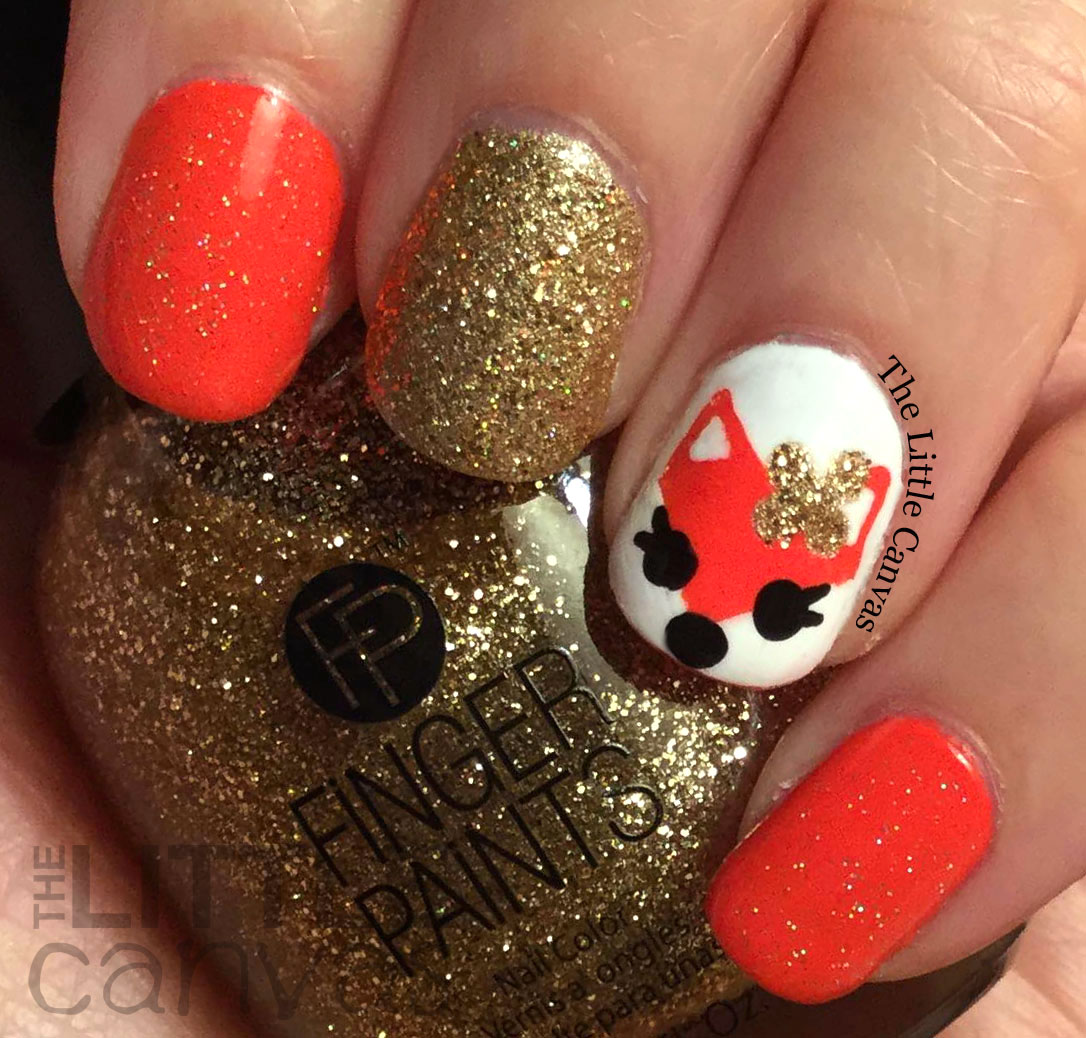
This bottle that I'm holding is one of my favorite FingerPaints glitters, Sterling Sculpture.  It was first released last year, and now it has been re-released as part of the holiday collection.  I absolutely love the multi hexed silver glitter in a clear base.  I used one coat over Glitz and Glam, a metallic silver polish.  It has such perfect distribution of glitter with just one coat and you do not need to place or dab at all.  If you're a fan of silver, this is a must have for your polish arsenal.

What do you think?  Fan of these polishes?  Do you have issues with photography like I do?

Photo issues or not, I love this manicure and I love the polishes used to create it.  It only lasted two days because I was busy at work putting Christmas decorations and lights up so I ended up breaking some nails and chipping ones that survived the breaks.  That's what happens when you're climbing a ladder, over the top of bushes, to hang icicle lights off a brick building.  I cannot wait to use BFF again, and you know for sure you're going to be seeing a lot of Sterling Sculpture here on this blog.  Especially now that I have two bottles. :)

Hopefully these nails bring some snow!

Until next time, <3.

China Glaze

Random Dry Brush Manicure

9:00:00 AM


Good morning polished world!  Happy Friday!!  My week is all thrown off right now since I had yesterday off and now today I'm working.  Seriously, yesterday felt like a Saturday so I'm convinced that I should be going to church today instead of work.  Oh well, at least tomorrow is Saturday and I'll get to sleep in again!  I guess it's a bonus?  Who knows.

Today I am sharing with you a random dry brush manicure I did after Halloween.  After doing all that orange, yellow, and black, I wanted to have something bright and funky.  The obvious choice was to grab some of my favorite neon polishes!

Let's take a look!


Colors Used:
  • China Glaze - Too Yacht to Handle
  • China Glaze - That's Shore Bright
  • Zoya - Aurora
  • Look Nail Color - White
I honestly forgot how gorgeous Zoya Aurora is.  Two coats of jelly holo perfection.  They need to make more polishes like this.  Preferably in red and green for Christmas.  Maybe in a teal too.  I stumbled across a gradient someone did using Aurora and Storm and I think I need to re-create it soon because it was beyond gorgeous.


I love how Aurora offsets the creams and the nail art on the pinkie and thumb.  It's a great contrast.  At first I was planning on putting INM Northern Lights on the cream nails, but I'm thrilled that I didn't.   I think it would have taken away from the simplicity of the design.

What do you think? Do you think extra sparkle would have ruined it?

Until next time, <3.

Dot Mani

Twinsie Tuesday: Inspired by Food....Kind of? Maybe?

9:00:00 AM


Good morning polished world!  How are you all doing today?  It's Tuesday which means it is time for another Twinsie Tuesday!  This week we are sharing manicures which are inspired by our favorite food.  I had zero ideas for today and almost thought about skipping because when I can't think of something it stresses me out, I get angry, and the manicures never turn out.  Plus, we all know that I wear my manicures for a few days.  So if I didn't like wearing a manicure for a few days I was not 100% happy with.  It just all around would have been a bad situation.

Then I realized Thanksgiving is Thursday and I started to think of all the different foods that are served.  Stuffing, cranberry sauce, green bean casserole, and most importantly turkey.  Everyone loves Thanksgiving turkeys!  So I decided to do a turkey themed manicure.

Let's take a look!


Colors Used:
  • Orly - White
  • Orly - Bling
  • Acrylics
I decided to re-create my pilgrim turkey from last year.  If you don't remember, click here to see my cute little turkeys from last year which were also for a Twinsie Tuesday post!  Literally it was a year ago.  Kind of funny how that happened.  Anyways, I only really wanted turkey accents instead of all 10 so I decided to figure something else out for the other nails.


Which of course I came up with using a very fun glitter, Orly Bling.  This polish came out as part of last years winter collection and I couldn't be happier that I own it.  It's so pretty and holo.  It needs to be released as part of their core collection like Mirrorball was.  Hmmm I wonder if they actually did.  I should take a look this weekend when I go to Sally.

What do you think?  Fan of this turkey?  Are you a fan of Thanksgiving turkey?

Can't wait to see what the other Twinsie's did!


Amanda at Amandalandish
Amanda at Fashion Footing
Amber at Nails Like Lace
Bridget at A Painted Nail
Chelsea at Nailed Blog
Claire at Kerruticles
Marisa at Polish Obsession
Róisín at Cuti-CLUE-les
Savannah at Addicted to Polish

Until next time, <3.

Bestie Twin Nails

Bestie Twin Nails with Fashion Footing: Round 18

9:00:00 AM


Good morning polished world!  How are you all doing today??  Winter is actually here, kind of.  The temperature finally dropped and it's supposed to possibly snow today or tomorrow.  We have had such a mild Fall/Winter that it seems weird that it's going to snow.  Seriously, it was 65 degrees on Wednesday.  It's about time that winter got here.

Today is Round 18 of Bestie Twin Nails with Fashion Footing!  I honestly cannot believe we are almost at the two year mark of this feature.  Where did the time go??  This month Amanda and I re-created this tribal looking manicure by Alondra Loves Polish on Instagram.  It shocked me that Amanda chose this manicure to re-create because she hates tribal designs and this is what it reminded me of.  According to her though, it isn't tribal, it's stripe-y.

Let's take a look!


Colors Used:
  • OPI - Just Lanai-ing Around
  • OPI - Love, Angel, Music, Baby
  • Orly Instant Artist Stripers
OPI - Just Lanai-ing Around is such a pretty polish.  I wasn't sure if I should purchase it or not, but I'm happy I did.  It's a beautiful dark mauvey pink with a subtle shimmer.  Since I added a matte top coat, and there is art on top of it, you can't see the shimmer at all.  It applied perfectly in two coats.  It was a little thicker than other OPIs that I own, but it was very easy to work with.  I think it's an odd color for a Spring collection.  It's perfect for this time of year in my mind.

To get the look, after my base was dried, I went through with my gold polish and did a swipe down the middle of my nail.  Then with my striper, I outlined the gold stripe and did the zig zag pattern.  I then went through with my white and added the final details.


I'm still working on the new bottle shot photos.  Sorry that they are kind of odd looking.  I purchased an OttLite but I haven't gotten it out of the box yet.  You think I would have ran home as soon as I purchased it and tried it out, but nope.  I'm a lazy little nail blogger.  These photos though have turned out really well considering they are up against my bed, using a regular light, and my iPad.  Some turn out better than others.

What do you think?  Fan of the design?  Do you like these colors?  Do you think it's tribal?

Make sure to check out Amanda's design!

Until then, <3.

Nail Artist of the Month

November Nail Artist of the Month: Love Polish Them

9:00:00 AM

Good morning polished world!  How are you all doing today?  I'm super excited to finally be introducing you all to a new Nail Artist of the Month!  I usually do this post in the beginning of each month, but I slacked at the end of October and never contacted someone in time to get the post up by my own personal deadline.  So I settled for a mid month post!

I'm so pleased to introduce you all to the very talented Constanza from @lovepolishthem on Instagram!  She is beyond talented and I couldn't wait to feature her.  I'm so happy she agreed, and her manicure today does not disappoint!

Let's take a look!

__________________________________

Hi beautiful ladies!

I was so happy that Alaina invited me to be the artist of the month! Wow, such an honor. I like your IG account very much and now that I discover your blog I´ll make sure not missing an entry!

Let me introduce myself. I'm Constanza, @lovepolishthem on Instagram, and I'm from Chile, a small country in South America. Here is spring time (yay!).

I started to become interested about nail art about a year and a half ago when I first met a very well known local nail artist. First, was all about the designs, after that I began to collect nail polishes and started to be interested in the different shades and textures. I have over 200 nail polishes by now and counting..... hahaha...

Most of my designs are free hand and sometimes I use some vinyls. I don't consider myself an expert; I'm still learning. But I'm very happy with the improvements I've made, which make me say: never give up, practice is the key!

Today I bring you a peacock feather design in green tones.


Colors used:
  • Pastel yellow: Models Own "lemon meringue"
  • Dark yellow: Opi "good grief!"
  • Green: Essie "ruffles & feathers" and "mojito madness"
  • Green glitter: Essence "party in a bottle"
  • Top Coat: Glisten & Glow HK Girl
First I applied pastel yellow and made the design with a super thin and long brush using the different nail polishes.

On the index I applied glitter, the first coat with the brush and then with a sponge to get full coverage.

At last, I applied glossy top coat.


I hope you liked it! <3

Thanks Alaina once again for the opportunity and thank you to all of you reading this entry right now ;)

___________________________________

What a gorgeous manicure!  The color combo is absolutely to die for.  I really think I might have to re-create this.  It's just amazing.  I haven't done a peacock design, so it's perfect!

Connie, thank you so much for creating this post!  I truly hope that everyone heads on over to her Instagram and follows her!  You won't be sorry!

Until next time, <3

Dry Marble Mani

Twinsie Tuesday: Fall to Winter Transitional

9:00:00 AM


Good morning polished world!  How are you all doing today?  Its unseasonably warm here lately.  I almost think we might skip winter.  Usually we have snow by now, but so far nothing and it's in the 50s.  I'm not complaining.  I was able to put all my Christmas lights up on the house without wearing gloves and  winter coat.  It was quite pleasant.

It's Tuesday which means it is time for another Twinsie Tuesday.  This week we are sharing manicures using a Fall to Winter transition polish.  Since the weather here isn't seeming like it's transitioning, I haven't really been thinking much about winter manicures or winter polishes.  So I started looking around Pinterest and Instagram for ideas.  I started to see dozens of navy blue manicures and I thought that navy is a perfect transition color.  I always correlate all shades of blue with winter, and anything dark for Fall.  Therefore, I think navy is  perfect transition polish.  Right?  Maybe?

Today's manicure is inspired by this awesome dry marble by JustJan26 on Instagram.  I've been loving all the dry marble manicures I've seen, but I never had the guts to try them myself.  After seeing this one I decided to give it a try.  Let's take a look.


Colors Used:
  • Zoya - Sailor
  • Orly - Mirrorball
  • Orly - French White
  • INM - Northern Lights
I love Zoya Sailor.  It's such a pretty, rich, navy blue polish which applies perfectly in two coats.  The added top coat of INM Northern Lights really adds a new dimension to an already gorgeous polish!  I was a little hesitant on adding the Northern Lights but I am so happy that I did.


I am super pleased with how my dry marble turned out as well!  I started off with a base of white polish.  While my second coat of the white was still wet, I dripped a few drips of Sailor and Mirrorball on the nail.  I then very quickly used a toothpick and swirled the colors together.  I wish I had a little more Mirrorball, but it still looks great.

What do you think?  Fan of this look?  Have you tried to dry marble??

Don't forget to check out the other Twinsie's posts!


Savannah at Addicted to Polish
Róisín at Cuti-CLUE-les
Marisa at Polish Obsession
Claire at Kerruticles
Chelsea at Nailed Blog
Bridget at A Painted Nail
Amber at Nails Like Lace
Amanda at Fashion Footing
Amanda at Amandalandish

Until next time, <3.

FingerPaints

Fall Leaf Nail Art

9:00:00 AM


Good morning polished world!  How are you all doing today?  It's Sunday meaning the weekend is close to over.  It's also midway through November which means Fall is close to over as well.  It feels like Fall has been dragging on because usually by now we have our first snowfall, even if it is just a trace.

Since Fall is still hanging around a little bit longer, I decided to do a Fall themed manicure.  After looking around Instagram, I came across this gorgeous leaf manicure by @badgirlnails.  I wanted to re-create it, but I was very apprehensive because in all the years I have been blogging, I have not mastered the glitter gradient.  Search the blog, you will not find a single glitter gradient because they just never work out for me.

Amazingly enough, I figured it out for this manicure, and I couldn't have been happier!  Let's take a look!


Colors Used:
  • FingerPaints - Tye Die Tangerine
  • FingerPaints - Paper Mache
  • FingerPaints - Wrapped in Ribbon
  • Salon Perfect - Champagne Toast
Kind of pretty, right?  I really love Tye Die Tangerine!  Two coats and full coverage of a fun orange polish!  And it looks even more amazing with that top coat of Champagne Toast by Salon Perfect.  This polish is the gold sister of China Glaze Fairy Dust.  Right down to that strong smell that Fairy Dust has.  It reminds me of my beloved Northern Lights in gold, which was lost in a tragic Melmer accident a few months ago.  I really was upset when that broke, but happy I found a replacement within my own collection!


Now for the glitter gradient!  I started off with a base of white polish.  When it was dried, I took a make up sponge and did a gradient using white and a metallic gold polish.  I then went through with the glitter on the make up sponge and dabbed it on over the metallic part of the gradient.  So even if the glitter didn't fully cover the bottom of the nail, the gold color still was there so it looked opaque.

What do you think?  Fan of this manicure?  Think I should try more glitter gradients??

If I were going to re-do this manicure, I would probably make my leaf a little smaller on my ring finger.  I feel like it took over the nail.  Oh well!

Until next time, <3.

kitchen sink mani

Orly Chevron

9:00:00 AM


Good morning polished world!  How are you all doing today?  It's Friday which means the weekend is almost here!  It's been a long week so I cannot wait to sleep in tomorrow.  I was too exhausted to edit up a perfect Fall manicure to show you all today, so I decided to go into The Little Canvas vault for today's post!

I purchased some of the polishes from the Orly In The Mix Collection in September and of course used them right away.  Of course time got away from me and other manicures took precedent so it got lost in the vault.  It's rather sad because it is such a cute manicure

Let's take a look!


Colors Used:
  • Orly - Indie
  • Orly - Electropop
  • Orly - MirrorBall
  • Orly - French Tip White
  • Twinkled T Chevron Vinyl
Indie and Electropop are just like all other Orly polishes.....perfect.  Two coats for both and I had full coverage.  When doing the gradient over the chevron vinyls, I only had to dab the sponge a few times because the color is so concentrated in the polishes.


I'm actually happy that this manicure fell into the vault and I'm revisiting it now because I'm remembering that I own these polishes.  I need to break them out and use them again.  Maybe for something floral?

What do you think?  Did you purchase any polishes from this collection?  I still need to use the matte glitter I bought along with these!

Sorry for the short post, but exhaustion is getting the best of me!

Until next time, <3.

Dot Mani

Twinsie Tuesday: Inspired by a Child In Your Life

9:00:00 AM


Good morning polished world!  How are you all doing today??  It's Tuesday which means it is time for another Twinsie Tuesday.  I apologize for skipping last week.  I was a tad under the weather again and really didn't feel well enough to create a manicure.  I'm back though and feeling pretty well.  Okay, maybe I'm a tad stuffy and my sinuses are crappy, but what can you do?

Today for Twinsie Tuesday we are creating manicures which are inspired by a child in your life.  I don't have any children, but I do have two nephews and one little niece.  Last year I did this awesome superhero manicure inspired by my nephews, and was thinking of revisiting it but I wasn't really feeling it.

Then it hit me.  Years ago when I first started with my polish addiction I was so jealous of all these girls with their rainbow glitter polishes.  I went on the search and I found myself a bottle of Ulta Pinata Yada Yada.  I ran home and I used it on top of mint polish for a pedicure.  My oldest nephew saw my nails and pointed and said he liked them, to which I responded "it's Pinata Yada Yada".  For months and months later, every time he saw a glitter on my toes he'd point and ask "Is that Yada Yada??"  It was the cutest thing ever and it's one of those stories I'm never going to forget.

So I dug out my bottle of Pinata Yada Yada and created a manicure!


Colors Used:
  • Orly - Gumdrop
  • Orly - French White
  • Ulta - Pinata Yada Yada
I honestly had no idea what I was going to do when I sat down with that bottle of glitter.  Luckily, after staring into my Melmer, I found my trusty bottle of Orly Gumdrop which is a perfect color to match any glitter, especially a rainbow one!  Pinata Yada Yada is such a pretty polish with gold, blue, silver, pink, red, copper, you name it multi sized glitters.  It applies pretty well in one coat, but I did have to fill in a few blank spaces.  I need to start using it more!


Do you like my new bottle shot photos?  I'm leaning away from my trusty INM Out the Door bottle and trying to use the actual polishes I used in the manicure.  You can kind of see from this bottle of Gumdrop how old it really is.  Half filled, has some purple polish dripping down the side from when I used it for marbling.  The top is kind of crusted.  I need to get a back up!

What do you think?  Like this look?  Do you own Yada Yada? :) 

Make sure to check out the other Twinsie's Posts!


Amanda at Amandalandish
Amanda at Fashion Footing
Amber at Nails Like Lace
Bridget at A Painted Nail
Chelsea at Nailed Blog
Claire at Kerruticles
Marisa at Polish Obsession
Róisín at Cuti-CLUE-les
Savannah at Addicted to Polish

Until next time, <3.


Animal Mani

Fox Nail Art Inspired by 25 SweetPeas!

9:00:00 AM


Good morning polished world!  How are you all doing today?  I can't believe that it's already November 8th.  I swear, the months are just flying by.  I did email a Nail Artist of the Month and I'm waiting for her to respond, so I'm hoping to have one up by the end of the month!  I really hate that I slacked on that this month.

Today I am sharing with you a fox manicure that might be perfect for Fall.  Maybe it isn't, but in my mind the colors are Fall-like so it works!  This cute little fox design is inspired by 25 Sweetpeas!  I saw her manicure a few weeks ago and fell in love with the cute little fox with a bow on her ear, so I put it on the to-do list of manicures!

Let's take a look!


Colors Used:
  • Zoya - Rocha
  • Orly - French White
  • Orly - Instant Artist White
  • FingerPaints - Wrapped in Ribbon
  • Salon Perfect - Champagne Toast
Isn't the little fox adorable?!  I followed Sarah's tutorial on her Instagram to re-create the fox.  I started off with a base coat of white polish.  When that was dried, I used Zoya Rocha and painted a the head of the fox onto my nail.  I then used a toothpick and added the ears.  I used my Orly Instant Artist to add the white cheeks of the fox and the triangles in the ears.  I then added the little details using my dotting tools.


Wrapped in Ribbon was a polish that was released last year as part of the FingerPaints holiday collection.  I really hope they re-release this polish because t is the perfect gold microglitter!  Two coats and you get full glittery coverage!

Since my middle nail was so glittery, I decided to add a top coat of Champagne Toast by Salon Perfect on my other nails.  This polish is the gold version of China Glaze's Fairy Dust and also closely resembles INM Northern Lights in Gold.  I think I wrote about my love for this polish in another post, but I called it Champagne Kiss by accident.  That's what happens when you have over 500 names of polishes in your head and you don't write down what you use when you actually use it.

What do you think?  Fan of this gold, glittery, fox manicure?  Is this something you would try?  Should I do more animal manicures??

Until next time, <3.

Madam Glam

Mustache Manicure with Madam Glam!

9:00:00 AM


Good morning polished world!  How are you all doing today??  It's November which means it's time for Movember, or whatever it is they call it!  So that means it was time for me to do a mustache manicure.  A few years ago I did the Fancy Schmancy Movember Tuxedo Men, but never revisited it since then.  After some searching on Pinterest, I found this manicure by Cocos Nails I just had to try!

The polishes I used today were sent to me by Madam Glam!  They are a cruelty free brand based out of New York City.  After taking a look at their website, I fell in love with many of the colors so I was very excited to try some!  The four bottles I received can be seen here.  The ones I used for today's manicure are More Diamonds Please, a gorgeous silver holo glitter, and Just a Flirt, a gorgeous pastel pink/purple.

Let's take a look!


Colors Used:
  • Madam Glam - More Diamonds Please
  • Madam Glam - Just a Flirt
  • Orly - Liquid Vinyl
If you followed the link and saw the pictures of the bottles, you can see that they are smaller than your average bottle of polish.  Due to the bottle size, I was fully expecting the brush to be something small and hard to work with; kind of similar to an Essie brush.  Don't get me started on the Essie brush, it's just awful.  I was pleasantly surprised to discover that the brush was similar to the Sally Hansen InstaDri brush.  A tad smaller but still perfect to work with.  I love wider brushes like that because I don't have to do a million swipes to cover my nail.  Two or three swipes and bam, done.


Just a Flirt is truly a gorgeous purple pink shade.  The website says it's a pastel purple, and I can see that by looking at the bottle and looking at my nails in certain light, but in others it's kind of pink.  I really like the color and can see myself using it a lot for mish mosh manicures.  It applied perfectly in two coats, which surprised me because most pastels I've used take 3 coats to gain full coverage.

More Diamonds Please is just gorgeous.  Can you see the holo sparkle?!  I cannot stop looking at my nails!  And it's been sunny here so they're truly a real distraction.  This polish was a little on the thicker side, but it's a glitter so I expected that.  It covered completely in two coats.  If it didn't have the super small micro glitter, I don't think it would have covered as fully.  I read some reviews that said it was hard to work with, but I didn't find that to be the case.  This is one polish I can see myself using over, and over, and over again!  You know me and my love for silver glitters!

What do you think?  Fan of this look?  Loving these polishes?

If you are loving these polishes and want to get your hands on them, then this is the perfect time for you to buy!  Madam Glam is having an early Black Friday Sale which runs until November 27th.  If my followers use the code BFAlaina, the first 10 buyers will receive 40% off their order, after the first 10, you will receive 30% off your order.  If you are interested in this deal, head on over to their website by clicking this long hyperlink, shop around, and use the code BFAlaina at checkout!

Until next time, <3.

Dot Mani

A Neon Dot Flower Manicure

9:00:00 AM


Good morning polished world!  How are you all doing today?  October is over and November is here!  Usually for the first post of the month I introduce you all to a new Nail Artist.  I was a huge slacker and totally forgot to select a lovely lady, so I think that post will now be at the end of the month...or maybe middle.  I'll have to see how fast I select and email someone.

Today I am bringing you a manicure from The Little Canvas vault.  Since I focused on Halloween nail art all throughout October, I gathered up a little back log of manicures which I did towards the end of September.  This one today is one of my favorites which I believe was inspired by Paulina's Passions.  I truly fail when it comes to drafting posts....I just edit the photos and stick them in there and don't write who inspired me, what colors were used, or anything useful.  So here I sit a whole month later trying to think about where I got the idea for this manicure.  I apologize.

Anywho, let's take a look!


Colors Used:
  • Orly - French White
  • Orly - Push the Limit
  • Orly - Be Daring
  • Orly - Frolic
  • Orly - MirrorBall
  • China Glaze - Lotus Begin
  • Floss Gloss - Dime Piece
I can't for the life of me remember what the glitter is over the top of Push the Limit.  Push the Limit is such a gorgeous, bright, neon, coral polish which I am so happy I purchased.  It applied perfectly in two coats, and with that glitter topper, it was even more spectacular.  Now that I think about it, I think it's a Salon Perfect.....maybe Champagne Toast?  I really should write down what colors I use when I draft the posts.  You think I would have learned that lesson ten times over by now.


I really loved this manicure and now that I'm revisiting it for this post, I want to do it again.  Or something similar.  I'm a huge fan of the accents being the ring and pinkie finger and all others being the art nails.  If that makes any sense.

What do you think?  Fan of this look?  Something you would try?

Alright all, I'm going to stop procrastinating and find a Nail Artist of the Month!

Until next time, <3.