#SallySquad

The One With the Candy Corn Spider Web Manicure

9:00:00 AM


Good morning, Polished World, and Happy Halloween!!!  Is it just me or is anyone else feeling anxious because of tonight's Blue Moon?  If you work in healthcare like me, you already know how a normal full moon affects the industry.  Hospitals, nursing homes, you name it, all things weird and crazy happen. Prayers to all my healthcare workers who are working today!  Hopefully I won't get called in.  Seriously though, leave it to 2020 for there to be a Blue Moon on Halloween.

Anyways, I almost forgot today's post, which is crazy because this is my favorite Halloween manicure to date. On Instagram, I have been obsessing over Sammie's Halloween manicures.  My first design this season was inspired by her, and if my nails were longer I would have re-created her pumpkin design.  Maybe I will put a Thanksgiving twist on the pumpkin and recreate it then.

Well, Sammie came up with a really cool orange ombre spider web design that I really wanted to re-create.  After my last mani with a nude base, I was really hating the idea of attempting another nude look, even if it was an ombre.  Then, it hit me....the candy corn gradient!  How cool would a spider web look on top of that?!  I always love doing the candy corn gradient, but hate it on it's own.  I've always wanted to put something on top but never knew what.  Now, that all changed...

Let's take a look!


Colors Used:
  • Sally Hansen - Electrocute
  • Sally Hansen - Blacky O
  • ORLY - White Tips
  • ORLY - Mirrorball
  • OPI - Exotic Birds Do Not Tweet
Seriously....isn't this the BEST Halloween manicure ever?!  Hands down it is my one of my all time favorite designs.  It honestly might be my favorite. Actually, I did like this naked nail with a black jelly, vampy accented spider web nail.  Getting off topic, but this is amazing.


I debated on having glittery black nails framing the manicure, but I decided for the plain black and am so happy that I did.  Then I was thinking of adding little googly eyes on the index finger, but thought it would take away from that awesome accent.  You know, my perfect candy corn gradient.  It's been a long time since I've attempted a gradient and I was beyond thrilled to see I still can accomplish one, especially one nubby nails like I have right now.

What do you think?  Fan of this Halloween design?

I hope that everyone is super safe this evening and has fun!

Until next time, <3.


#SallySquad

The One With the Candy Corn Patchwork

9:00:00 AM

Press Sample 


Good morning, Polished World!  How are you all doing on this fine Sunday?  Can you believe I am here for yet another post?  I haven't disappeared yet.  Nor am I planning on it.  I can't begin to tell you how grateful that I am to be back to painting my nails, posting, and sharing them on Social Media.  Sure, I'm not where I was when I disappeared a few months ago, but I'll get back there again.  It's been relaxing for me to find an escape again from my work life.

Today's design is a different Halloween design which I do not believe that I have done before.  The other night when I sat down to do my nails it was close to 11pm.  I didn't want to do just a swatch so I went to my Pinterest board for some inspirations. I came across a candy corn patchwork design and I settled for that.  At first I was going to do it on on my nails, but alas, it was 11pm and I didn't want to go all out like that.  So, I opted for the easy peasy accent nail.

To be honest, I love it just as an accent.  Let's take a look!


Colors Used:
  • Sally Hansen - Blacky-O
  • OPI - Exotic Birds Do Not Tweet
  • OPI - No Tan Lines
  • ORLY - White Tips
Isn't this a cool manicure?  I really, really loved this design a lot more than I thought I would.  It also received a lot of compliments.  To get the look, I started out with a base coat of white polish.  Then I outlined the patchwork boxes.  I then colored in each box with either yellow or orange.  When that was dry, I went through and again outlined with black, and then added the little sew marks.


Now, you all know my love of ORLY Liquid Vinyl.  It has been my favorite black polish for years and years.  Sally Hansen Blacky-O is now right at the top of the list.  This polish applies kind of thin on the first coat but builds up beautifully on the second coat.  It is beyond shiny and just like the other Miracle Gel polishes, it wears like steel and doesn't chip easily.

What do you think? Like this Halloween manicure?

Until next time, <3.


#SallySquad

The One With the Miracle Gel Shiny and Matte Top Coat Comparison

9:00:00 AM


Hey polish world!  How are you all doing today?  As promised I'm back today to show you a comparison between the Sally Hansen Miracle Gel Shiny top coat and the BRAND NEW Sally Hansen Matte top coat!!  I was so excited when I got the invitation to be apart of the #SallySquad and review this for you!

It is no secret that I love the Miracle Gel polishes, including the shiny top coat.  I have a few matte top coats that I like, but none that have become a staple in my collection because I don't like how the matte looks on my nails.  I feel like it's never matte enough....if that makes sense.

That all changes though with this Miracle Gel Matte Topper!

Let's take a look!!

Miracle Gel Shiny


Miracle Gel Matte


Look at the difference between the two!!!  Seriously, I haven't found a matte that is so visibly different from the shiny when photographing them.

Best part - I only needed one coat to get this matte look!  My other matte toppers have required at least two.  You know what else is great about this matte top coat - I didn't have to add a shiny top coat base down before adding the matte.  My OPI, China Glaze, and a cheap drug store one, all required me to put a shiny topper down first because if I just did the plain matte, the colors would drag and smear.  Not with the Miracle Gel matte!!!  Ahhhh love it!

If you want to get your hands on a bottle - click here and pre-order your own from Amazon!

Until next time, <3.

#SallySquad

The One With the Snowflakes and Candy Cane Nail Art

9:00:00 AM


Good morning polished world!!  How are you doing today?  It's Wednesday, middle of the week, so close but still so far from Christmas.  I just painted my next Christmas manicure and I'm not feeling it, but we will talk about it on that post.  I'm just annoyed by it so I had to mention it here!

Anyways, today's manicure I did like but it didn't photograph 100% how I wanted it to.  Mainly because the green was gorgeously dark that it photographed almost to be black.  It matched the candy cane dress I wore to a work Christmas event perfectly though, and the dress was a lighter green.  My camera just loves me so much sometimes.

Let's take a look!


Colors Used:
  • Sally Hansen - Jealous Boyfriend
  • Sally Hansen - Can't Beet Royalty
  • ORLY - White Tips
I cheated using an ORLY when reviewing Sally Hansen Miracle Gels, but I don't own a Miracle Gel in white!!  Does that even exist?  If it does, I need to get my hands on it!!!

Let's talk about Jealous Boyfriend by Sally Hansen.  GORGEOUS dark green polish which covered completely in two coats.  Absolutely am in love with this color and am kicking myself that it didn't photograph perfectly.  It's so brilliant and I am so happy to have this polish in my collection.

Can't Beet Royalty is a gorgeous red, and I don't say that much about red polish.  Only one coat over the tape to get the candy cane look.  As you can see, it didn't even bleed under the tape, which means it's amazingly perfect for nail art.

What do you think?  Like this look??

Wait until tomorrow when you see it with a matte top coat!!!  Yup, that's right, Sally Hansen has a Miracle Gel Matte!!!

Until next time, <3.


#SallySquad

The One with Sally Hansen Smartease and Metro Midnight

9:00:00 AM


Good morning polished world!  How are you all doing today?  I could have sworn that yesterday was Thursday, but of course, it wasn't.  It's weird, because everyone I talked to felt the same way.  Odd how that happened.  Alas, here we are and it's Thursday, not Friday.  Guess we should talk nails.

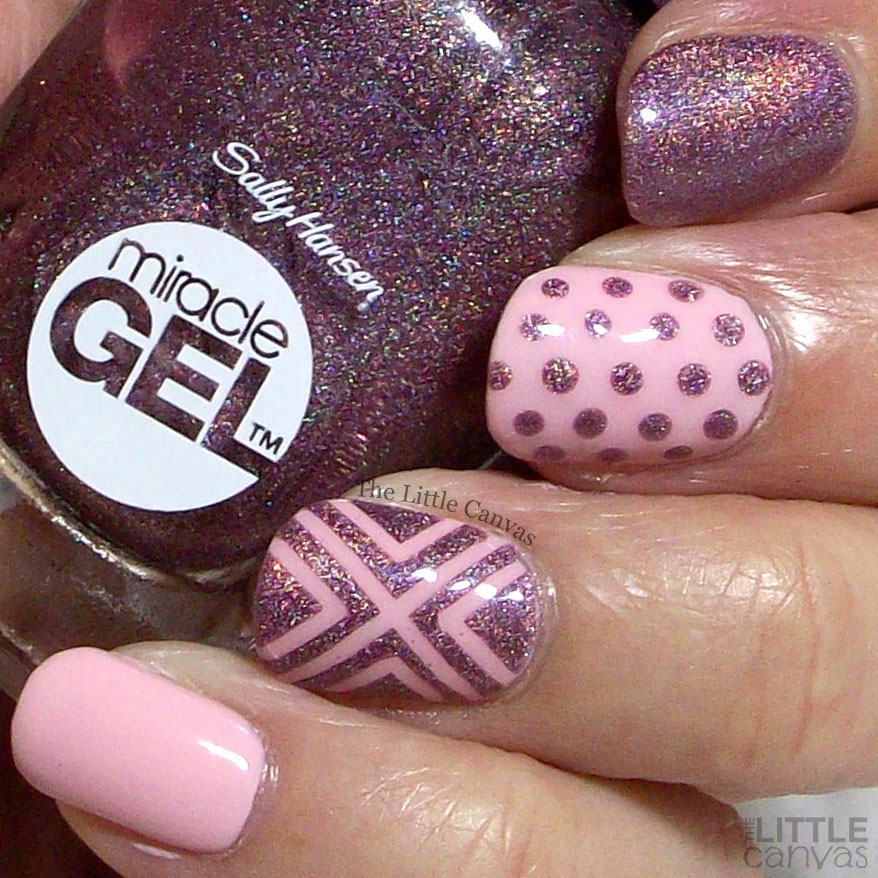
Today is my last post for the Sunset Splash collection from Sally Hansen!  I think I saved the best for last too.  Smartease and Metro Midnight are the pink and purple from the collection.  Although I kind of can see Metro Midnight being a dark pink/purple.  You can be the judge of that part, all I know is that it's a holographic polish.  Yes, that's right, a mainstream brand has released a holographic, and guess what, it's just as good as an indie!

Let's take a look!


Smartease is a pale pink polish which covered completely in two coats.  Normally I'm not a huge fan of pink nails, but this one I did like.  In my opinion, it's not that summery of a polish, I see it more being a Spring shade.  Paired with Metro Midnight though, it does get that summery vibe.


Metro Midnight......just......no words people....no words.  Look how amazingly gorgeous that is?!  Two coats on my index finger and used for the tape design.  The holo effect is so strong in this baby!  I really felt like I was using one of my ILNP or Serendipity Polish holographics.  Speaking of which, this is actually a recreation of a design I did using my Serendipity holographic polish last year!

What do you think?  Like this design?  Love the holo??

I had fun this round with the #SallySquad!  Can't wait to see what's next!!

Until next time, <3.

#SallySquad

The One With Sally Hansen Bourbon Belle, Sundown Socialite, and Sunflowers!

9:00:00 AM


Good morning polished world!  How are you all doing today?  It's Saturday, I'm kind of under the weather, so that means I'm going to rest up all weekend.  It really hasn't been my week.  On Wednesday I fell at work injuring my knee, so I've been living in a knee brace for the past two days.  My saving grace is that it's cooler out so I don't have to wear that thing in the brutal heat.  Finally Fall is here though.  It was such a wonderful Fall day yesterday, so I'm hoping I feel better today so I can enjoy it.

Today I have two more polishes to share with you from the Sally Hansen Sunset Splash collection from the Miracle Gel Line.  Have I mentioned how excited I am to be apart of the #SallySquad??  Bourbon Belle and Sundown Socialite are perfect summer to fall transition polishes.  As soon as I saw them, I knew what nail art I was going to do with them. 

But first, a swatch!


Above is two coats of Bourbon Belle.  A beautiful dusty peach polish.  Now I'm sure not everyone will call it dusty, but to me it's not as bright as a normal peach, therefore I think it's dusty.


I then grabbed the duochrome Sundown Socialite and dry brushed it over Bourbon Belle, and goodness was I in love.  Part of me wanted to swatch the whole thing over it, but after seeing the dry brush I was obsessed.  I need to use it though on it's own ASAP.

Nowwwww, for the nail art....SUNFLOWERS!


Every year I do a sunflower manicure.  Usually I do it over a royal blue polish, but these two polishes together were calling to me to use them for a base for some sunflowers.  At first, I wasn't too happy because the back orange petals seemed to disappear on the base, but once I added hte yellow petals, the details in the center, and added the top coat, I truly was in love.  To me, this is the perfect end of summer design.

What do you think?  Like this manicure?  Like the polishes?

Until next time, <3.

#SallySquad

The One With Sally Hansen La Vida Lilac and Floral Nail Art

9:00:00 AM


Good morning polished world!!  How are you all doing today?  It's in the 90s, and September, so do not get me started.  We all know how much I love Fall, so it's killing me that it's not here yet.  While I should be posting my palm tree manicure I did last week, that's going to hold off and probably end up being posted this winter when I'm missing Summer.  I'm really a contradictory person, aren't I?

Anyways, the reason I'm holding off on my post is because I'm super delayed in posting my #SallySquad manicures!  Yup, that's right, I'm now part of Sally Hansen's #SallySquad where I get access to the new lines of polishes to share with you all.  The first collection I received is the Miracle Gel Sunset Splash collection.  You all know how I rave about the Miracle Gel polishes in all my other posts, so you know I was excited to receive more.  Truly, these babies wear like iron on my nails and take forever to chip.  I always end up removing them before they're ready to come off.

 First polish I want to share with you is La Vida Lilac.  Let's take a look!


Just like all my other Miracle Gel polishes,  this covers completely in two coats.  Smooth application, perfect brush size.  And what a color.  Beautiful grey lilac polish which is such a versatile base for nail art.  Speaking of which, let's take a look at what I did.


I went back and forth debating on what I wanted to do on this base.  I've been wanting to do my annual sunflower manicure, but another polish in this collection I feel would be a better base for sunflowers.  Then I was going to do daisies, but I'm kind of all daisy-ed out - for now.  Then it hit me, a while back I did a yellow and black nail art design over a grey polish.  I thought those colors would be a good match over the top of it.


And as you can see, I was correct.  Really loved how this manicure turned out.  Added a top coat of the Miracle Gel topper, and I'll be sad in three days when I go to remove this manicure and there are no chips.  But alas, I need to move on to painting more designs!!!

What do you think?  Like this look?  Fan of the Miracle Gel polishes??

Until next time, <3.