Animal Mani

The One With Another Bunny Manicure

9:00:00 AM


Good morning polished world!  How are you all doing today?  My injury is healing up quite nicely.  It's weird painting only 9 nails.  I figured why paint my right thumb nail if it's going to be covered by bandages.  Still hurts, but again I'm very blessed that it wasn't worse than what it is.  And I'm able to still paint my fingernails for Easter!

Today's manicure is a re-creation of one I did years ago which was inspired by Pshiiiit polish.  At least, I think that's what her blog name is.  I think she kind of disappeared off the face of the earth, just as many other amazing bloggers.  It's weird to me to think that I'm still at this when so many moved on.  I love it and don't see myself moving on anytime soon.  I hate to think of this blog as being a thing of the past.

Anyways, this manicure is adorable and my photos do not do it justice.  I hate how my camera hates pastels.  Literally I have zero luck photographing them.  Maybe if I used a black background.  Now as I'm typing this I wish I photographed them using a black background and am debating on taking other photographs.  Eh, maybe next time.  I'm kind of lazy.

Let's take a look!


Colors Used:
  • Sally Hansen - Smartease
  • Sally Hansen - Sweet Tea
  • Sally Hansen - Pardon My Garden
  • Sally Hansen - Blacky-O

Now again I sit here wishing I re-took the photos but there is no guarantee that they would turn out well.  Then I would have to re-edit photos.  Ahhh why is it so much work?  I think I'm starting to see why the other bloggers gave it up.  Just kidding!  Okay, maybe not, this blog is a lot of work but for me it's worth it.  Such a huge stress reliever, you know, when I'm not stressing that my photos are horrible and I should retake them.


I love how the pastels all went together with the black.  I think that if these were white dots it would have totally disappeared.  I love pastels so much, I just never will understand why they hate me and don't like to photograph clear.

What do you think?  Fan of the manicure?  Any tips for photographing pastels?

Until next time, <3.

Animal Mani

Happy Easter!!!!

9:00:00 AM


Happy Easter Polished World!!!!!  What a glorious day, He is Risen!!!  How are you all doing on this wonderful Easter Sunday?  Despite being under the weather, I am wonderful.  Yeah, that's right, it's a holiday and I'm sick...shocker.  Hopefully I'm feeling better so I can return to work tomorrow.  I hate missing work due to sickness.

Easter kind of snuck up on me, so I wasn't able to do as many Easter designs as I wanted to.  Every year I usually do a design that represents the true meaning of the holiday, and of course I didn't this year.  I'm kind of kicking myself for that now.

Today's design is inspired by the lovely Sarah from 25 Sweet Peas.  She did a cute Easter bunny design which she snapped me and I think filmed a tutorial for that I just had to re-create.

Let's take a look!


Colors Used:
  • China Glaze - Lotus Begin
  • China Glaze - Highlight of My Summer
  • China Glaze - Pinking Out the Window
  • ORLY - White Tips
I am absolutely in love with this manicure.  Everyone really is loving the polka dot middle finger I did as an accent.  I'm not going to lie, I do love that one also.  It looks like a cute little Easter Egg.  Which honestly I wasn't going for that look.


I don't think I've used Highlight of My Summer yet.  Maybe for a gradient or something, but I cannot remember if I ever used it as a base color.  I am in LOVE with this bright mint polish.  It's a perfect neon pastel shade.  Covered completely in two coats.  A little streaky, so be patient with it.

What do you think?  Like this cute Easter bunny??

I hope everyone has a Happy and Blessed Easter!!!

Animal Mani

The One With the Owls and Jessica Cosmetics Snake Pit

9:00:00 AM


Good morning polished world!  How are you all doing on this fine Sunday?  It's the first Sunday of October!  That means I need to start decorating for Halloween, plan Halloween nail designs, and get prepped for Fall.  I've already purchased new boots and half a new wardrobe, so I'm all set on that front.

Today I'm sharing a manicure using Snake Pit by Jessica Cosmetics from the new Into the Wild Collection.  This polish is a gorgeous grey/brown color which I thought would be a perfect base for some owls!  I saw a similar owl design on Pinterest, so I attempted to re-create it.  I also attempted to create a tutorial, but I photographed it wrong, so it didn't turn out.  This manicure photos aren't that great either, but it's a cute design so I had to share.

Let's take a look!


Colors Used:
  • Jessica Cosmetics - Snake Pit
  • ILNP - Clockwork
  • Acrylics
I think Snake Pit is my favorite from the Into the Wild collection.  It's such a unique color to my collection, which if I saw in a store I probably would have passed up.  Now that I've tried it, I'm going to be on the lookout for more colors like this!  Two coats and full coverage.  You could get away with one coat on this beauty!


I love how Clockwork accents this manicure.  Such a gorgeous copper gold holographic polish by I Love Nail Polish.  Barbara creates some beauties, I really need to get some more!

What do you think?  Fan of this design?  Something you would try??  Would you be interested in having me create another tutorial??

I apologize for the colors being a little off.  My camera was not my friend the day I took these.  Sigh.  Always happens that way.  I'm trying a new photo set up so hopefully it won't happen anymore!!!

Until next time, <3.

Animal Mani

The One with the Adorable Panda Bear

9:00:00 AM


Hi everyone!  How are you all doing on this fine Thursday?  Almost the weekend!  Part of me wants the weekend to be rainy and gross so I can stay home and just sleep, but I highly doubt that will be the case.  It's also Mother's Day on Sunday....I probably should go and get my mom a gift.

Time for some cute nail art today!  I haven't done any animal manicures in a long time, so obviously it was time to change that.  I went with a panda design I saw on Instagram (cannot remember who the blogger was who originally did it and can't find the post).  I think that this is one of the CUTEST manicures I have ever done!

Let's take a look!


Colors Used:
  • Color Club - Blue-Ming
  • Orly - Liquid Vinyl
  • FingerPaints - Sterling Sculpture
I have wanted Blue-Ming by Color Club for years.  There were any times I picked the bottle up at the local beauty store, but then I ended up putting it back because I was always convinced that I had colors that looked just like it.  So when I bought a bunch of Color Club polishes from HBBeautyBar, I threw this one in the cart and finally made it my own!  I'm so happy that I did!  This bright mint polish is perfection.  Two coats, full, bright coverage.  While I have dozens of mint polishes, this one most certainly stands out.


Look how adorable that little panda bear is!  I think this is one of my all time favorite animal manicures.  He was super easy to create.  After my base coat was dried, I added the panda head with a white polish.  Then with acrylic paints, I drew on the little details.  He looks so cute on top of Blue-Ming!

What do you think?  Something you would try doing?  Do you love Blue-Ming?

Until next time, <3.


Animal Mani

The One With the Floppy Bunny Ears and Dots

9:00:00 AM


Good morning polished world!  How are you all doing today?  I'm doing quite well!  Easter is right around the corner so my nails are all painted and ready to go!  Sadly my last Easter design is not photographing well at all, so I'm probably just going to upload one photo on Sunday and call it a day.  I have the WORST trouble photographing pastels.  Ugh, I'm kind of sad that I can't show you guys four photos...but oh well!

Let's talk about my awesome manicure for today which did photograph!  Today's manicure is a semi re-creation of last year's Bestie Twin Nails with 25-SweetPeas.  I loved the floppy bunny ears so much that I knew at the beginning of this season I was going to try them again.

I received some of the new Sally Hansen Miracle Gels and two of them were standing out and I thought would be perfect for this design.  Let's take a look!


Colors Used:
  • Sally Hansen - Electric Pop
  • Sally Hansen - Digi-Teal
  • Acrylics
Let me first start out by telling you that this design did not chip for four days on my nails.  I honestly would have kept it on longer if it weren't for the blog and having to continue to paint.  The only thing that started to chip was the acrylic design, but the polish underneath was still intact.  Kind of amazing, these Miracle Gels really do work.


Electric Pop is a fun dark bubblegum pink polish which is perfect for Spring/Summer.  Two coats and I had full coverage.  Digi-Teal is more of a blue polish, not a teal one in my opinion.  Pretty, pretty color.  Two coats for this one as well!  Kind of stained my nails though which annoys me, but Since I paint my nails all the time it doesn't really bother me.  If you want to have naked nails in between manicures, then I would just be cautious with this one.

What do you think?  Fan of this manicure?  Do you like the Miracle Gels?

Until next time, <3.

Animal Mani

The One With the #ThemedThursdayJan Winter Wonderland Theme

9:00:00 AM


Good morning polished world!  How are you all doing on this fine Thursday?!  This week is going by super slow and I feel like today should be Friday.  Oh well, what can you do....at least it's one more day before Friday.

Today is the last #ThemedThursdayJan prompt!  I've been enjoying this challenge and I hope that the lovely ladies who created this will do a Themed Thursday February!  Today's theme is winter wonderland!  Back when I started my blog (a few more days until the 4 year anniversary!), I stumbled upon this winter berry manicure which was accented with a cute cardinal.  I clearly remember pinning it with the hopes that my skills would improve and I would be able to re-create it.   Each year since then, I have looked at it and never attempted it because I truly didn't believe I could manage the design. 

When I saw the prompt for today, the manicure immediately popped into my mind.  I think that it truly resembles a winter wonderland.  Nine times out of ten when it's snowing outside and those large fluffy snowflakes are falling from the sky, I always happen to see the red cardinals jumping around or sitting on the bird feeder.  For those little guys and me, it's a winter wonderland.

So I mustered up the courage and I attempted the manicure....and I am so HAPPY with how it turned out!  Let's take a look!!


Colors Used:
  • Orly - Boho Bonnet
  • INM - Northern Lights
  • Acrylics
Orly Boho Bonnet....oh how I love thee!  This was one of my first ever Orly polishes and I really hope that someday in the near future Orly re-releases the shade.  I was going to take a bottle shot with it, but I ended up dropping a brand new bottle of hunter green polish and it shattered and made such a mess on the carpet.  So I spent most of my night scrubbing the carpet and ran out of time to take a decent bottle shot.

But anyways, Orly Boho Bonnet is a gorgeous dusty grey blue shade.  You can get it to apply evenly in two coats, but I tend to use three.  I ended up having a few bald spots on some nails because I was lightly applying the base.   This time around I added a top coat of INM Northern Lights and holy gorgeous.  It made the gorgeous shade pop.


When my base was dried, I went through with acrylics and created the designs.  The branches, berries, and snow were easy.  The thing I was most scared to do was that cardinal.  I think that I did a pretty dang good job!  He looks stinkin' cute!  I started by making his body then added his little head.  After he was dried, I went through with the black acrylic and started outlining different areas.  Ahh, I just think he's so cute!

What do you think?  Is this something you would try?  Does it remind you of a winter wonderland?

I'm going to go stare at my nails for a little longer!  Until next time, <3.

Animal Mani

#ThemedThursdayJan - Penguins

9:00:00 AM


Hey all!  How are you all doing on this fine Thursday!   As I mentioned last week, I have decided to take part in Themed Thursday January on Instagram.  You can see all the posts by looking p the hashtag #ThemedThursdayJan.  This prompt was created by @kellimarissa and @wondrouslypolished.

This week the theme is penguins!  I love penguin nail art.  I have yet to see a penguin manicure which I do not think is cute.  I did a penguin design in December for Christmas and really wasn't planning on doing another.  I'm happy I decided to take part in this little challenge because I was able to create another create little design on my nails.

It originally was going to be a re-creation of my design a few years ago, then I saw this one by @judyrox on Instagram and decided to make my penguins look more like hers.

Let's take a look!


Colors Used:
  • Color Club - Crystal Baller
  • FingerPaints - Sparkle With Me
  • Orly - White Tips
  • Acrylics
Isn't Color Club Crystal Baller gorgeous?!  Amanda from Fashion Footing got me this polish for Christmas and I am so beyond thrilled that she did.  It's such a gorgeous blue holo polish which was most certainly lacking from my collection.  Kind of hate the name though.  I like the other names of my halo hues like Over the Moon.  Honestly that polish name describes a holo more than this but that's my personal opinion.  Two coats and it was pure holo perfection.


I added a top coat of FingerPaints Sparkle With Me for the snow.  This polish has holo glitter flecks in it which made the Color Club even more awesome.  It really added a fun dimension to this polish.  I then went through with Orly White tips and added the snow drifts.  When those were dry, I added the happy little penguins with my acrylics and this time I used a nail art brush.  I figured I should start shying away from the toothpicks and practice my brush skills.  I think I did pretty well.

What do you think?  Fan of this look?  Something you try?  Own any of the gorgeous Halo Hues?


Have a Happy Thursday everyone!  Until next time, <3.

Animal Mani

Penguin Nail Art!

9:00:00 AM


Good morning polished world!  How are you all doing today?  It's Tuesday, but no Twinsie Tuesday today.  I believe last week I posted that this month we will be taking a little break from our regularly scheduled posting.  I think we have one coming up though the week of Christmas....I should double check that.

I'm starting to get in the holiday spirit!  Are you?  It is taking me a little longer this year because our weather is unseasonably warm.  I really am hoping for a white Christmas.  I'll cross my fingers and say a prayer!

Today my manicure is a re-creation of this adorable penguin manicure by @kt_tk1 on Instagram.  After stumbling upon it on Instagram, it went immediately into my must re-create file.  It's honestly one of the cutest things I've ever seen!

Let's take a look!


Colors Used:
  • FingerPaints - Patent Black
  • FingerPaints - Paper Mache
  • FingerPaints - Sparkle With Me
  • Salon Perfect - He's With Me
  • Salon Perfect - Glam Glitter
  • Acrylic Paint
Aren't these the most adorable things you've ever seen!?  I love the little guys!!!  I didn't think that they would be so easy to re-create either.  For my middle finger, I started out with a base coat.  Using acrylic paint, I drew the heart shape face on my nail.  While that was drying, I painted on the scarf.  I then went back through and added the rest of the facial details.

My ring finger took a little more work.  I started off with a base coat of white polish.  Once that was dry, I put nail art tape across my nail and painted on a coat of Salon Perfect He's With Me.  This polish is a dupe of China Glaze's Red Ruby Pumps.  Love having it as part of my collection, but I'll talk about that in my next post.  Once dried, I took black acrylic paint and outlined my nail and painted on the little fins...or flippers?  What do you call them on a penguin??  Then I added the scarf and the feet, covered off with a top coat, and called it a night!


Since I really, really, really want snow, I added a top coat of Sparkle With Me by FingerPaints.  This polish is so so pretty.  It contains multi-hexed white glitters with holo silver flecks throughout.  It really reminds me of fresh snow.  Over the black it's like snowfall at night.

On my thumb I decided to do a coat of Paper Mache with a top coat of Glam Glitter.  This is a red, green, and gold top coat.  It is a dupe of a China Glaze which came out years ago before I got into polish.  I'm so happy it's part of my collection!  I think it really tied the manicure together!

What do you think? Fan of this adorable manicure?  Something you would try??

Until next time <3,

Animal Mani

Fox Nail Art Inspired by 25 SweetPeas!

9:00:00 AM


Good morning polished world!  How are you all doing today?  I can't believe that it's already November 8th.  I swear, the months are just flying by.  I did email a Nail Artist of the Month and I'm waiting for her to respond, so I'm hoping to have one up by the end of the month!  I really hate that I slacked on that this month.

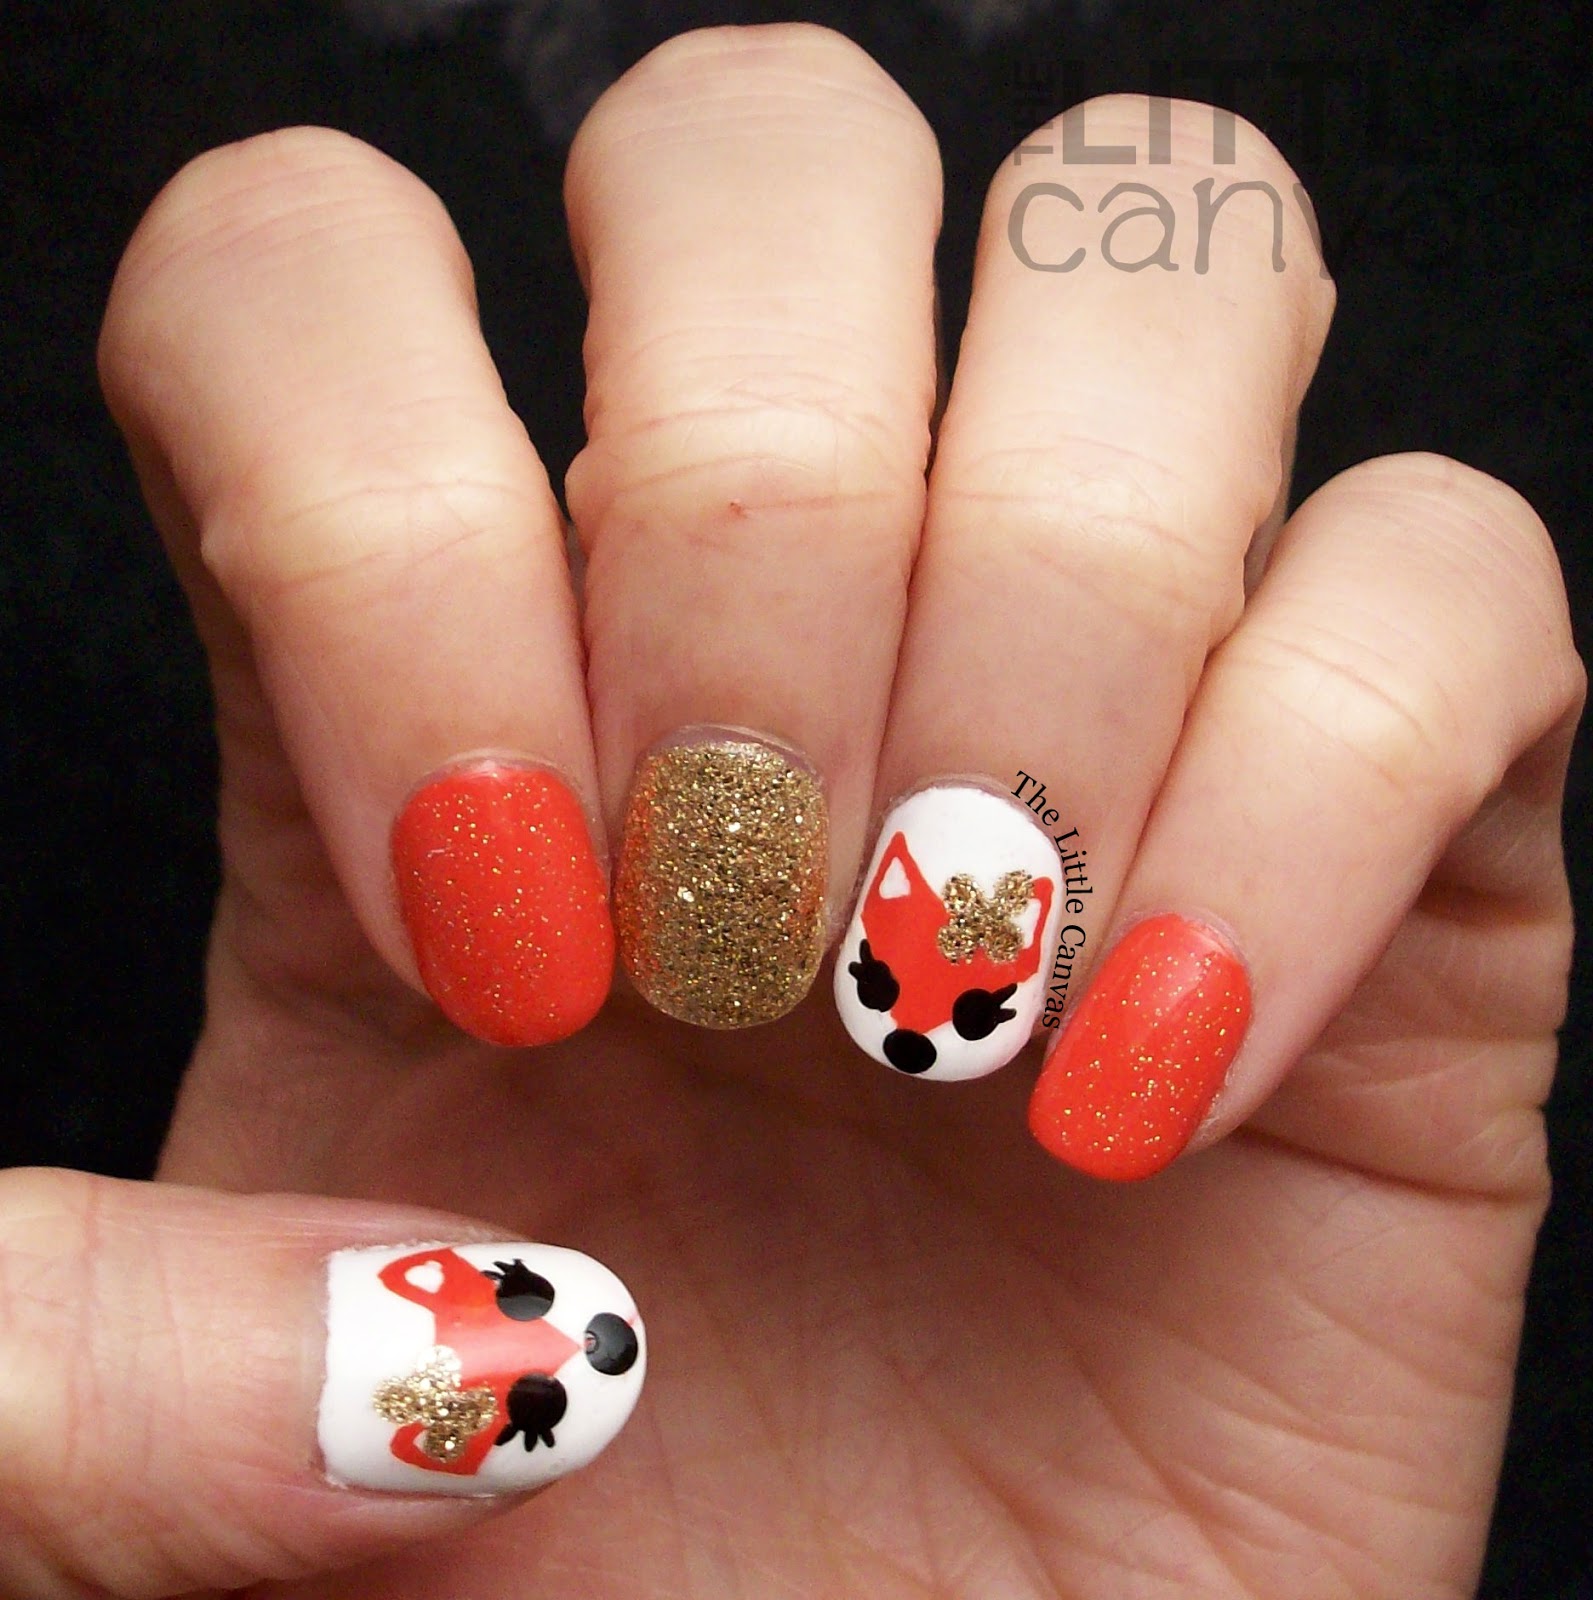
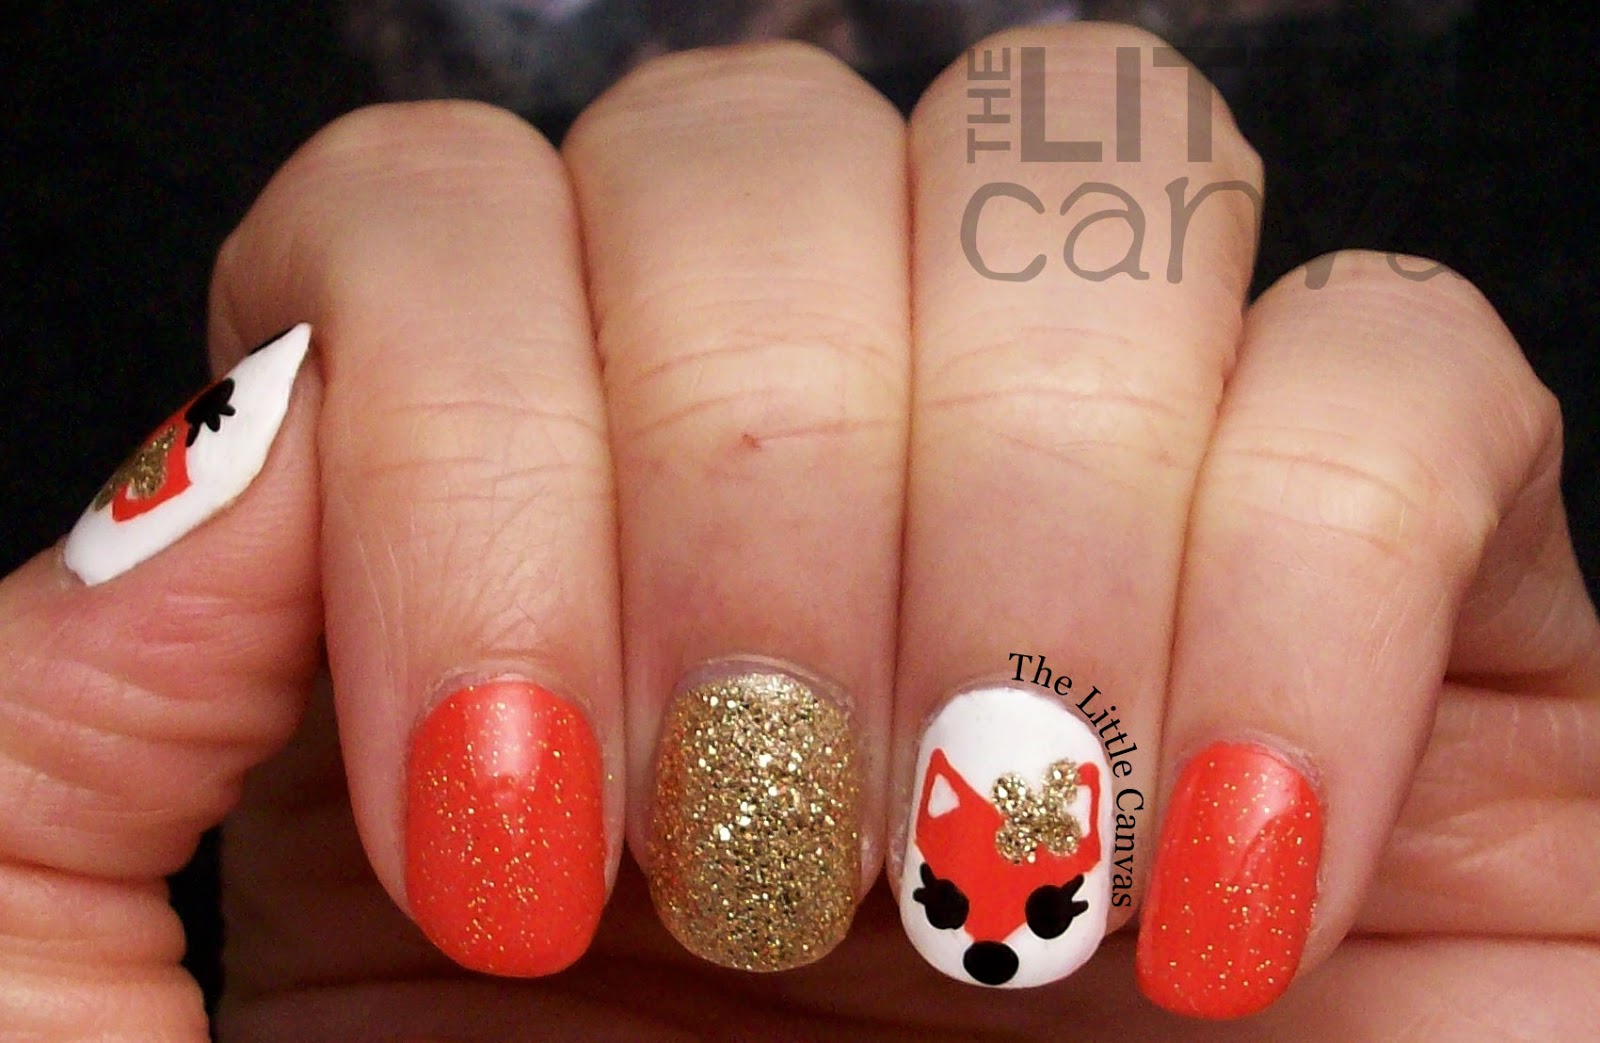
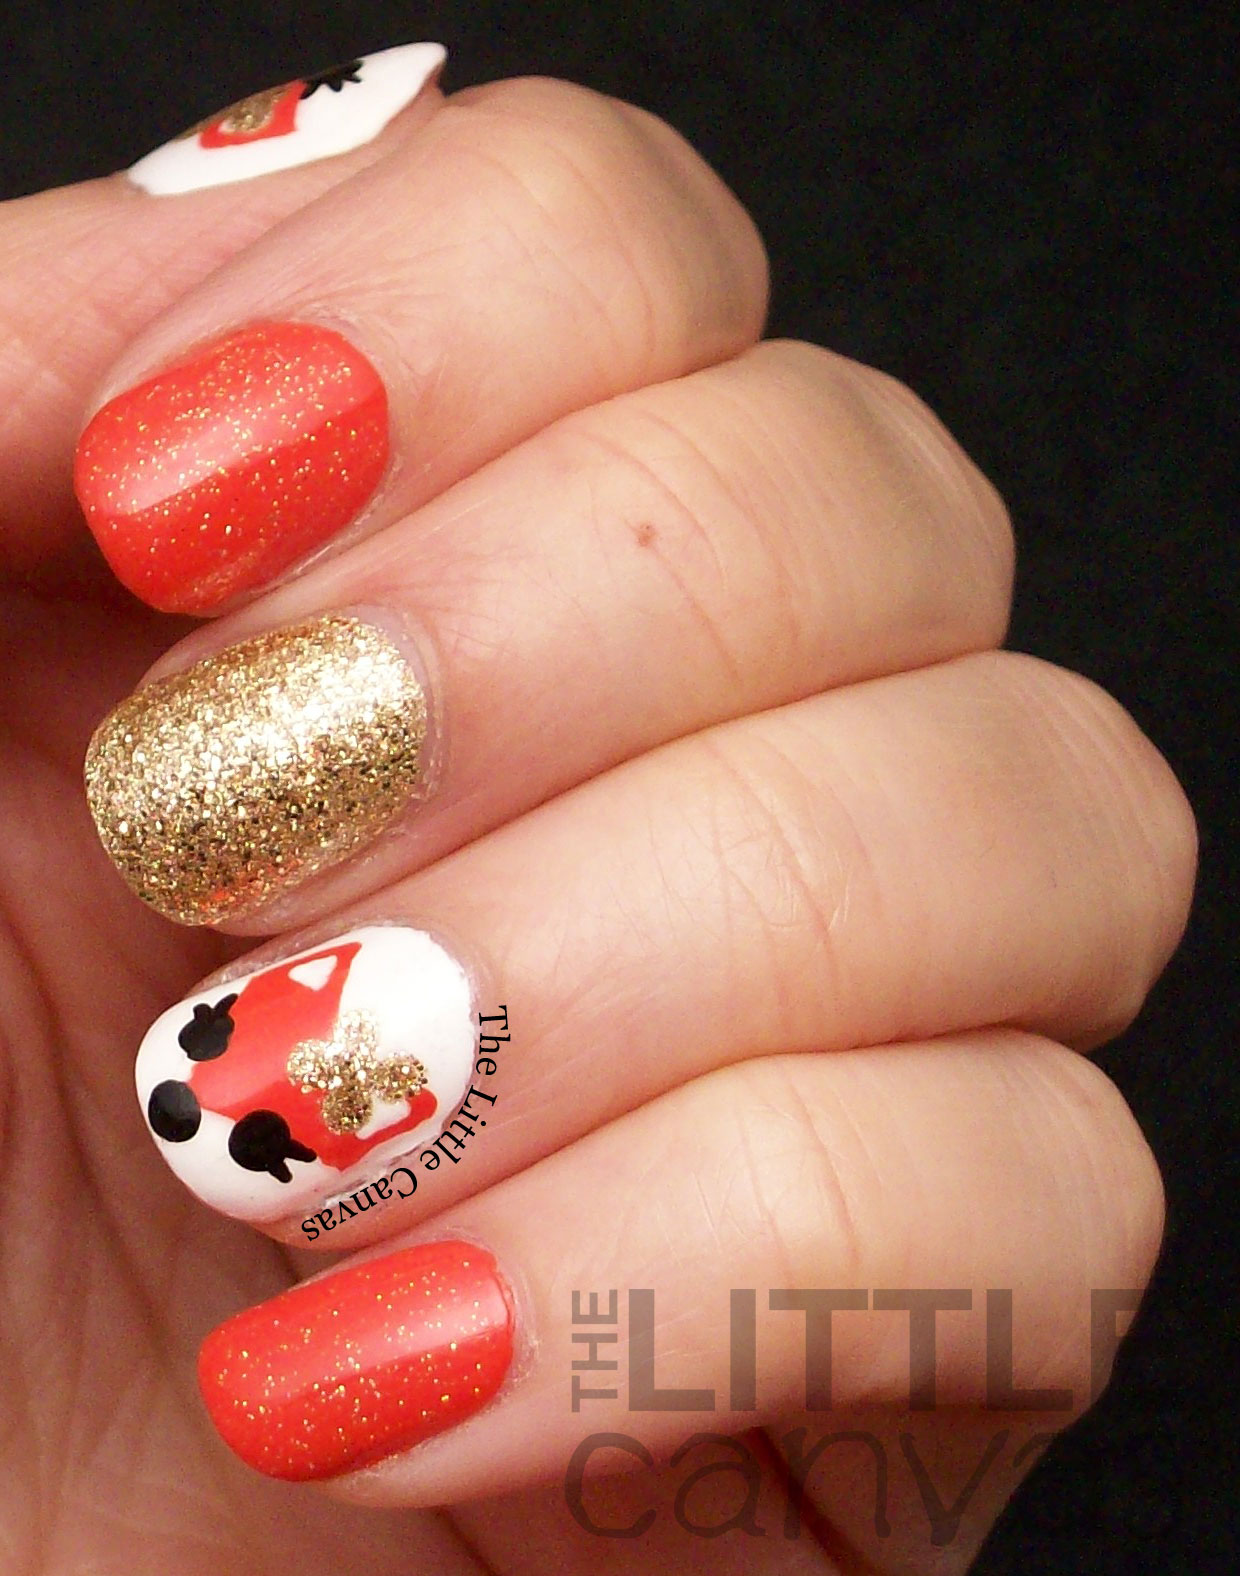
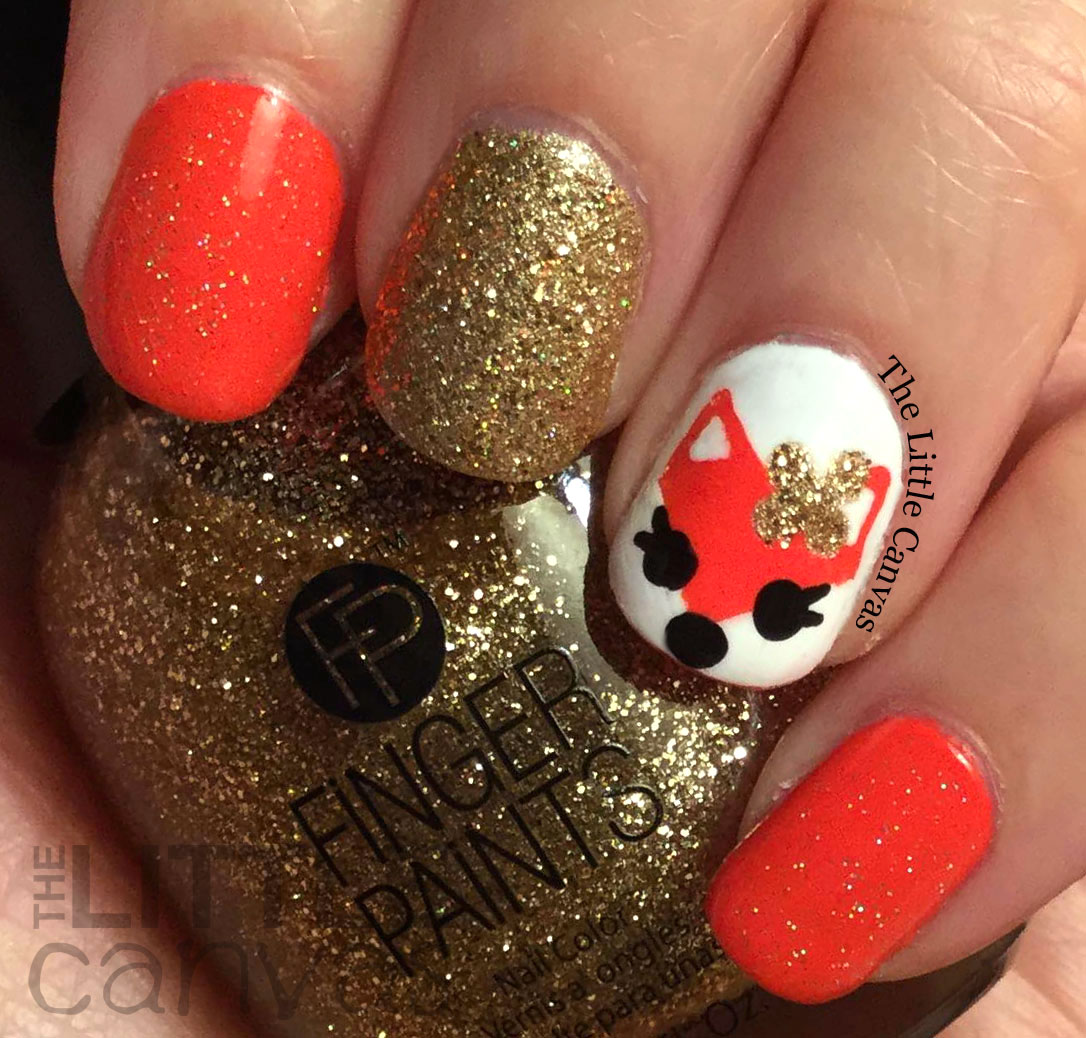
Today I am sharing with you a fox manicure that might be perfect for Fall.  Maybe it isn't, but in my mind the colors are Fall-like so it works!  This cute little fox design is inspired by 25 Sweetpeas!  I saw her manicure a few weeks ago and fell in love with the cute little fox with a bow on her ear, so I put it on the to-do list of manicures!

Let's take a look!


Colors Used:
  • Zoya - Rocha
  • Orly - French White
  • Orly - Instant Artist White
  • FingerPaints - Wrapped in Ribbon
  • Salon Perfect - Champagne Toast
Isn't the little fox adorable?!  I followed Sarah's tutorial on her Instagram to re-create the fox.  I started off with a base coat of white polish.  When that was dried, I used Zoya Rocha and painted a the head of the fox onto my nail.  I then used a toothpick and added the ears.  I used my Orly Instant Artist to add the white cheeks of the fox and the triangles in the ears.  I then added the little details using my dotting tools.


Wrapped in Ribbon was a polish that was released last year as part of the FingerPaints holiday collection.  I really hope they re-release this polish because t is the perfect gold microglitter!  Two coats and you get full glittery coverage!

Since my middle nail was so glittery, I decided to add a top coat of Champagne Toast by Salon Perfect on my other nails.  This polish is the gold version of China Glaze's Fairy Dust and also closely resembles INM Northern Lights in Gold.  I think I wrote about my love for this polish in another post, but I called it Champagne Kiss by accident.  That's what happens when you have over 500 names of polishes in your head and you don't write down what you use when you actually use it.

What do you think?  Fan of this gold, glittery, fox manicure?  Is this something you would try?  Should I do more animal manicures??

Until next time, <3.

Animal Mani

Panda Nail Art

9:00:00 AM


Good morning polished world and happy Sunday!  I can't believe it is already Sunday.  Time is speeding up it seems.  At least it has been gorgeous outside!  The daffodils are blooming, the birds are chirping.  I honestly have nothing to complain about.  Even if it is going to rain today, it's not snow.  So I can be a happy happy girl.

Today I am sharing a manicure with you that I did a few weeks ago.  It is inspired by this adorable panda manicure by Did My Nails.  I have seen plenty of panda manicures over the years, but none as cute as this one.  Dots, little pandas holding hearts, and blue....seriously, it's the perfect combination.

Let's take a look!


Colors Used:
  • China Glaze - Capacity to See Beyond
  • OPI - My Boyfriend Scales Walls
  • Black Acrylic
Aren't the little pandas adorable?  If I had to change anything about this manicure, it would have been to be a little neater around the eyes.  I think my little guy looked a little drunk or sad.  Regardless he was cute.

To get the look, I started off with a base coat of My Boyfriend Scales Walls.  Dear OPI, please bring this polish back ASAP.  I only have two back ups left.  Once my base was dry, I used my dotting tool to add all the little black details with the acrylic paint.  I feel like I have more control using my smallest dotting tool versus using my paint brush when it comes to adding details like this.  I had more control over the size of the circles and the shapes of the arm.


Capacity to See Beyond is a gorgeous blue and perfect for this manicure.  I'm so happy I purchased a back up of this polish when it was out.  Sure, I went to about 3 different Sally Beauty stores to find it, but I now have it and that is all that matters!

What do you think?  Like the little panda?  Don't you think the little heart is adorable?

Until next time, <3.

Animal Mani

Easter Bunny Nail Art!

9:00:00 AM


Good morning polished world!  How are you all doing today?  I'm doing fabulously since it is supposed to be 60 degrees today!  Spring is here, for at least a day!  This weekend there is a possibility for snow in the forecast.  I need Spring, neeeeeed it!

Today I am sharing another Easter manicure with you all!  Today's design is a cute Easter bunny design inspired by this cute manicure by Just1Nail on Instagram.  Purple + polka dots + animals = the cutest most Alaina manicure in the whole wide world.

Let's take a look!


Colors Used:
  • Zoya - Hudson
  • Zoya - Kitridge
  • Black and white acrylic
Hudson is one of the prettiest polishes I own!  It's one of my favorite purples which I forgot I owned until a few weeks ago.  I also forgot I owned Dillon as well and I really need to get around to using Hudson's beautiful mint sister.  I was almost going to use that for this manicure, but the purple seemed more Easter to me!


I'm really loving how this manicure turned out.  I'm a huge fan of doing a polka dot base and then putting a design over it.  I've done this before with roses and absolutely loved it....now with the little bunnies over polka dots it's amazing.

What do you think?  Fan of this look?  Liking the little bunnies?

Until next time, <3.

Animal Mani

Twinsie Tuesday: Inspired by Pinterest

9:00:00 AM


Good morning polished world!  How are you all today?  Seems like we are in a bit of a cold spurt again.  I just wish the weather would level out and it would stay warm for at least two weeks.  I feel like I should be doing snowflake manicures instead of all these spring floral ones!

Today is Tuesday, so that means it is time again for another Twinsie Tuesday!  This week we are sharing manicures that were inspired by Pinterest!  If you follow me on Pinterst, then you already know I have a "Nail Ideas" board that is filled with dozens upon dozens of ideas.  Many I have tried and succeeded, and others that I look at and one day will have the guts to try.

For today's post, I sat for awhile looking through the board, but nothing was really calling my name.  I decided to do a Pinterest Search for "spring nail art" and I stumbled across this adorable fox manicure by One Nail to Rule Them All.  All of Alice's manicures are stunning and flawless, so I was a little worried re-creating one of her designs, but I went for it anyway because it was so dang cute!

Let's take a look!


Colors Used:
  • OPI - My Vampire is Buff
  • Zoya - Rocha
  • OPI - You're Such a Budapest
  • FingerPaints - Grassy Knoll
  • FingerPaints - Paper Mache
  • OPI - Love Angel Music Baby
I think this is the cutest manicure I have ever done!!!  The floral and the little fox, just so adorable!  My old job had a little wooded area, so we had foxes that would come and scavenge for food around the dumpsters.  I looked forward to when the little cubs would be following the mom fox because they honestly were the cutest things you ever saw.

Rocha is a great color for the little fox.  It's such a unique red color and I'm surprised I never used it before, especially for flowers.  Unless I used it when I did my poppies last year.  Hmmm,


I absolutely love the floral tips.  I think I'm going to do my whole nail with dot flowers and fill in the blank spaces with the leaves like I did here.  I think it would have made this manicure too busy though, especially with the little fox there.  This made it look like the fox was peeking over some flowers in a field.

What do you think?  Fan of this design??

I can't wait to see the other Twinsie's Pinterest inspired manicures!!


Tiffany at Polished To Precision
Savannah at Addicted to Polish
Róisín at Cuti-CLUE-les
Marisa at Polish Obsession
​Lisa at The Polish Playground
Lakeisha at Refined and Polished
Kristine at Pink and Polished Nails
Jessica at Blue Velvet Lacquer
ChiChi at I'm Just Me...ChiChi
Chelsea at Nailed Blog
Bridget at A Painted Nail
Amber at Nails Like Lace
Amanda at Fashion Footing
Amanda at Amandalandish

Until next time, <3.

Animal Mani

Polar Bear Nail Art

9:00:00 AM


Happy Saturday and Happy New Year!  I'm kind of  happy all the holidays are over for the next few months.  This whole having a Thursday off and then going back to work for one day really messes up my schedule.  Today feels like a Tuesday.  At least I got to sleep in and don't have to go to work, especially because I think the weather today is going to be freezing!

Since the weather has gotten so bitterly cold, it's the perfect time to post my polar bear manicure!  These nails were inspired by Adventures in Acetone!  Amanda from Fashion Footing sent me the design ages ago and I put it on the top of my to-do list.

I wasn't a fan of them when I first re-created the design, but after a day I fell in love.  Let's take a look!


Colors Used:
  • FingerPaints - Ho Ho Happy Holidays
  • China Glaze - Capacity to See Beyond
  • OPI - My Boyfriend Scales Walls
  • Sinful Colors - Cool Grey
  • Orly - Liquid Vinyl
It's been forever since I did a cute animal manicure!  Kind of missed having little critters on my nails!  I followed Adventures in Acetone's tutorial and started off with a base coat of a blue polish.  I used Capacity to See Beyond because it matched very well with the FingerPaints glitter.  When that was dry, I used the brush of My Boyfriend Scales Walls and created the little head.  With my dotting tool, I added the ears.  I then went through with my nail art brush and added the grey details, followed by the black ones.


The glitter polish is FingerPaints Ho Ho Happy Holidays from the Winter Wishes collection.  Now, if you know me, you know I hate removing glitter, so I rarely use it.  I used so much glitter in this manicure because I have a new gel glitter remover which I will be reviewing in the next few days on the blog, so stick around for that!

Anywho, this glitter polish is a silver and blue microglitter in a clear base.  In two coats you have full coverage, but I used three for extra sparkle and bling.  If you're going to use glitter, go big or go home.  Plus, it was really worth it in the end.  Look how sparkly!  And see how the blue flecks match Capacity to See Beyond!?

What do you think of the manicure?  Loving the look?

You still can pick up bottles of the Winter Wishes collection by FingerPaints at Sally Beauty Supply Stores.  I saw full displays of them at two different locations where I live!

Until next time, <3.

Animal Mani

The First Snowy Manicure of the Season - Penguin Nails!

9:00:00 AM


 Good morning!  How are you all doing today?  I hope that everyone who is being hit by Snowvember in Western New York are all safe and sound!  So crazy everything that is happening in New York right now!  Could you imagine getting 70+ inches of snow in 24 hours?  And then on top of it, the town 10 minutes down the road from you only has about 1 foot?!  Just so crazy how lake effect snow works!

Well this whole weather event is making our weather quite chilly, cold, and a little bit snowy.  I figured it would be appropriate to do a cute winter themed manicure to match the weather!  What better than a penguin manicure?!

Let's take a look!


Colors Used:
  • Sinful Colors - Bright Lucite
  • Zoya - Ling
  • INM - Northern Lights
  • Finger Paints - Sparkle With Me
  • Black and White Acrylics
I love this manicure so much!  To get the look, I started off with a base coat of a light blue polish.  When that was dry, I sponged Zoya Ling around the cuticle to make it look like a wintery snowy sky.  I added a quick coat of INM Northern Lights to even out the gradient and make the nails really sparkle.

On my snowy nails, I added a coat of FingerPaints Sparkle With Me.  This polish is a part of the FingerPaints Holiday Glitz Kit.  This kit contains this glitter, along with a multicolor glitter, and a silver foil polish.  Sparkle With Me is just a gorgeous matte white glitter polish which has holo flecks throughout.  It reminds me of that fresh sparkly snow you wake up to on a freezing morning.  The polish has a perfect base to glitter ratio, which means I didn't have to place any of the glitters!  They all fell into place perfectly!


For my penguins, I used my nail art brush and acrylic paints.  I may have to make a tutorial for them because they're so dang cute.  I'm going to do them again when Christmas is closer and maybe add a Santa hat on them.

What do you think?  Liking the snowy manicure?  Think it's too soon?

The Holiday Glitz Manicure Kit is available now at Sally Beauty!  Rumor has it that they are on sale, so I highly suggest running out and grabbing them while you can!

Until next time, <3.