Tape Mani

Holo Tape Manicure

9:00:00 AM

I'm kind of becoming tape obsessed.  It's such a simple way to get a really neat looking manicure.  I know that in past posts I have complained about how much I hate tape manicures, but that was scotch tape manicures.  Oh the difference it makes when you have the proper tools!

Before Valentines Day, I shared with you a swatch of Color Club Cloud 9.  I only wore that polish plain for a day before I realized I had to do something with it.  That something was to add some tape and the gorgeous Zoya Storm.  All together, it was a trippy holo masterpiece.  Sadly, the pictures did not give it justice, but, it still looks cool.

Let's take a look!


Colors Used:
  • Color Club - Cloud 9
  • Zoya - Storm
To get the look, I applied three coats of Cloud 9.  Once it was completely dried (For me it was a day), I put on three pieces of tape in different directions one nail at a time.  I painted on a thin coat of Storm and let it dry completely.  I then painted another thin coat of storm, and quickly removed the tape.  Added some topcoat and bam, done.

Sadly, the Zoya shrunk a bit thnks to my Out the Door.  I have heard people having the same problems with Zoyas when they use Seche Vite, so I'm assuming it's an issue with quick dry formulas.  I know when I used to use Sally Hansen Double Duty Base and Top Coat I never had the issue.  Despite the shrinking, Storm is a gorgeous polish.  The black with the holo glitter flecks...absolutely love.  It applied like a dream as well and dried rather fast.  So happy I decided to purchase it during the Zoya promo earlier this year.

After I taped up Color Club Cloud 9, my family and I went to the butterfly garden which I fell in love with.  The worker helped put butterflies on our hands, which my nephew hated, but I thought was so cool.  All their wings were so gorgeous, and I got so many different nail ideas while in there.  Not only were there about 800 butterflies flying around (some may call this a nightmare but omg it was gorgeous), there were so many beautiful flowers, little ponds with koi and turtles, and the cutest little quails walking around.  There was even a tucan!!! 


This was the first little guy that the worker put on my hand.  Look at the gorgeous blue coloring in the wings!!!  He was a tired butterfly as he literally just sat on my hand not moving.  The others before kept flying away as soon as they touched my hand.  I thought it was because I wasn't sweet enough. 


This guy also had the most gorgeous blue wings as well.  My sister and I disappeared into the corner of the garden and picked him up ourselves.  Not sure if we were supposed to, but the butterfly was rather happy.  Look at the details on the back of his wings....just gorgeous.  It really is amazing to look at it now and see all the different detail on such a small creature.  You can also see the amazing holo goodness on my nails, I think the butterfly liked them...what do you think?


If you want to re-create this manicure, and need some nail art tape, head on over to the Born Pretty Store and purchase yourself some!  If you use the code AMBK31 and you will receive 10% off your order!!!

What do you think of the nails?? Love, hate?  Think the butterflies are awesome?

Until next time <3
Flowers

Red Roses Nail Art Tutorial

9:00:00 AM

An old post I forgot to actually post!  I can't believe I did this!  This would have been perfect to put up around Valentines Day, but alas, I forgot.  So we go!

________________________________________

Well Hello there!  How are you all?  Today, I bring you a new tutorial!  Since a lot of my nails are inspired by tutorials, I thought I would post a tutorial to inspire some of my followers!

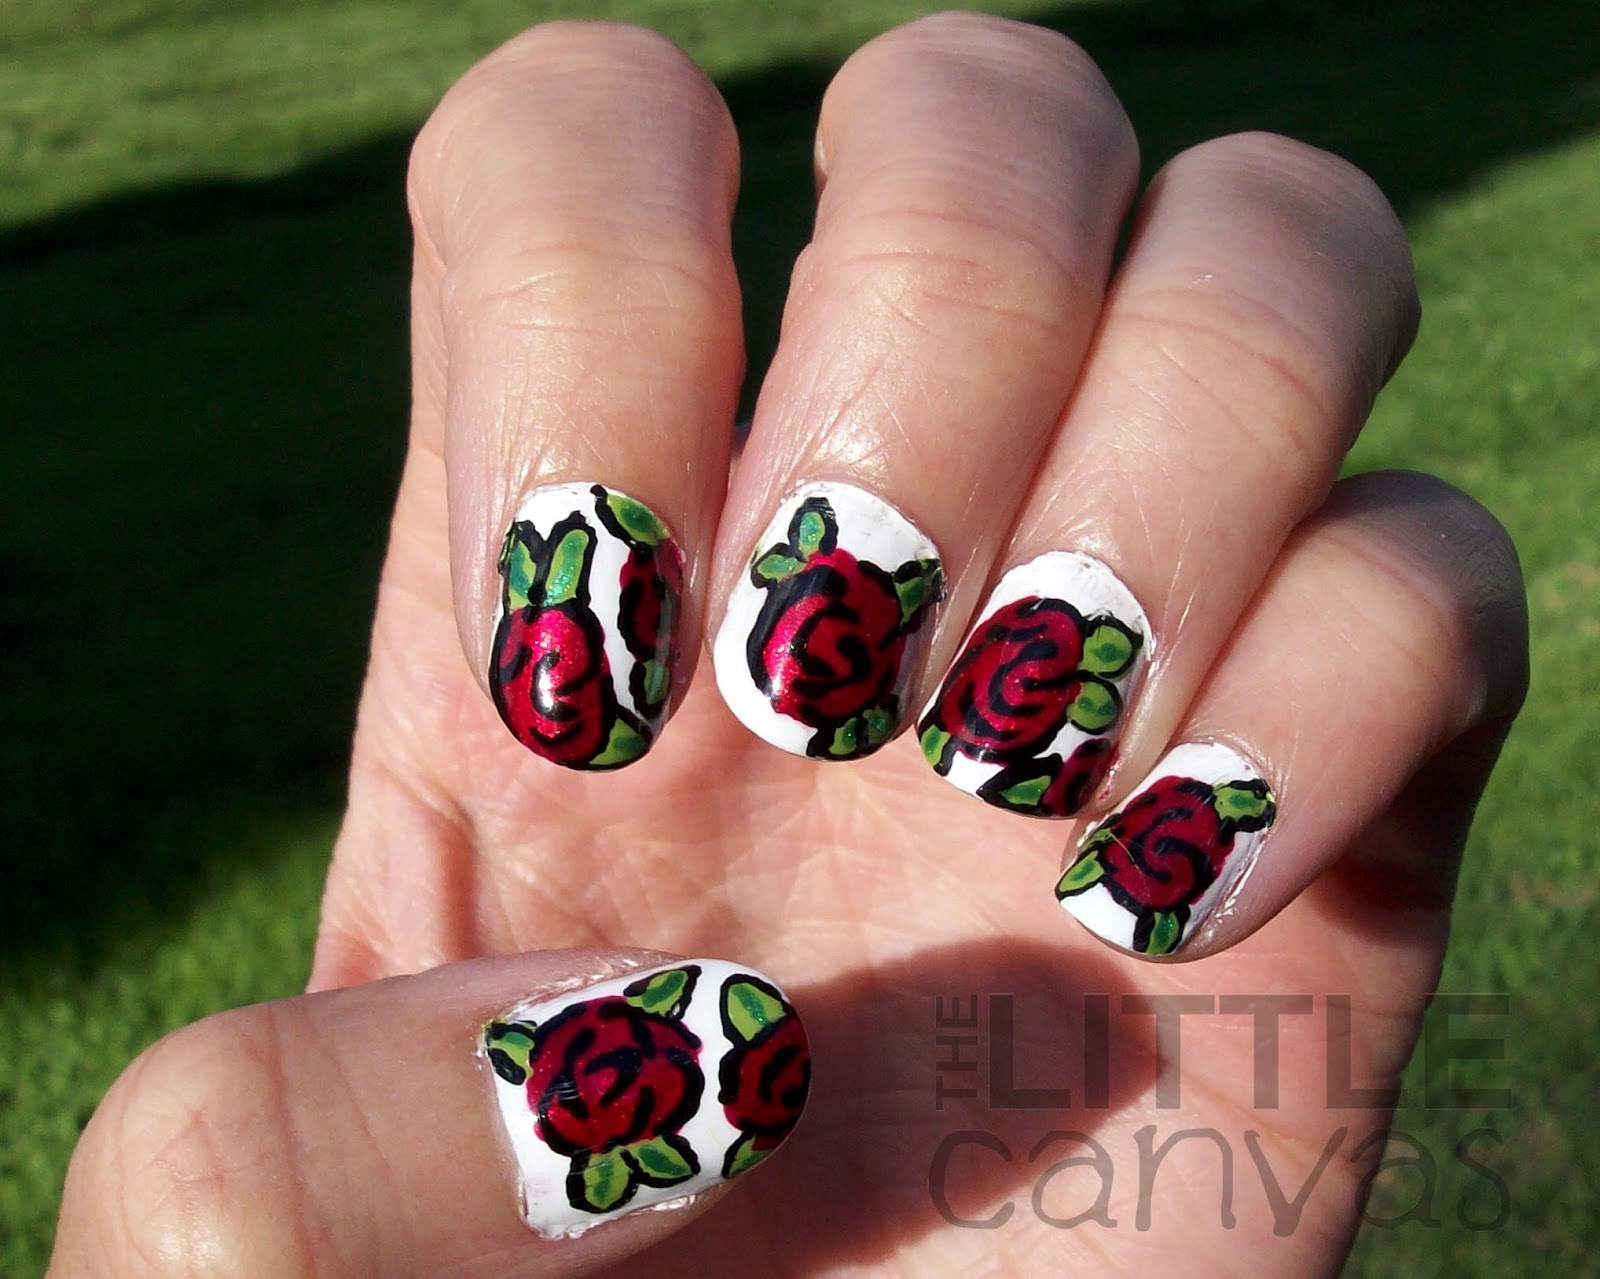
Ever since I posted my red rose nail art for Day 1 of the 31 Inspired Days of Nail Art Challenge, I have received numerous tweets regarding the manicure.  I decided after seeing so many "I could never do that" and "How was that possible?" I would create a little tutorial for you so you could try to copy it if you wanted!  It really isn't that hard as it seems!  It's a five step manicure!  Granted the steps may take a bit of patience, but trust me, it isn't that bad!!!

When I first saw this manicure, it was on Pinterest.  The original image was never watermarked, and when I clicked the pin it lead to the main page of F Yeah Nail Art Tumblr.  I searched for "red roses" and "roses" in hopes to find the original post, but I had no luck.  I did the manicure as I thought the original person may have done it. 

Without further a-do, here we go.

This is the manicure I posted for Day 1 - Red Nails.  It is a pretty red rose on top of a plain white nail.


To get the look, follow these five steps :)


  1. Paint your nail a base coat of your favorite white polish.  For this manicure, I used Sinful Colors Snow Me White.
  2. With a dotting tool, a large, not perfect red circle onto the nail.  Roses are not perfectly circular, so it is important to try to make the edges uneven.  I used Sinful Colors Sugar, Sugar.  I preferred using a shimmer polish over a flat creme, as I believed it really made the roses pop off of the white base.
  3. With a tooth pick or a small paint brush, use a green flat polish to paint on the leaves around the rose in the blank white area.  I used Revlon Sassy.
  4. With a toothpick or a small paint brush, add a darker green line down the middle of the flower to add dimension   I used Sinful Colors HD Nails, which is a dark green shimmer.
  5. With a dotting tool or tooth pick, outline the leaves.  Outline the rose as well with a black polish making sure to leave some open spaces around the rose.  In the center, add random circular lines to make it look like petals.  These, just like the main rose, do not have to be perfect since roses are not perfect.  I used Sinful Colors Black on Black and a tooth pick.  If you were to use a dotting tool, I suggest using a very small one.
Don't forget to apply a top coat at the VERY end!  I find if you add top coats in between nail art manicures, it never dries right.  It is important to make sure the black polish is almost completely dry before adding the top coat or you will smear the black paint on the rose/leaves/background.

You don't have to do this on every nail, trust me it would look gorgeous just on an accent nail!

Now that you see how I have done this, would you attempt the manicure?  If you do, you all better show me!!!  If this tutorial isn't clear enough, or it seems that I have missed a step, please please please let me know!  I created this at 12:30am so it may not be 100% perfect.

If there have been any other designs which you would like to see a tutorial for, please, let me know! 

<3

Valentine's Day

Happy Valentines Day!!!!

9:00:00 AM

Happy Valentines Day!!! Also known as the day I hate!  I'm such a grinch, but I truly see Valentines Day only as a Hallmark holiday.  Aren't we supposed to show our love for our loved ones everyday and not just focus on it for one day?  Eh, whatever.  I had so many Valentines Day nail art ideas, but after doing two of them, I got kind of tired of them.  Actually, this nail art was done a few days ago and today I have no hearts or pink on my nails.  I'm kind of happy with this.

When I had my nails painted white with the gorgeous Sally Hansen Moonstone, I was going to draw a bunch of red and pink hearts all over them.  After doing a few hearts, I didn't like how it turned out.  The idea in my mind was great, but on the nails, not so much.  After that one disasticure, I took to my pinterest ideas board. I came across this cutepolish video that I pinned AGES ago.  Probably around the time I started this blog.  I always liked how it looked, so I thought I should try it.  

Le sigh, on my one year anniversary I couldn't even come up with an original post, oh well.  Actually,  I was going to attempt to re-do my first ever nail art which was a doily heart design, but when I was attempting it, I just wasn't happy.  So I gave up and vowed to not do any more Valentines Day manicures until next year.

Let's take a look at my copy-cat of cutepolish's design!


Colors Used:
  • Ulta - Snow White
  • Sally Hansen - Red Carpet
  • China Glaze - Hang Ten Toes
  • Sinful Colors - Black on Black
  • Sally Hansen - Disco Ball
Okay, they were rather cute.  I started off with two coats of Snow White.  When that was dried, I sponged on Hang Ten Toes and Red Carpet in random areas on the nail.  The red kind of turned out like a darker pink, but it still was cute.  To smooth out the sponging, I painted on a coat of Disco Ball, the worlds prettiest glitter.  When it was all dried, with my nail art brush I painted on the black hearts.

In the end, they kind of looked like hearts painted over some spray paint on a wall.  Almost like graffiti?  Maybe I'm the only one who sees it!!!

What do you think??  Do you love Valentines Day or hate it like me?

I'm off to celebrate the holiday by writing my thesis and having a lil party with my nephews!  Hope you all have a great day! <3

My One Year Anniversary!

9:00:00 AM

Today is the one year anniversary of The Little Canvas!  I cannot believe that a year ago today I started this blog.  I always liked painting my nails, and then randomly started doing nail art.  I would share them on my personal Facebook page, but nothing else.  Everyone would comment, hit the "Like" button and that was enough for me.  It was a hobby, something I enjoyed, and slowly my collection began to grow.


In late January of 2012, I ended up getting sick, and boy did it stink.  For three weeks, I literally spent my days either in bed or on the couch.  Sometimes I'd wander to the grocery store.  Majority of my time, when I wasn't attempting to do school work, was spent on Pinterest searching for new nail ideas.  That's when my "Nail Idea" board really grew.  It was during this time I discovered the world of blogging.  It was amazing to me how many nail artists there were out there.  Day in and day out, I was continually being inspired.  If I wasn't so sick at the time, I probably would have been painting my nails daily.

Since all these amazing bloggers inspired me, I thought maybe, just maybe, I could inspire someone out there too.  Sure, my nail art wasn't amazing or the cleanest at the time, but I figured I could inspire even the most amateur artists.  I wanted to show people that hey if I can do this and never had done it before in my life, then anyone could start with the right amount of dedication!

So I embarked on this journey, an amazing one at that.  My first step was to create a name of a blog, which trust me, was a difficult venture.  It seemed like all the good names were taken.  After so many people had told me I was an artist, I remembered that artists paint their masterpieces on canvases.  So who was to say that my nails weren't little canvases in their own way.  Thus, the name was born...I became The Little Canvas.

I'm not going to lie, I was nervous.  I didn't think that anyone would follow my blog, enjoy my work, or become inspired.  I am overwhelmed by the support and the following I have gained in the past year.  Sure, I'm still a lot smaller than some of the other blogs out there, but I wasn't even expecting 10 followers.  Now on the blog I have 141, Twitter has over 600, my Facebook and Instagram are over 200.....it's just amazing.

I sincerely thank all of you who have followed me this past year!  This blog has become such an outlet for me, and I really cannot imagine life without it.  I have met some of the nicest, talented people who continually inspire me.

Again, thank you everyone!  I really cannot wait to see what this next year has in store for me and The Little Canvas.  <3