
Back to School Nail Art + Tutorial!
9:00:00 AM
Hello polished world! I'm in a great mood today because I feel like my manicure is stinking adorable. It turned out exactly as I planned, and well when that happens, it's a great feeling. Where I live, Labor Day weekend marks the end of summer for all of those who go to school. Typically the Tuesday or Wednesday after Labor Day is the first day back to school. Since I obtained my Masters Degree in May, this is the first year since, well, preschool that I'm not returning to school. Most people would be jumping for joy over this, but for me, it's rather weird. It's been my routine for as long as I can remember, and now this year I have to find a new routine.
Despite not returning to school, I couldn't turn down the opportunity to paint my nails with a cute back to school manicure. I may or may not have another one planned as well. It's kind of like Thanksgiving, you can't not do a Thanksgiving Day manicure. Last year for my back to school manicure, I did these pencils which I received so many compliments on. I knew for this years manicure I wanted to re-create them to see how far I have come.
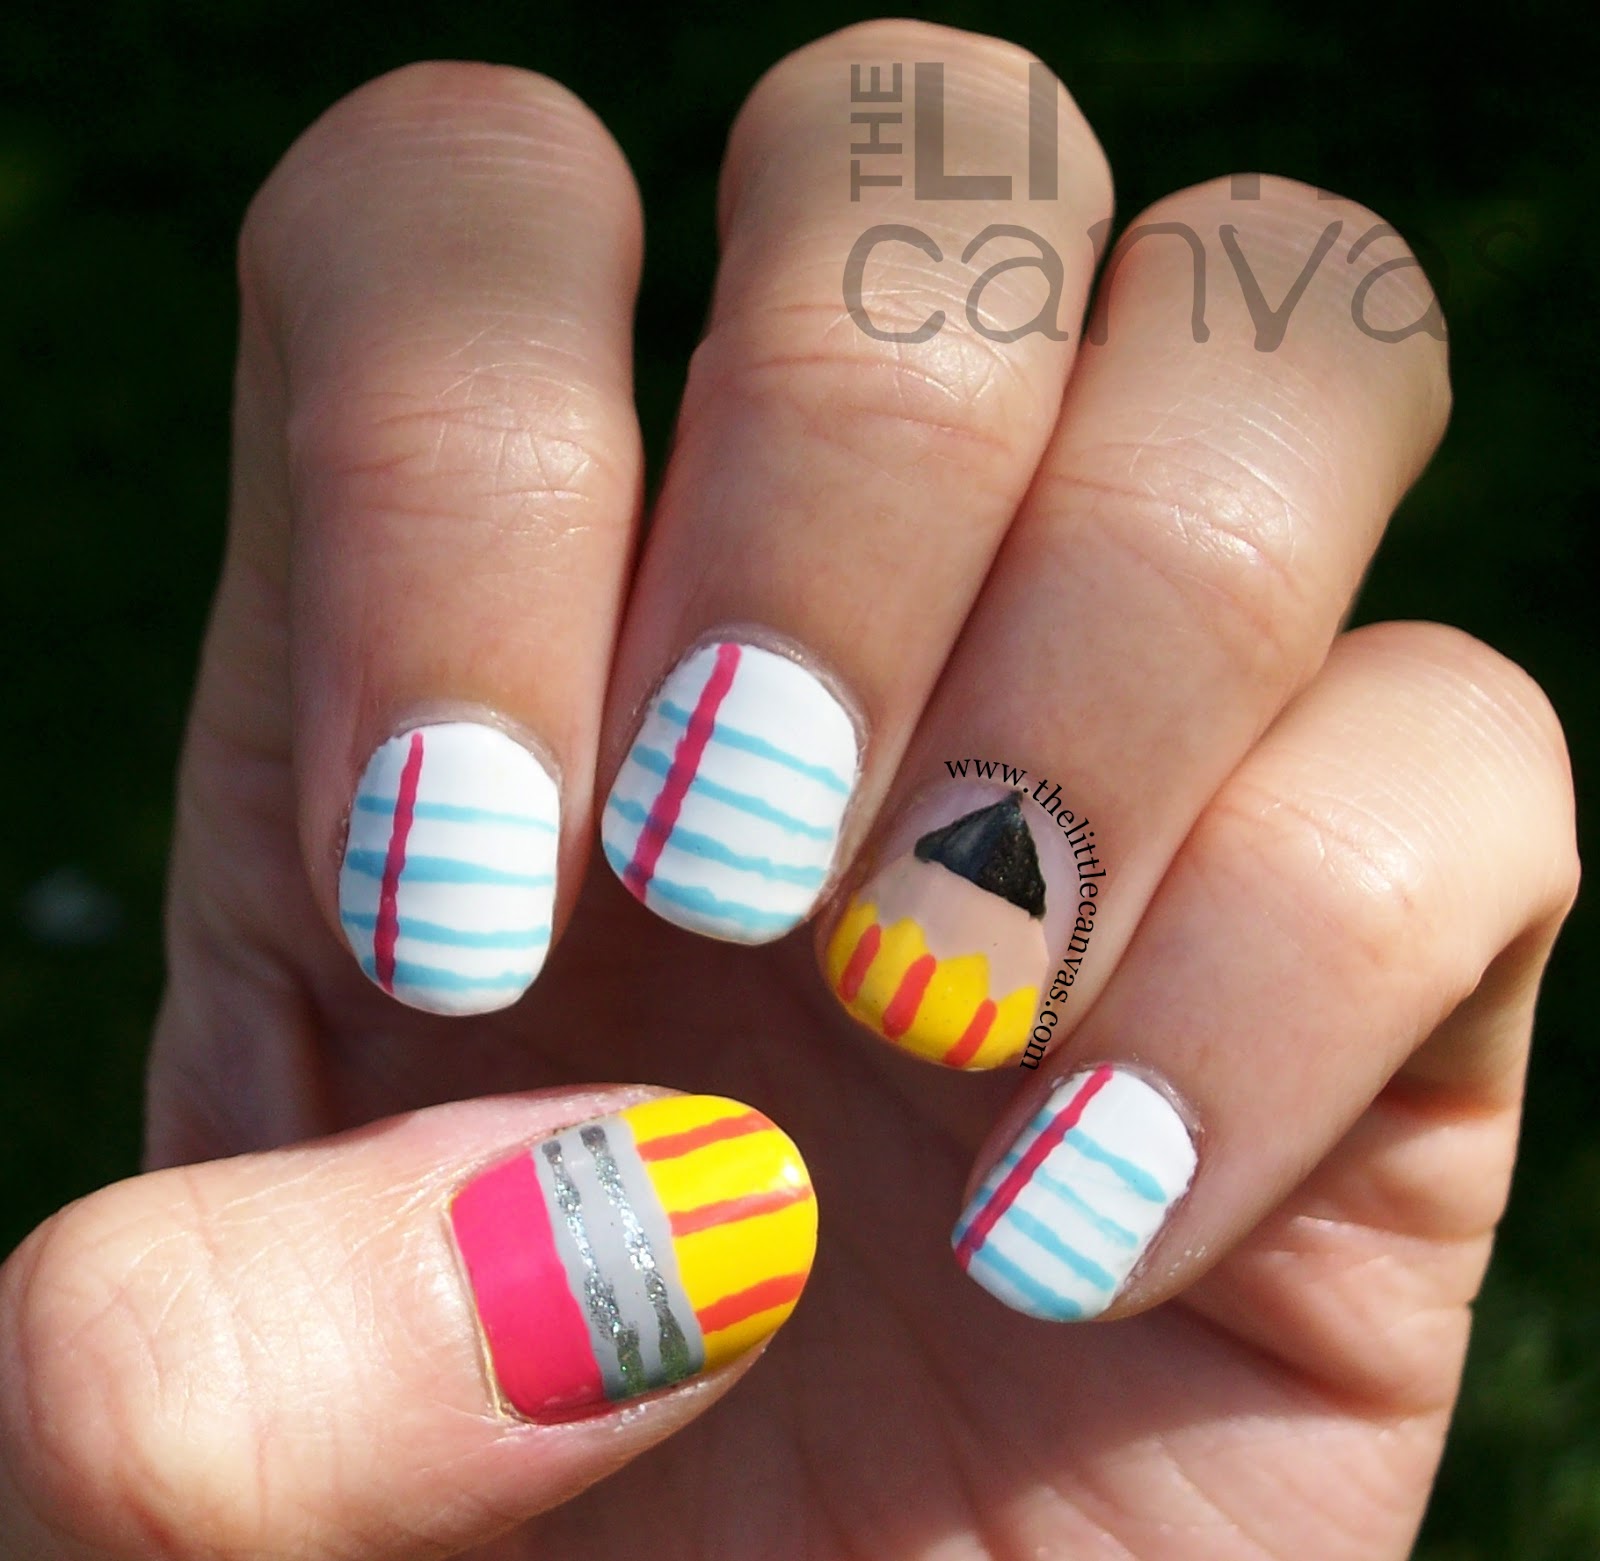
I feel like I have come a long way as a nail artist and as a blogger here at The Little Canvas, so I wanted to not copy my manicure 100%. I needed to change it up a little bit. Then it hit me, what do you write on when using a pencil. That's right, PAPER! I have seen "doodle" nails all over the internet where girls make their nails look like lined paper then with a black polish draw little designs on them like I used to do on real paper when I was bored in class. I thought, wouldn't it be cute to paint doodle nails with an accent of a pencil?!
Despite having that brilliant idea, after having the plain lined paper nails, I decided against having the doodles. I thought the manicure looked so clean, fresh, and crisp, kind of like those brand new school supplies all us eager kiddies used to run into school with on the first day.
Enough of my babbling, let's take a look and I'll tell you how I created this cute little design :).
Colors Used
- Pencils
- Zoya - Darcy (pencil yellow)
- Zoya - Thandie (orange lines)
- Zoya - Micky (eraser)
- Zoya - Avery (wood)
- Zoya - Claudine (granite tip)
- Sinful Colors - Cool Grey and Sally Hansen - Celeb City (metal around eraser)
- Paper
- OPI - My Boyfriend Scales Walls
- Sally Hansen - Blue Away
- Zoya - Micky
How I Got the Look (Yes, I did a tutorial again!)

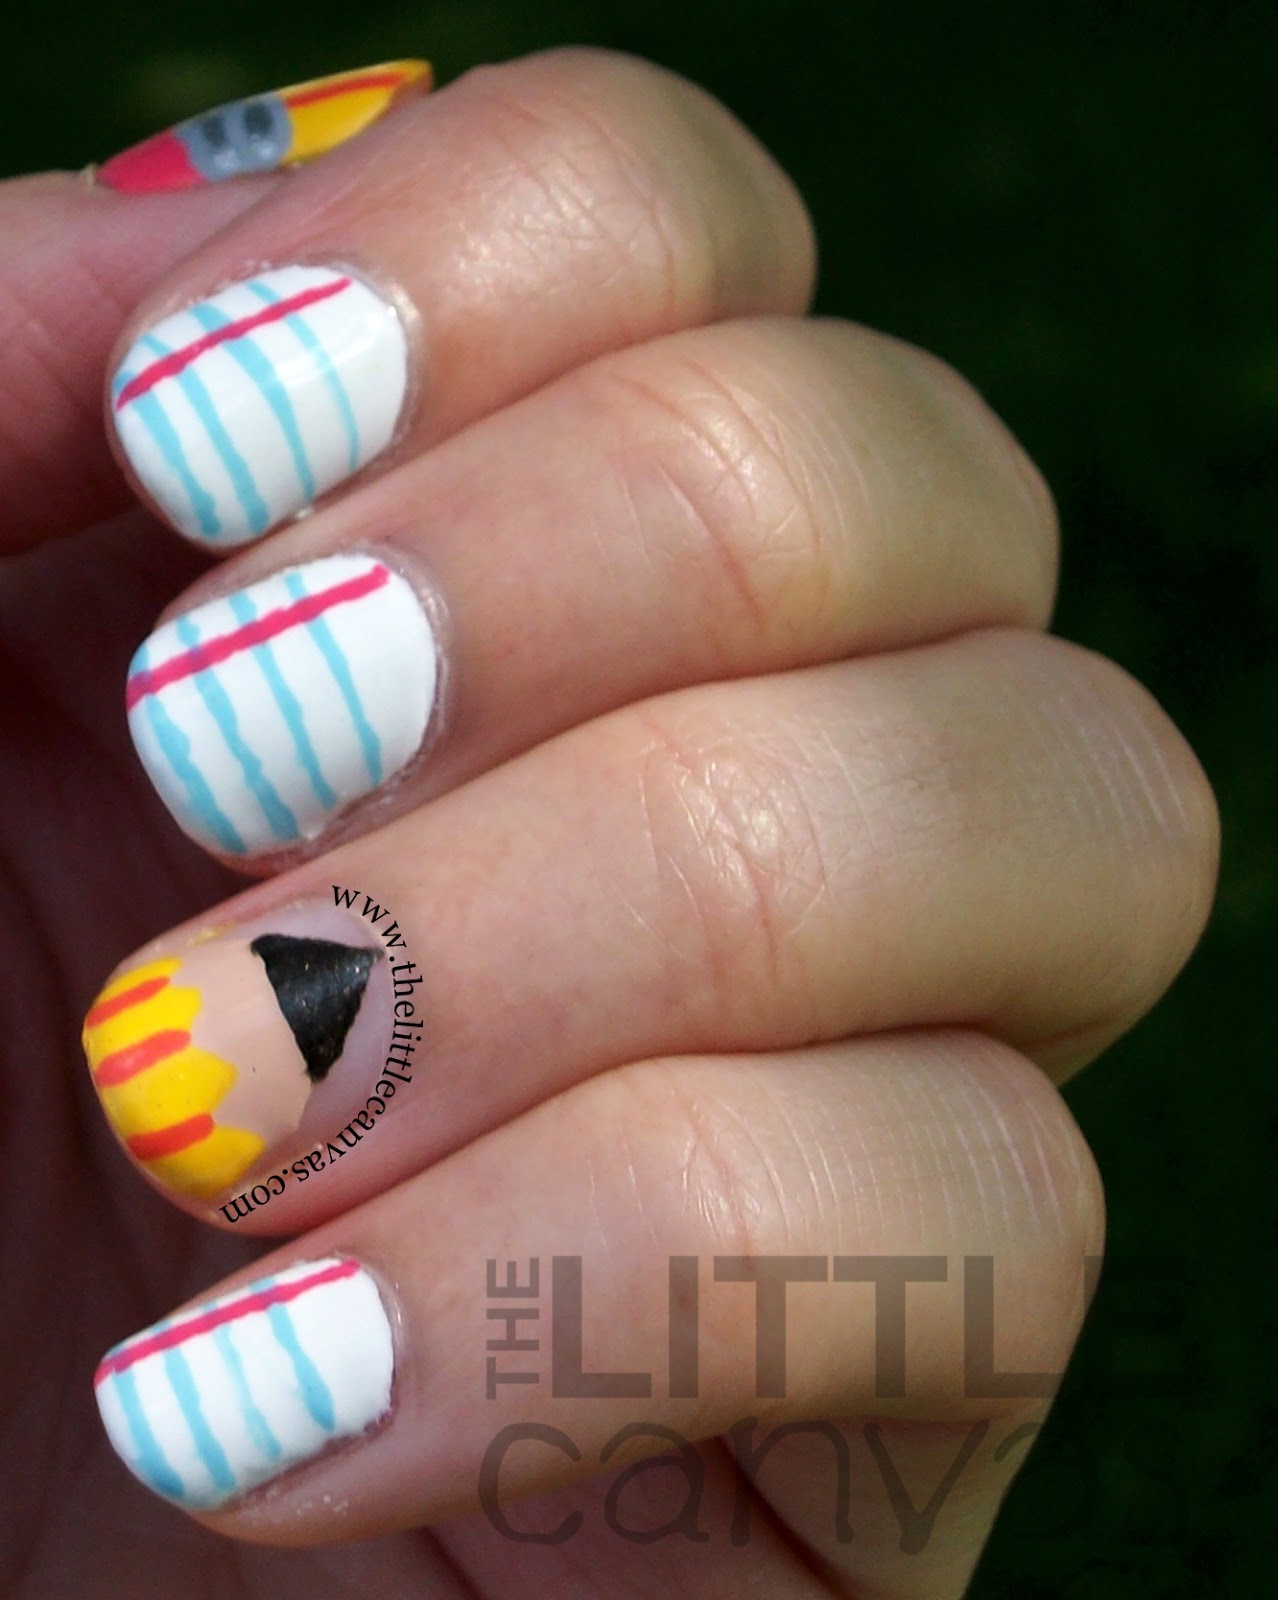
Pencil Tip
- On your naked nail, take some painters tape (or scotch tape) and create a point on your nail.
- Paint on a base coat, and your favorite tan/pencil wood color polish. For my manicure, I used Zoya Avery.
- Remove the tape! If you need to make the lines crisper you can always go over them with a nail art brush
- With a nail art brush or small dotting tool, add the graphite of the pencil.
- With a nail art brush, draw a little chevron design halfway down the pencil wood. Fill in the rest of the nail with a yellow polish. For this manicure, I used Zoya Darcy.
- Add some orange lines down the pencil.
Pencil Eraser
- Paint your nail a pencil yellow color.
- Add orange lines half way down the nail.
- On the cuticle end or tip of the nail (depending if you want a whole eraser manicure or if you want a manicure like mine) paint on an eraser pink polish. For this manicure, I used Zoya Micky.
- With a gray polish, fill in the empty area to resemble the metal that holds the eraser onto the pencil.
- With a darker gray, or a metallic silver polish, draw on two lines on the gray area.
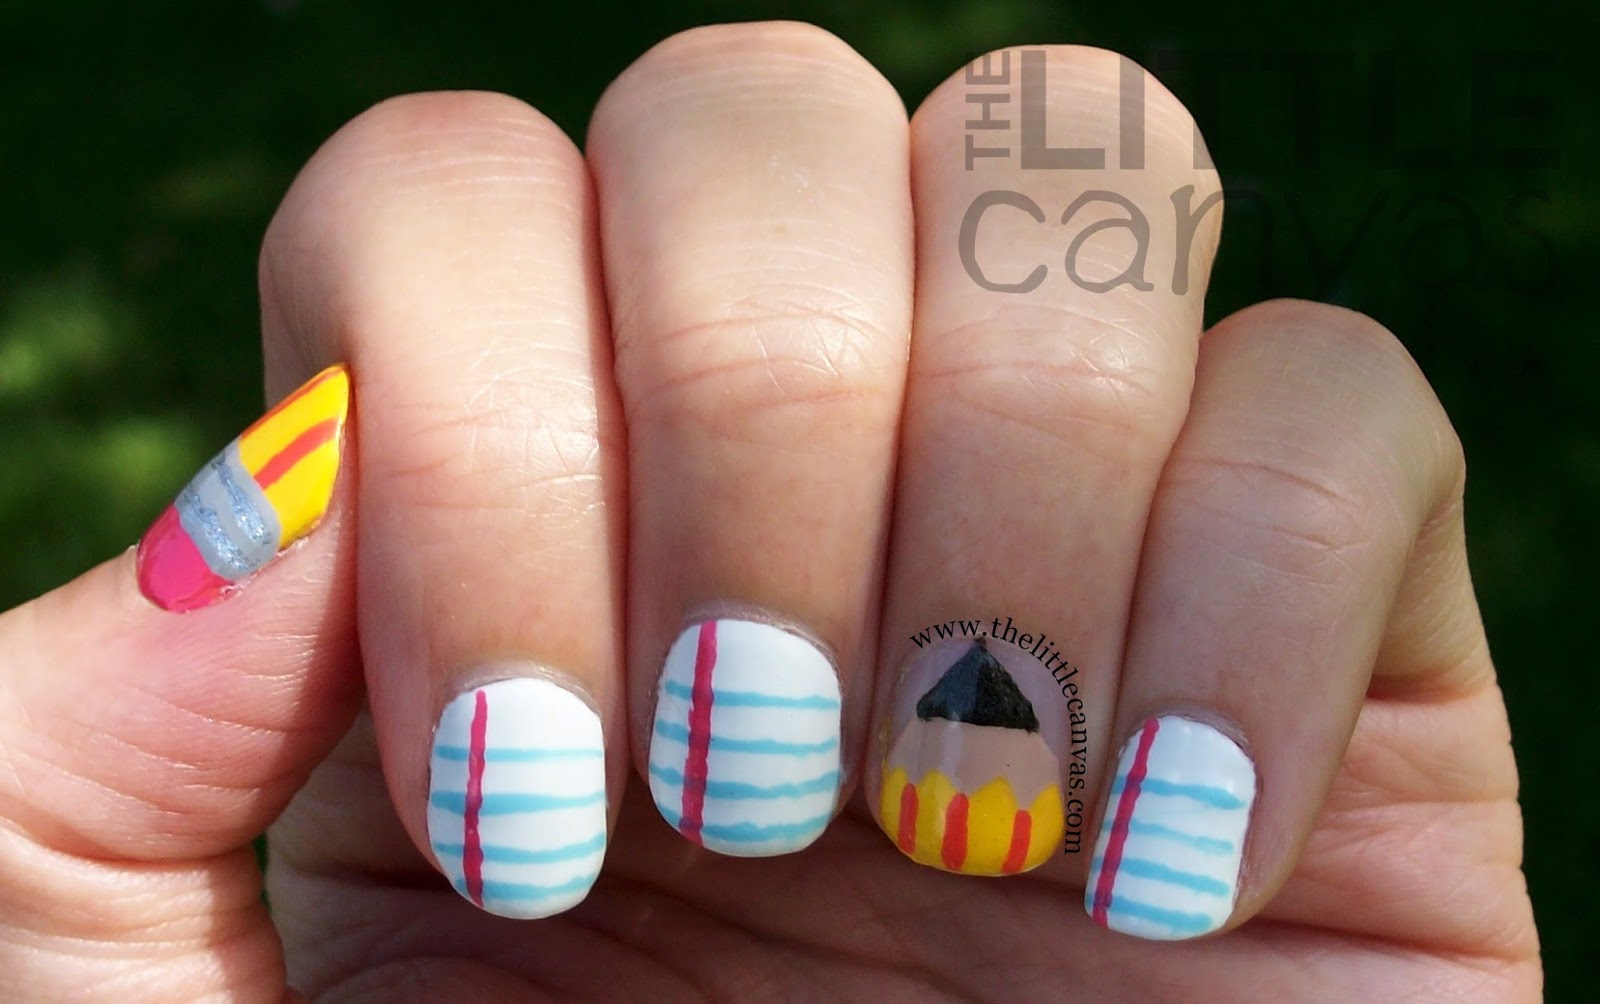
Lined Paper
- Paint your nails white.
- With a light blue polish, paint four lines across your nail.
- With a pink (or red) polish, paint a line down the nail.
Finish all the nails with a top coat, and you have yourself a fancy little back to school manicure!!!! An alternate way of doing this manicure is by just doing pencils on your nails like I did last year, or just all paper. It's up to you! You can even try the little doodles I was going to do!!
If you try this manicure, please oh please tag me and the photo #thelittlecanvas so I can see! I love seeing re-creations! :)
Well, I am off, this post has turned out to be extremely long winded. It's been awhile though since I've done something like this though, so it's kind of nice!
Next post will be September's Nail Artist of the Month! I hope you enjoy! I may also switch up my posting schedule too, not sure yet, so stay tuned.
Until next time, <3.
**The Zoyas were provided by Zoya for review. All other polishes, I purchased. Please see my disclosure policy**


0 comments
Oh how I love reading all of your comments! I truly appreciate each and every single one!