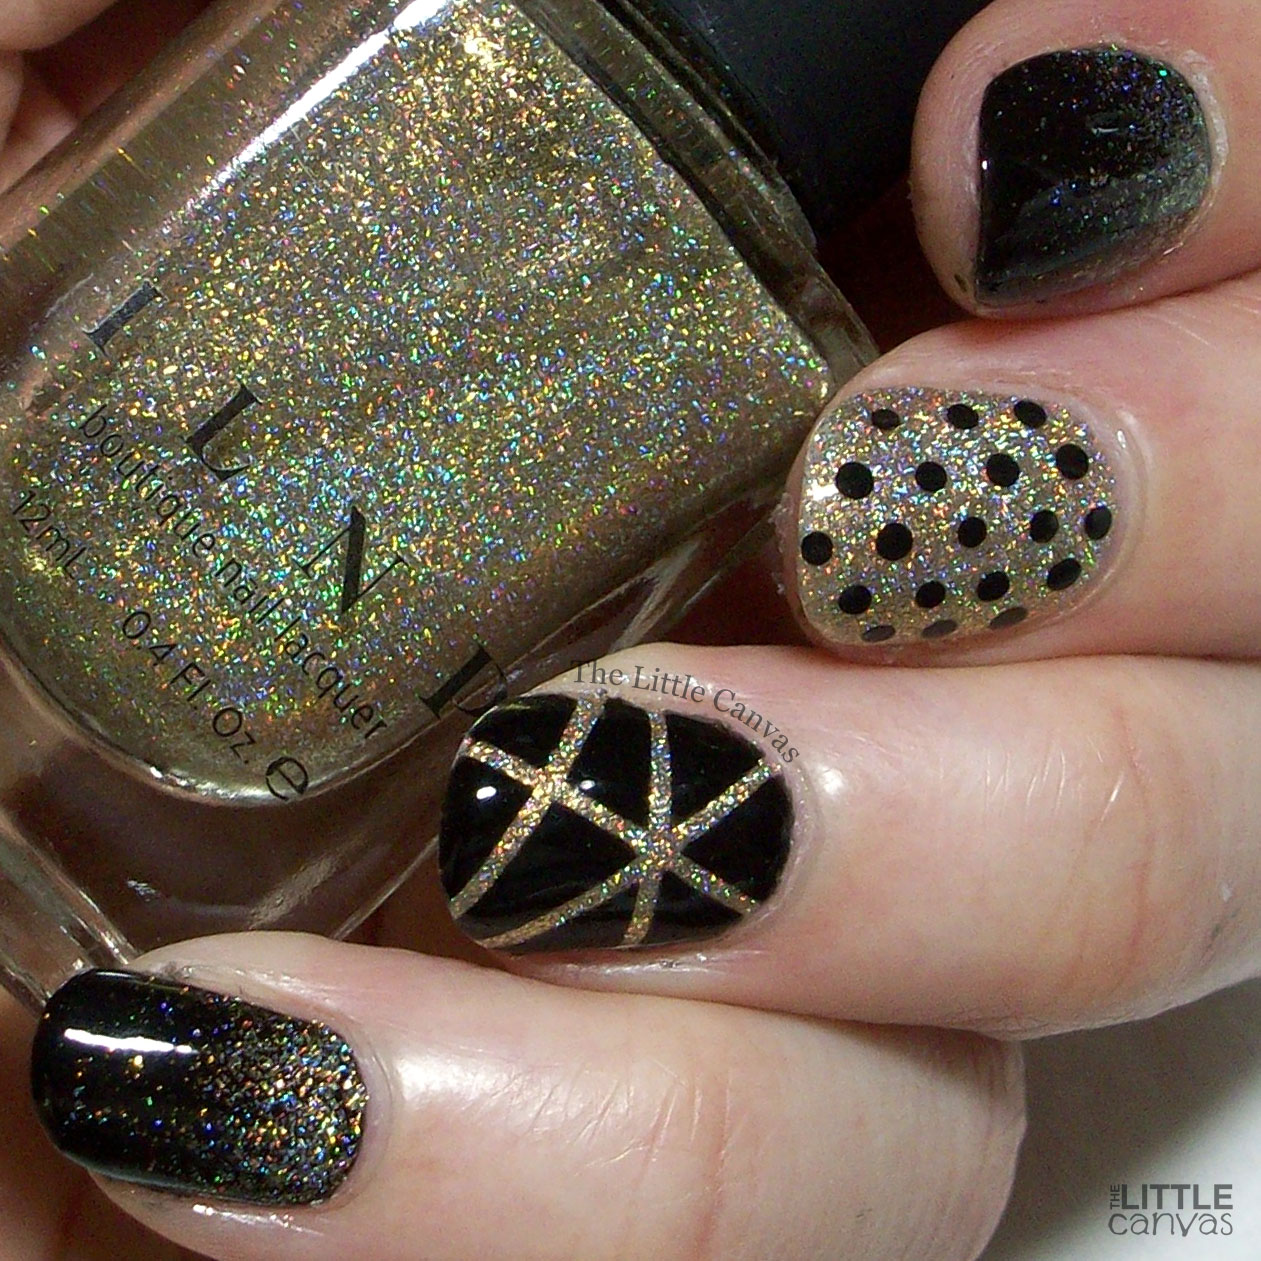
ILNP

The One With the New Years Eve Manicure

9:00:00 AM

Nothing to Disclose


Good morning, Polished World!  Happy New Years Eve to you all!!!!  Can you believe that 2021 is now coming to a close and we are entering into 2022??  I feel like the past two years flew by.  The other day I was texting my one friend and I had to ask them how old I am because I couldn't remember.  That's how crazy my life is!

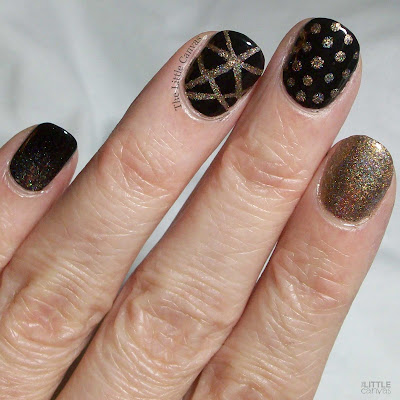
Despite the crazy, I wasn't going to miss painting my nails with the annual NYE manicure.  The main rules - has to be sparkly, and has to have black.  So, I created an idea that consisted of a mish mosh of manicures from the past year, grabbed a trusted ILNP, and got to work! 

Let's take a Look!
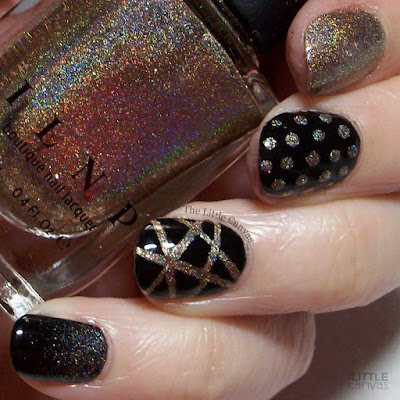

Colors Used:
  • ILNP - Clockwork
  • ORLY - Liquid Vinyl
I forgot that I owned Clockwork by ILNP!!!!  Absolutely in LOVE with this bronze colored beauty.  Two coats and you have full coverage of this holographic/metallic polish.  It's truly unique how it has that holographic and metallic look.  Beautiful!   Worked wonderfully for nail art, and that gorgeous pinkie nail gradient.  Of course, the camera didn't capture that glitter gradient, but trust me, it's gorgeous.


Now, my one issue had nothing to do with the nail art, but everything to do with me being impatient and not letting the polish dry.  I put the nail art tape on too soon, so when I peeled it off, some of the base went with it.  What did my tired self do at 12am when this happened?  I filled in the empty space with the polish and straightened the lines the best I could.  Overall, I think it turned out well!!!

What do you think?

I hope that everyone has a Happy and Safe New Years Eve!!!  See you all in 2022!
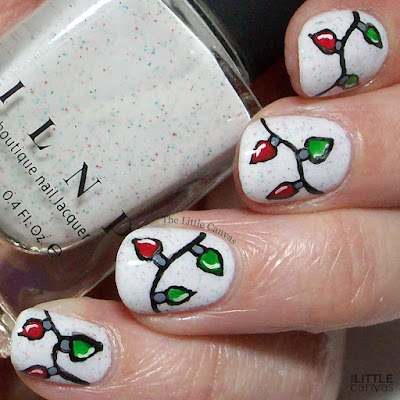


Christmas

The One With the Annual Christmas Light Manicure

9:00:00 AM

Nothing to Disclose


Good Morning, Polished World, and Merry Christmas!!!!!!  Now, I'm going to say I'm a bit disappointed in myself that I only had 4 Christmas Manicures this year.  I really wanted to create a whole lot for you all, but life really got in the way.  Let's just say I'm really tired of COVID and everything associated with it.  It just is allll consuming in my line of work and it's quite exhausting.

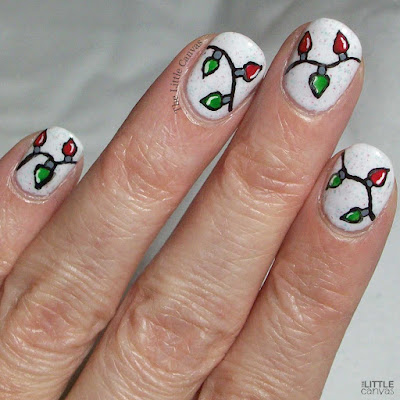
Despite all that exhaustion, I did find time to paint my nails one more time for Christmas.  Every year I create a Christmas Light manicure. I've been doing this since The Little Canvas was born, and I wasn't going to miss this year.  Last year I created a red and green light manicure using Christmas Cookie from ILNP as a base.  I loved it so much that I decided to re-create it this year.  Maybe next year I'll go back to the classic look over the snow.  

Until then, let's take a look!


Colors Used:
  • ILNP - Christmas Cookie
  • Acrylics
Yes, I cheated and used acrylic paint for my lights, but it's so much easier, especially when you're painting your nails at 11pm and just want to go to bed.  Christmas Cookie is my all time favorite Christmas polish.  It's a sheer white polish with tiny tiny red and green flecks.  I'm not sure how ILNP did this, but it's gorgeous and I love it.  It builds perfectly in two coats for full, Christmas-y coverage.  The best part - it dries rather quickly so you're able to just start your artwork.  Or throw on a top coat and go to bed.


This was the first year where I was able to paint the "string" perfectly in the first try.  Probably because I didn't do any curly q's like years prior.  Despite the one imperfection on my pinkie finger on that green light, all the other lights are perfect.  I'm really happy with how this turned out.

What do you think?

I wish all my followers and readers a Very Merry Christmas!!  I'll be back with at least one New Years Eve look. Hopefully.

Until then, <3.


Christmas

The One That Looks Like Wrapping Paper

9:00:00 AM

Nothing to Disclose


Good morning, Polished World!  Less than seven days until Christmas!!!  Are you ready?  I am not!  I'm so behind this year because work is kicking my behind and taking all my time.  I had so many plans to create a bunch of Christmas manicures, but alas I've been unable to.  I'm hoping to have at least two more by Saturday.  We shall see.

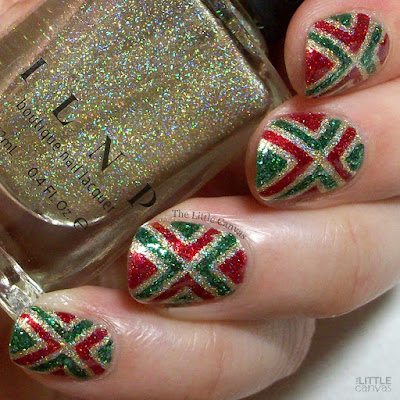
Today's design is....well....amazing.  I really don't know how else to describe it.  The look took forever to complete, but in the end it was well worth it.  I wore in on my nails for much longer than I normally wear nail art, but who could blame me??  It's so cute, beyond Christmas-y, and just all around perfect.

Let's take a look!


Colors Used:
  • ILNP - Versailles
  • ILNP - Say Love
  • ILNP - Lucky One
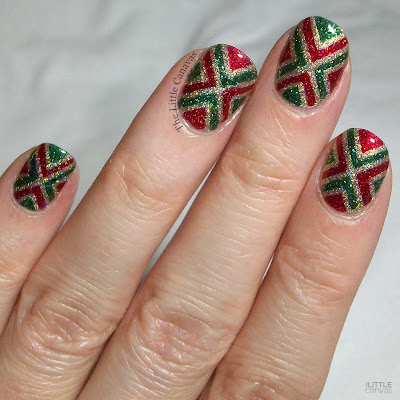
Amazing, right?!  I cannot get over how perfect this manicure is for Christmas!  At first I thought it looked like ornaments, but the more I looked at it, the more I realized that it was a dead on duplicate of wrapping paper.  All that was missing was a little bow in the middle.  The glitter, the holo, the colors, everything about it just screams Christmas.


ILNP never ceases to amaze me.  Her polishes are beyond perfect, especially when it comes to nail art.  You wouldn't think glittery holos would build so well, but they do.  To get the look I started off with two coats of Versailles, then threw on some quick dry topper.  When that was done, I started adding the 10, yes that's right, 10 pieces of nail art tape to each nail.  I then filled in the areas I wanted with Say Love and Lucky One.  Pulled off the tape, added a top coat, and admired my work.

What do you think?  Fan of the look? 

Until next time, <3.


Halloween

The One With the Halloween Drip

9:00:00 AM

Nothing to Disclose


Good Morning, Polished World!!!  Yes, that's right, two posts in one week.  Can you believe it?!  Well, I'm really knocking it out of the park with painting Halloween manicures and I need to share and post them as soon as I finish them.  Unlike my other designs, these can't disappear in a vault and be posted in two months.   I'm not going to lie, I'm enjoying getting back into a regular schedule!

Today's design is by far one of my favorite Halloween designs of all time.  The other night I was surfing Pinterest for some new ideas.  I came across a few Halloween drips on top of the negative nail. Most of them were plain black or red.  Now, I'm not one for the gruesome Halloween designs that look bloody, so I was drawn to the black drips.  Then, I came across the perfect one.  A black drip with a foil overlay which gave the drips a cool 3D look.   Since I didn't have foils, I got creative with some of my green polishes.

Let's take a look!


Colors Used:
  • FingerPaints - Smooth Over Ridge Filler
  • Acrylic Black
  • ORLY - Thrill Seeker
  • ILNP - Sundance
Before I get into gushing about how much I love the design, I need to share my secret for the perfect negative space manicure.  I am in LOVE with FingerPaints Ridge Filler.  It's come to my attention that this is on clearance at Sally Beauty, so I need to get to all my local stores and stock up.  It's the perfect nude-clear cream which still gives the illusion of the naked nail.  It also fills in my little gaps from when my nails are peeling.  For today's manicure I used two coats, which I normally do not do, but I felt like I wanted the background to be more cloudy.


Once that was dried, I went through and added the drips with my black acrylic.  Yes, I cheated, but I didn't feel like trying to manipulate black paint when it was 11pm.  When the paint was dry, I used a toothpick and created the Thrill Seeker outline.  Then went over that green outline with Sundance.  The two polishes together gave that 3D look that the foils gave other manicures.

What do you think?  Fan of this manicure? Something you'd try for Halloween?

Until next time, <3.


Flowers

The One With ILNP Better Days and Daisies

9:00:00 AM

Nothing to Disclose


Good morning and Happy Monday!  I cannot believe that it is already October 11th.  I'm literally shocked and so confused as to where the time went.  While I haven't started any of my Halloween designs, I was able to decorate for Halloween at my house, and get some Fall themed decorations up at work.  Now if I can get to my nails to be festive, that would be great.  Usually I bring you all Halloween designs for the whole month of October.  A little sad that I'm behind, but it is what it is.

So, since I don't have anything remotely Halloween related in my drafts, it's fitting that I bring you a daisy design using a fall-ish looking base.  Right?  

Let's take a look! 


Colors Used:
  • ILNP - Better Days
  • Acrylics
ILNP Better Days is now my favorite go to ILNP.  It is such a gorgeous grey blue polish.  The polish itself is described as a muted midnight holographic blue with gold accents. Those gold accents are really what stand out to me in person.  I wish that they captured in the photos, but instead you can see that gorgeous blue color with the lovely holographic.


When I bought this polish, I knew I wanted to do some sort of daisy design on top of it.  This design isn't what originally came to mind, but I'm happy it did.  I was thinking something little more dainty with some green leaves, but I really like this retro looking daisy.  I'm still thinking of doing the dainty design, but this was a good first daisy look with Better Days.

What do you think?  Fan of this manicure?

Until next time when I hopefully have a Halloween design, <3.


Dot Mani

The One With the Holographic Interlocking Dot Manicure!

9:00:00 AM

Nothing to Disclose


Good Morning, and welcome to yet another Wednesday.  Can you believe that the last week of April is next week?  Also, can you believe that it's 35 degrees and snowing where I am?  It was in the 70s last week, and now Mother Nature can't make her mind up.

Since the weather is not feeling too Spring-like, I felt it was appropriate to share a black and silver manicure instead of something with flowers or spring pastels.  Although, I feel I'm neglecting my pastel polishes this Spring.  Anyways, today's manicure is a fun interlocking dot mani using my all time favorite holographic polish - ILNP Mega X.

Let's take a look!


Colors Used:
  • ILNP - Mega X
  • Sally Hansen - Blacky O
I cannot begin to tell you how I was beyond obsessed with this manicure.  Ready to hear though the most disappointing thing ever?  Well when I painted this design, I didn't have anymore base coat, and I was too lazy to go downstairs and grab my new bottle that was in my purse.  So, I figured that using a top coat for a base would do the same thing.  Oh man, was I wrong.  After about a day, the nails literally were popping off as if they were fake nails.  Lesson learned the hard way, of course on a manicure I loved.


To get the look I started off with a base coat of Mega X.  When that was dried, I went through and did a diagonal swoosh of Blacky O.  I then went through with my dotting tool and added the dots.  Now, after looking at other interlocking dot manicures on the interwebs, I see that I did the dots slightly wrong.  I now know for next time.  You know, when I use a proper base coat....sigh.

What do you think?  Fan of this manicure?

Until next time, <3.


ILNP

The One With the Silver and Black Snowflake Nail Art

9:00:00 AM

Good morning Polished World, and welcome to January 11th!  Can you believe we are already almost halfway through this month?  This has been a crazy first two weeks of January, but hey, we all are still here and breathing so we should be grateful.  I meant to post more last week but work got kind of crazy, then I got on an editing binge, and well, one thing led to another and here we are.

Today's design is a black and silver snowflake manicure using my FAVORITE silver holographic polish, ILNP Mega X.  As I said in my last post, I'm a little bit obsessed with the glitter gradient using these ILNP holographics.   I couldn't resist when it came to this manicure, and you'll see why.

Let's take a look!


Colors Used:
  • ILNP - Mega X
  • ORLY - Liquid Vinyl
  • Acrylic White
Isn't this manicure perfect?  I was so sad when it chipped off and I had to remove it.  Mega X is just perfect. The holo accent, the perfect gradient, the bit of sparkle it added to the snowflake; all perfection!  It was very easy to manipulate over the top of the snowflake. 


One conclusion that I've drawn regarding this manicure; I need to learn how to paint different looking snowflakes.  I literally make all my snowflakes look identical each and every time I do one of these designs.  As we all know, January and February are my months of snowflake designs, so I feel I have some time to work on this.

What do you think? Like this manicure as much as I do?

Until next time, <3.

Dot Mani

The One With the Holographic Gradient Accent Nail

9:00:00 AM

Nothing to Disclose 


Good morning Polished World, and welcome to 2021!  I'm happy to see 2020 leave, but let's face it the years are only what you make of them.  I look back on 2020 and despite all the hardships, I'm very grateful for the year.  Sure, with my line of work I could look and be all woe is me and hate on 2020, but I'm not going to.  That's not going to get me or any of us anywhere if we choose to look at the negative.  So let's all go into 2021 looking at only the positives and how the negatives were just there to help us grow.

Today's post is a draft from before Christmas.  I did it shortly after Halloween as a palate cleanser from all the orange, greens, and purples.  You can never go wrong with mint and silver holographics.  Plus a glitter gradient?  This manicure is simple and perfect.

Let's take a look!


Colors Used:
  • Jessica Cosmetics - Flower Crown
  • ORLY - White Tips
  • ILNP - Mega X
Isn't this gorgeous?  I love how Mega X looks over White Tips.  In my last post, I used ILNP Versailles for a glitter gradient and it worked just as wonderfully.  I'm on a gradient kick because the design I painted last night has the Mega X gradient again.  You'll see that post in a few days.  I just think it's the perfect accent to any manicure.


Flower Crown is one of my favorite polishes.  It applies perfectly in two coats.  You technically could get away with one coat of this beauty, but you know me, I have to have at least two.  I've tried going the one coat route, but it feels like my nails are still naked.  Is that weird?  I feel that's weird.

What do you think?  Fan of this look? 

Until next time, <3.

ILNP

The One With Some New Years Eve Nail Art

9:00:00 AM

Nothing to Disclose 


Hey everyone!!  We are almost to the end of 2020, and boy oh boy was this year a crazy ride.  While many people are saying 2020 was the worst year ever, I'm trying my best to look at the positive of the year instead of the negative.  As you know, I work in healthcare and faced numerous challenges.  Despite the challenges, struggles, and hardships, the residents at my facility remained happy, healthy, and safe.  What more could anyone ask for?  There were many lessons learned and at the end of it all, I'm a stronger person because of it all.  I truly hope that whoever is reading this looks at the negative in their life and tries to find one positive, and rise from the ashes.

Anyways, I could go on and on about that all day, but you are here to see the nails.  Today's manicure is a kitchen sink manicure for New Years Eve.  Every year I always grab my silver or gold holographics and do something fun.  To be completely honest with you, my New Years manicures are 9 times out of 10 my favorite of the whole year.  Today's design is no exception.

Let's take a look! 


Colors Used:
  • ILNP - Versailles
  • Sally Hansen - Blacky O
Two polishes, one fabulous manicure.  Each time I look at the manicure I love it even more.  The gradient using Versailles is perfect, because it's a perfect polish!  Two coats and full coverage of this gorgeous light gold holographic.  To me, this polish is the gold sister of Mega X, my favorite silver holographic polish from ILNP.   You might be seeing that polish make an appearance for my final manicure of 2020.


I just love how the pinkie and index finger turned out.  The gradient was so perfect that it looked like little fireworks or glitter bombs coming from my cuticles.  Then the laser tape design just pulls it all together.  I was going to keep my middle finger blank, but you know me and my polka dots.  I can't leave well enough alone.  Plus, it looked a little naked with everything else crazy going on with the manicure.

What do you think?  Fan of this look?

If I don't get my next post up before the New Year, I want to wish everyone who is reading this a very Happy and Blessed 2021.  End this year on a positive note.  You made it through a pandemic, you didn't let the world take you down.  Let's all make a resolution to look at the positive and find one thing each day to be grateful for.  Release all your expectations you have about 2021, and just focus on each day.  Every single day that we are given is a major blessings.  Look at it like that.  If we go into this New Year looking at the negative and having a victim mentality, then that's how we are going to perceive every day.  So instead of letting that happen, be the winner, be positive, and just kick 2020 to the curb and take 2021 by storm!  Please be happy, healthy, and safe.

And as always, thank you for sticking with me.  I know I went on some hiatuses because life got crazy, but I am so grateful for the ability to come back like I was never gone.  I love every single one of you.

Until next time, <3.


Christmas

The One With the Red and Green Christmas Light Manicure

9:00:00 AM

Nothing to Disclose


Good morning Polished World!!!  Happy two days before Christmas!  Can you actually believe that Christmas is right around the corner?  I feel like December flew right on by.  I blame COVID and the fact it just turns my world upside down on a daily basis.  Despite the crazy, I'm super proud of myself for completing six Christmas designs.  Looking back at the year I've had and the hiatus' I've had to take because of my job, this is a huge accomplishment.  When I started up the blog again and my nail art, I told myself that I wasn't going to go on another break for the foreseeable future.  This has been a huge stress relief for me, and we all need that escape from the real world one way or another.

Today's I'm sharing with you my annual Christmas light manicure!  This is a design I've been doing since I started blogging years ago.  Each year I switch up the design by changing the base polish.  The most common base is typically a snowy gradient, but I really wasn't feeling that this year.  Then I remembered Christmas Cookie by ILNP.  It just begged to have some Christmas lights painted on top of it. 

Let's take a look!


Colors Used:
  • ILNP - Christmas Cookie
  • Acrylics
Super adorable, right?  I opted for the red and green lights because of the tiny red and green microglitters in this polish.  Christmas Cookie is a white jelly polish with the different color microglitters.  Two coats and I had complete coverage.  It removes off the nail just as easily as it applies.  I was worried because of the density of the glitter, but you'd have no idea that the glitter was even there.


I love, love, LOVE how the red and green lights really make those red and green glitters pop.  I wore this polish alone as a swatch a few times this season and while you could see the glitter on it's own, with the colors on top it just added a whole new dimension.

What do you think?  Fan of this manicure?

Just one more design to share with you all.  Can you guess what it is??

Until next time, <3.


Christmas

The One With the Christmas Dotticure

9:00:00 AM

Nothing to Disclose 


Good Morning Polished World!! How are you all doing today?  It's the 21st, which means Christmas is just four days away.  And I have two more manicures to share.  Well, I should have two more manicures to share.  I still need to paint my last one so maybe I'll only have one more to share.  I meant to paint last evening, but I didn't get home until late and I just did a swatch and called it a night.  Hoping tonight I can get my last design in.

Today's manicure is a simple dotticure I painted last week.  During this time of year, I fall in love with my red and green holographic polishes and I have to talk myself out of using them for every single design.  I wanted to show them off and not add too much art because I wanted the polishes themselves to shine.  So, of course a dotticure was the only solution for this.

Let's take a look!


Colors Used:

  • ILNP - Say Love
  • Zoya - Merida 
  • ORLY - White Tips
How gorgeous is Say Love by ILNP!?  This is by far my favorite red nail polish.  If you've been reading this blog a while, you know I'm not a huge fan of red polishes.  I feel like they wash me out and make my nails look super short.  I don't have that nice, long, pointed nail which reds look gorgeous on.  That was until I purchased Say Love.  This polish is everything.  Two coats of this gorgeous holographic red and my nails look amazing.  Not to mention, it's a perfect Christmas red.


The Zoya scattered holographic polishes have been a win since they were all released, and Merida is no exception.  Two coats of this dark, beautiful holographic green.  It compliments Say Love so wonderfully.  Both polishes work wonderfully for nail art.  They dotted perfectly on my index and pinkie nail.  Say Love dragged a little bit when I added my top coat, but that's because my dot wasn't completely dried when I applied it.

What do you think?  Fan of this simple Christmas design?

Until next time, <3.


ILNP

The One With the ILNP Mega X Tape Manicure

9:00:00 AM


Good morning Polished World!  Welcome to March!  Can you believe that the first two months of the year are already gone?  To be honest, I feel like January and February always fly right on by, then March and April draaaag.  That's because Spring is around the corner and I just want winter to end, but of course, it won't.  Mark my words, we will get another snow storm and possibly one ice storm before Spring.

Well since I did only pink nails last month, it's time for a little black, white, and silver manicure to refresh the blog so to speak.  I always need a little cleanse after I stick to certain colors, and for me the best way to do that is with these shades.  Of course, that means using my favorite polishes ever.

Let's take a look!


Colors Used:
  • ORLY - Liquid Vinyl
  • ORLY - White Tips
  • ILNP - Mega X

Isn't this amazing?  I absolutely LOVE Mega X and how it looks underneath black and white polish!  These tape manicures are something that I have loved creating for ages, and this one is no exception.  A year ago, I created this manicure where I used literally 100 pieces of tape to create the most perfect, awesome, X shaped tape manicure.  Since that manicure took forever to create, I didn't want to re-create it today, so I opted for the random zig zag look.  Looking back, I can't believe it was a year ago that I did that other manicure.


Anyways, just like the other manicure, Mega X truly shines under those black and white polishes.  The silver holographic is so strong that it truly gives the whole manicure a different dimension.  To get the look, I started with a base coat of Mega X.  I then went through and randomly added the tape almost in "Star" patterns.  You know, those stars you messily doodled as a kid on your notes in school?  That's what I was kind of going for.  Every nail mastered it except the index finger, not sure what happened there.

What do you think?  Love this look?  Think I should try the 100 tape design again but maybe with a different color scheme?

Until next time, <3.